Hey Everyone! I’m super excited to share with you my latest simple sewing holiday project, an Advent Calendar DIY. This project is very beginner friendly and perfect for those who don’t sew very often, but want to make something special for their family. I also have some applique tips if you are more advanced and want to add more to your calendar, but ultimately even those of us that are capable of making amazing sewn projects – I’m not sure we all should at this time of the year. I want to spend as much time as possible making memories with my family and while I want to make very special handmade items for us to enjoy, I don’t want to spend hours and hours on those things.
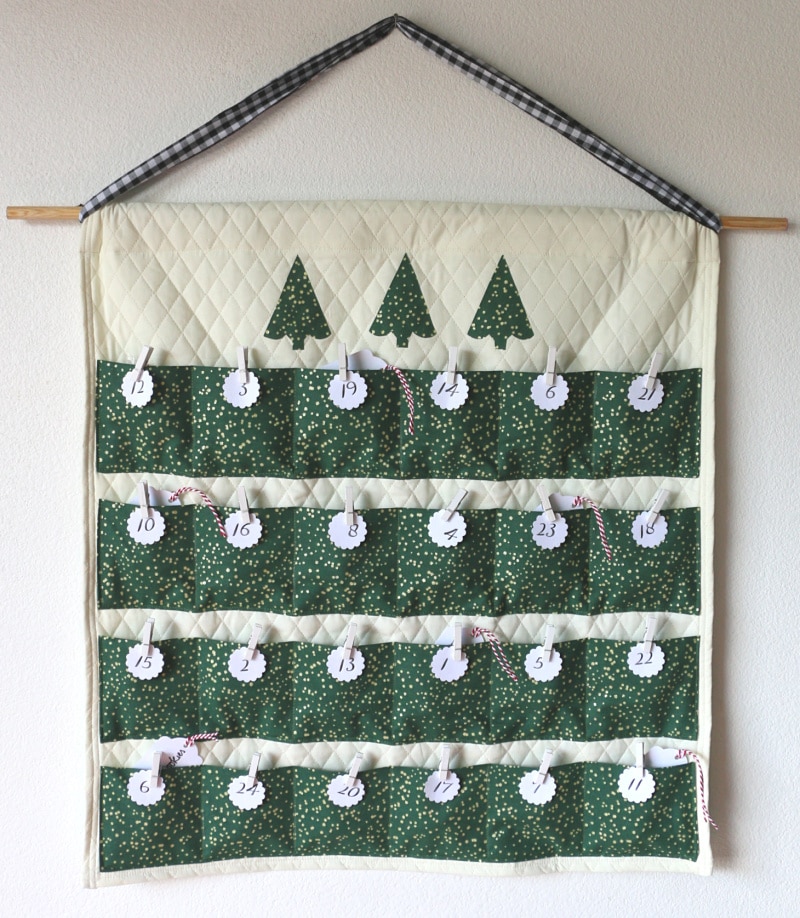
Advent Calendar DIY

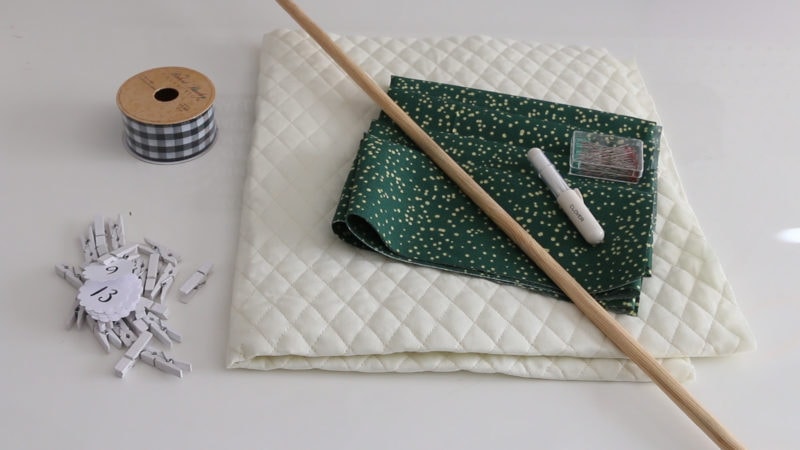
Materials
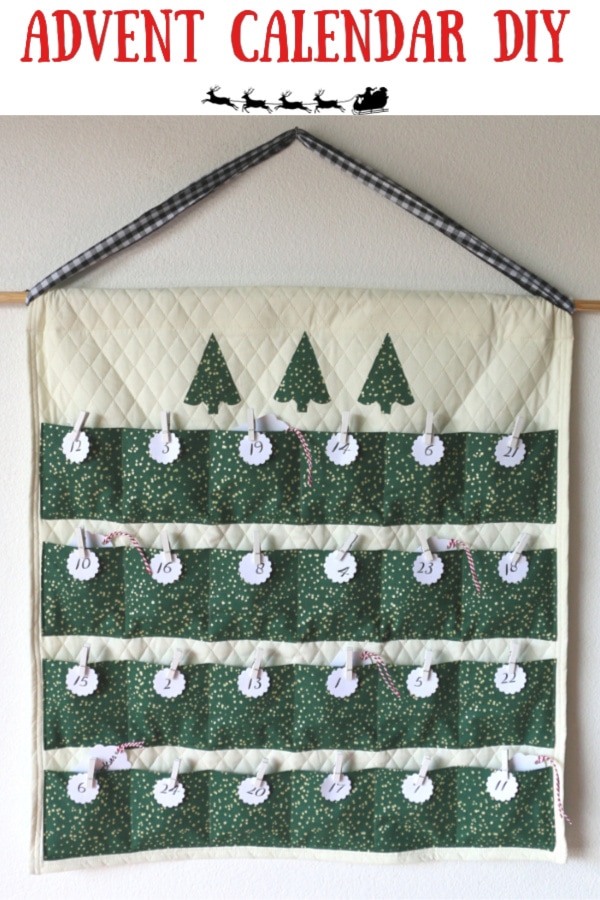
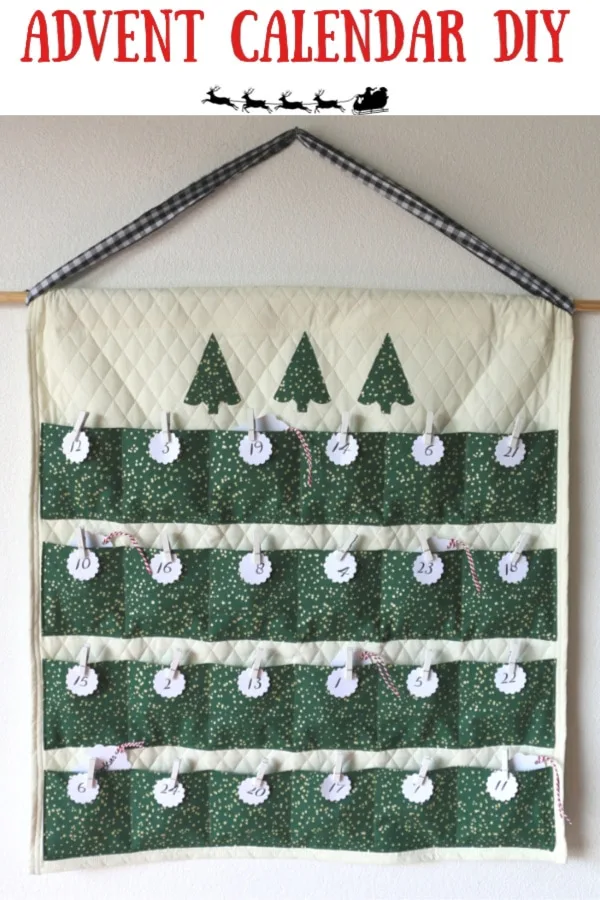
(1) 27 x 30 inch piece of background fabric (1 yard) – I recommend pre-quilted. It comes in many colors and I have seen it at Walmart, Hobby Lobby and Joann.
(4) 27 x 9 accent fabric for pockets. (1 yard total).
Wood Dowel
Thread – Coordinating color for background and accent fabric.
Marking tool – I think chalk is best for this. I love this Clover chalk pen.
Pins – Longer is good, THESE are my favorite.
Ribbon or twine for hanging
Iron/Ironing board
Sewing Machine
Optional:
Fusible web for applique
Fabric Paint Markers
Sewing the Advent Calendar DIY
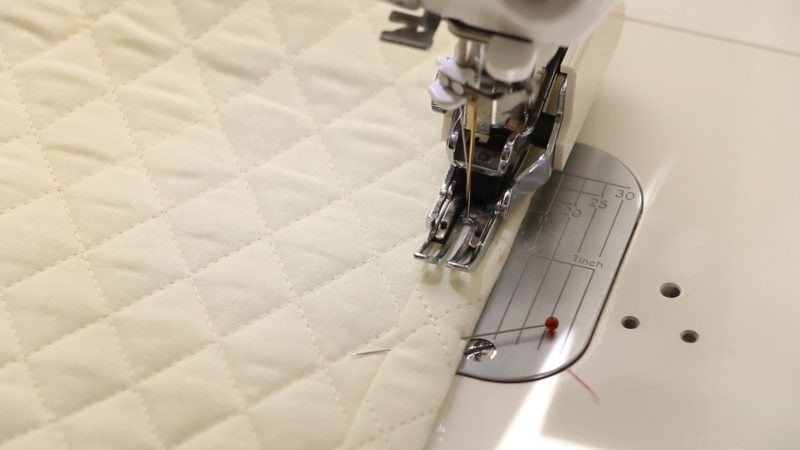

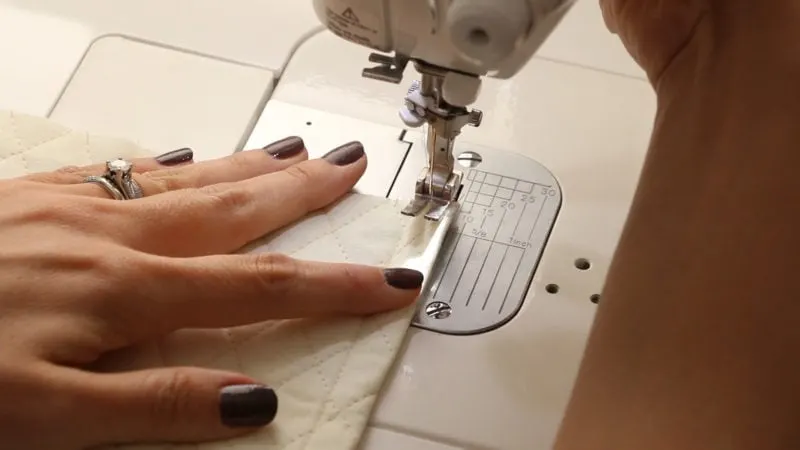
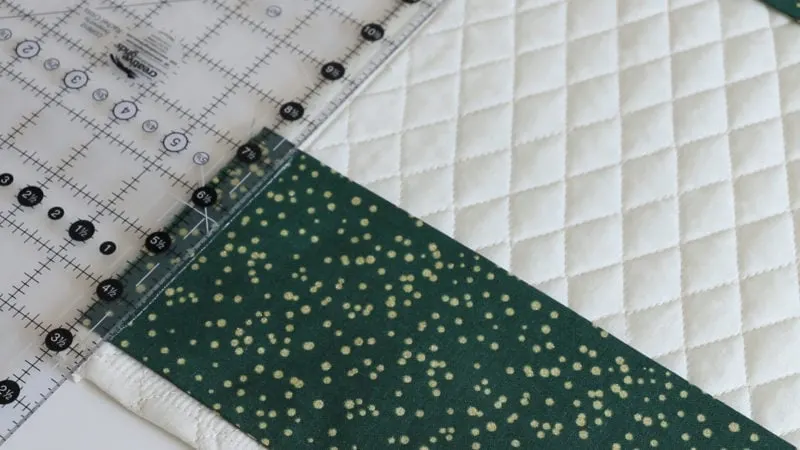
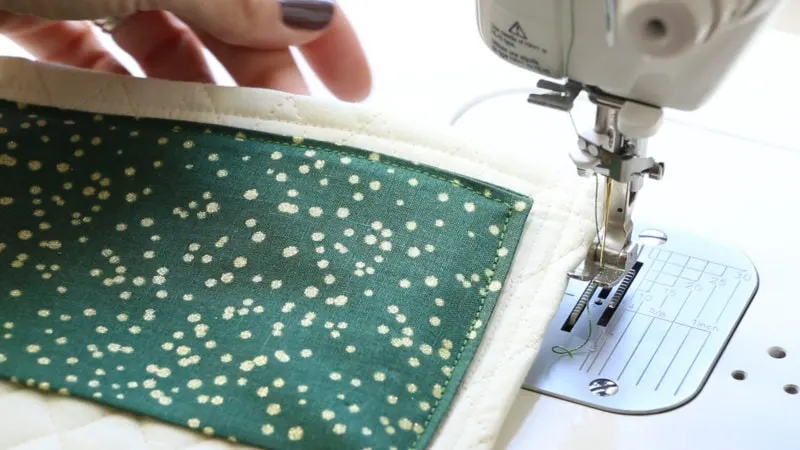
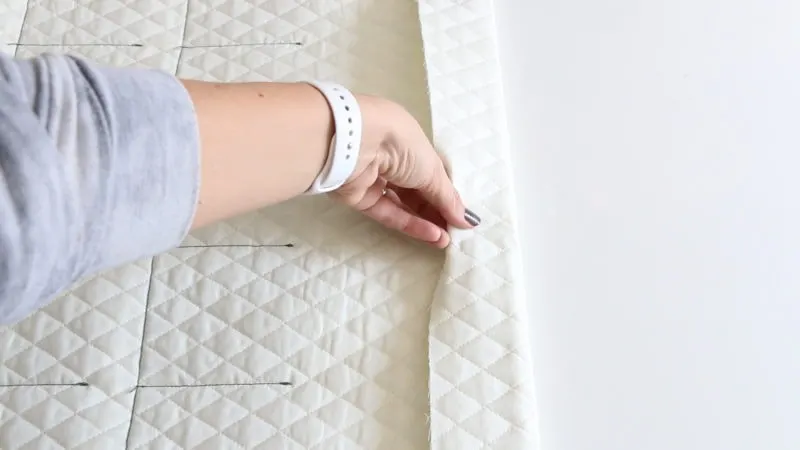
Start by folding over and then over again, pressing with an iron and then pinning in place. Sew down as close to the fold as possible with your coordinating thread. Do this on the sides and bottom, leave the top unfinished for now.
Turn the background fabric over and do an additional top stitch next to the stitch you just did to add a little extra detail. This is optional.

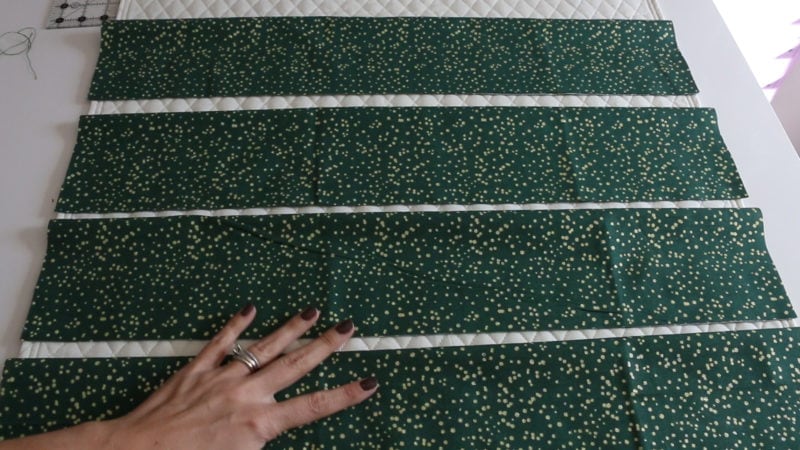

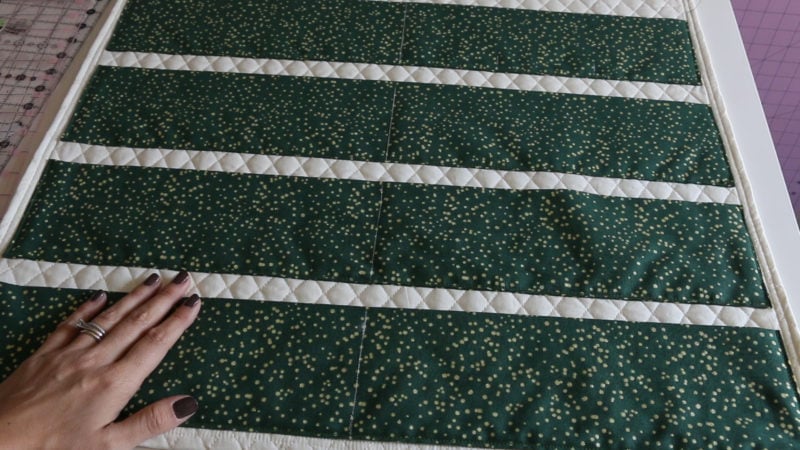
Get an idea of your pocket layout.
Sewing the Pockets
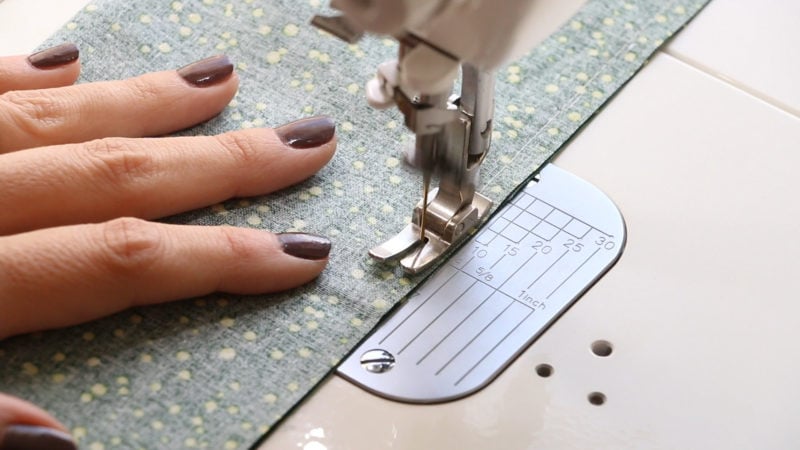
Take each pock and fold lengthwise right sides together. Sew down with a 1/4 inch seam allowance on the long side, turn right side out and press. Repeat for all 4 pockets.

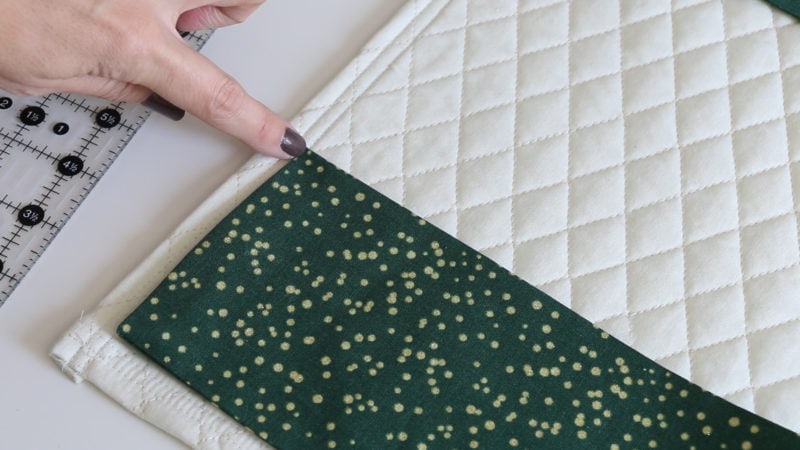
Starting with the bottom pocket, place in the location desired on the background fabric. Mark with the chalk where you would like the pocket to end on the sides.
Fold the pocket inward and press the raw edges are inside the pocket using your chalk line as a guide.
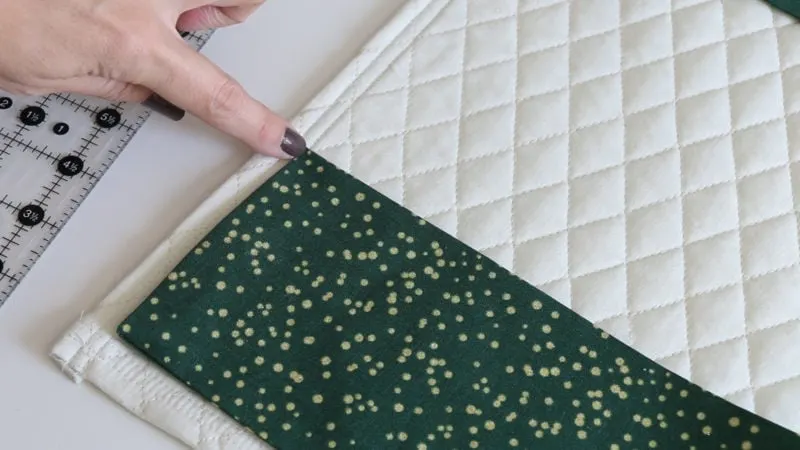
Pin the pocket into place after verifying the sizing and sew down along the short sides and the bottom using the accent fabric thread color. Be sure to backstitch at the beginning and the end.
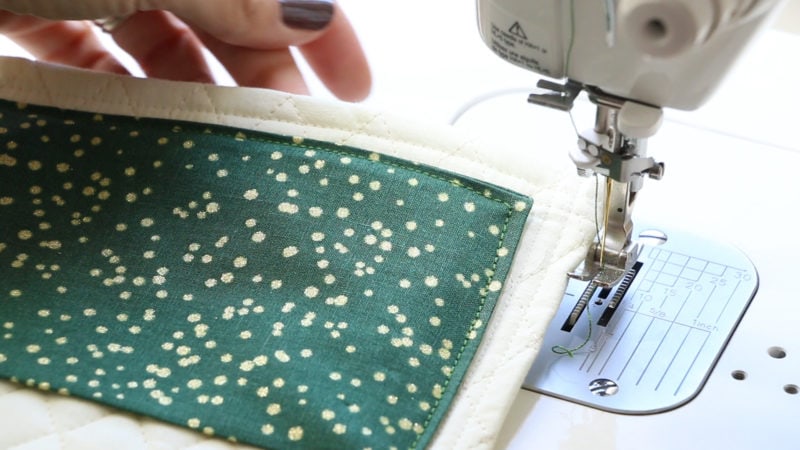
Repeat steps for finishing the pockets working your way up the calendar. Measure 1 inch between the top of the pocket below to insure your pocket is straight all the way across and then attach in the same method as first pocket.
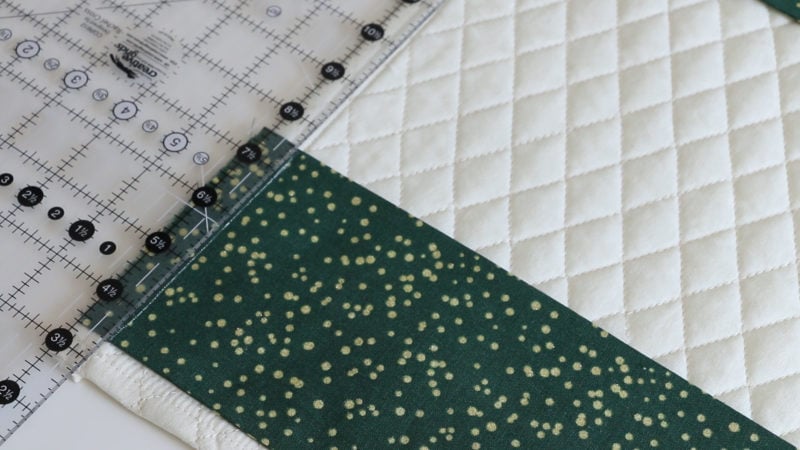
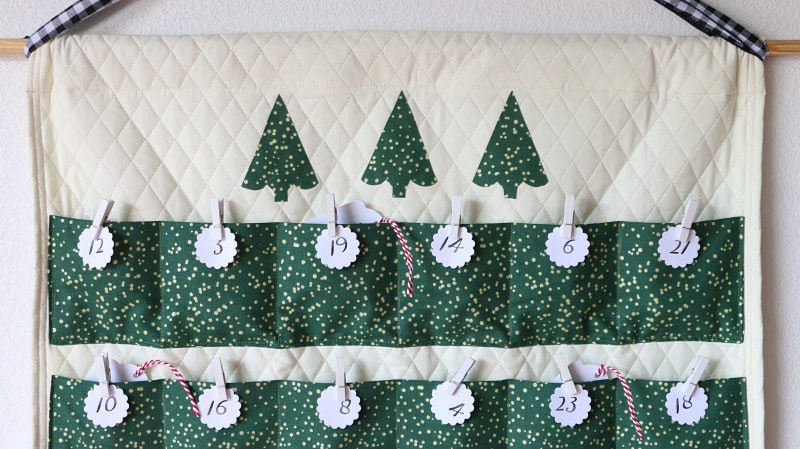
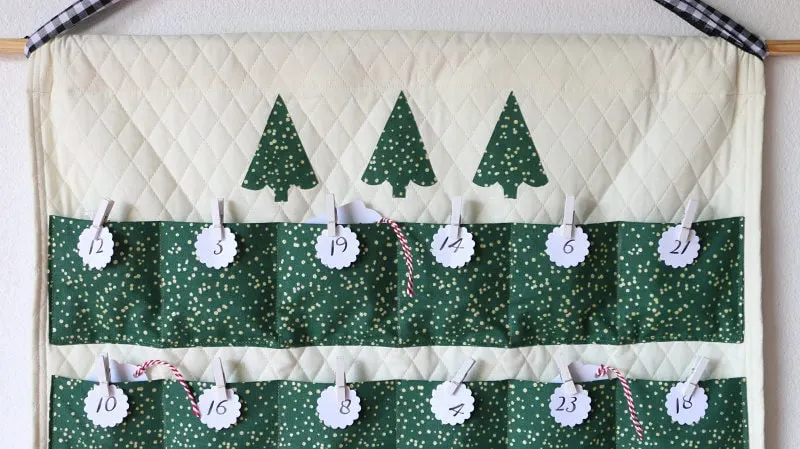
Once all the pockets are attached, we can now make our smaller pockets. Working from the top pocket, find the center of the pocket and draw a vertical line with the chalk. Using a long ruler or tape measure, continue that line down to the bottom of the advent calendar diy.
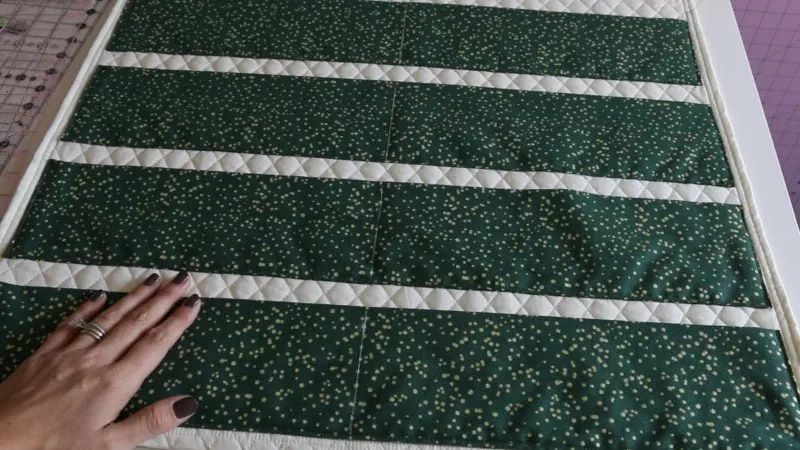
Sew along the chalk line, back stitching at the beginning and end of the pocket. Lift up your presser foot between pockets. Make sure to smooth out the pocket so there are no puckers at the bottom of the pocket. After the center line is stitched, you can measure and create the 3 pockets on either side of the center line. My pockets were roughly 3 3/4 inches. Sew directly after making your mark and then repeat for all of the pockets.

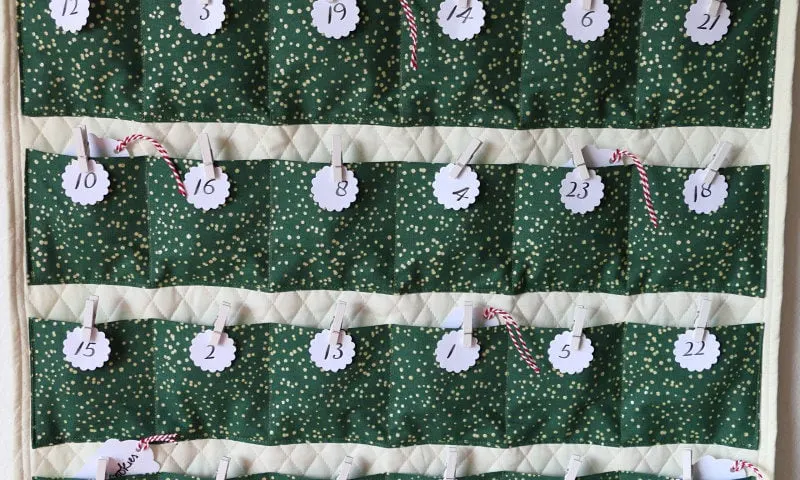
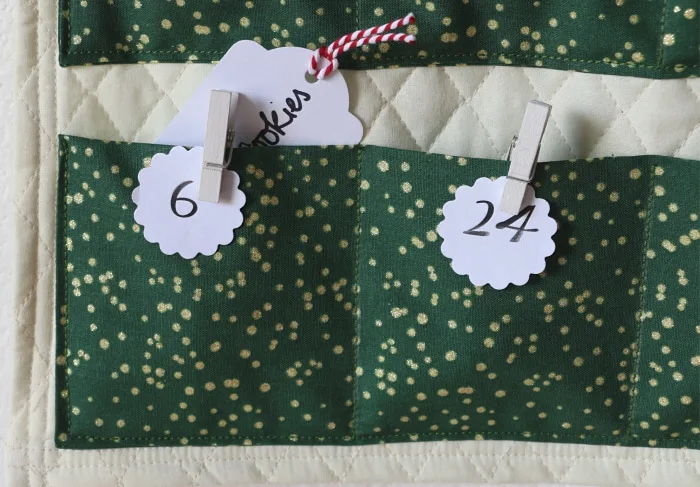
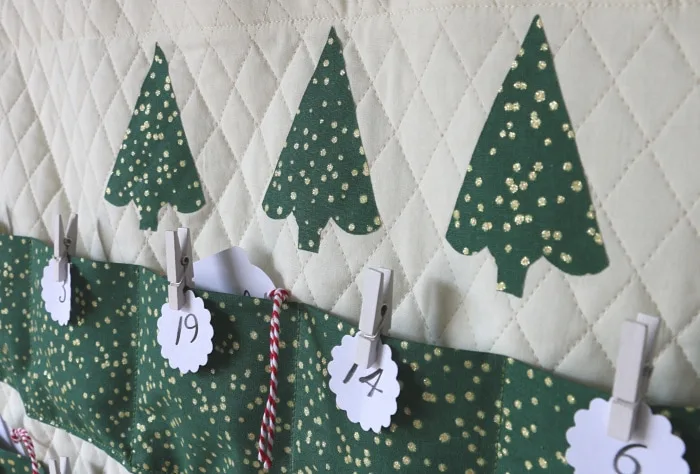
Adding Numbers to your Pockets
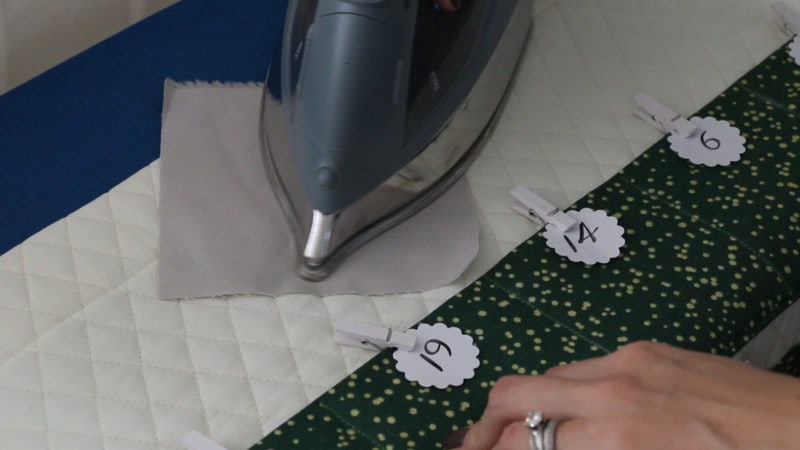
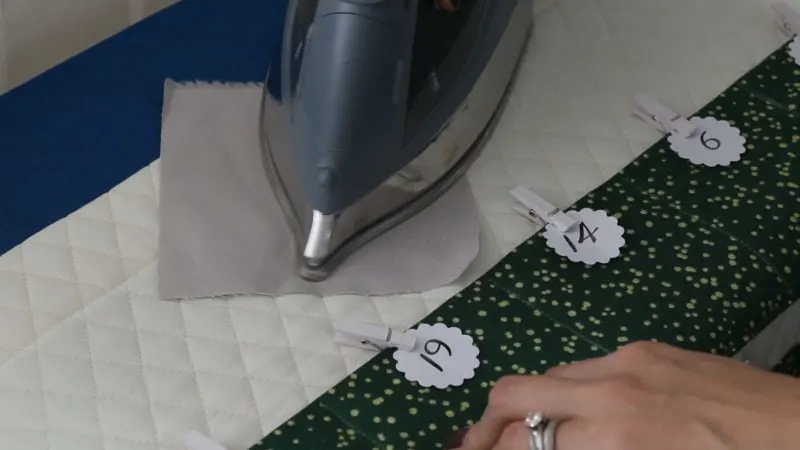
There are several ways to do this. I printed mine out on paper and used a punch to cut them out. I happened to have these cute clothespins in my craft stash to clip them to the pocket and make them interactive. After each day, I’ll let me kids unclip and place the number inside the pocket for safe keeping as an additional visual countdown. I have seen these tiny clothespins near the christmas cards of your local store.
You can also do applique fabric (felt would be great) or write the number with a fabric paint pen. See below for applique instructions. Pebeo is a great fabric paint, or THESE pens are recommended on Amazon. You may need a light color fabric for the paint option. Save this step for last if you chose to do so.


Create the Dowel Pocket
Depending on how large you want the top portion of your advent calendar diy to be, you can fold over and sew down the top of your calendar to create the pocket for the dowel. This is the same idea as when we finished the sides and bottom of the background fabric. Be sure your down fits and then stitch it down using your background thread color.

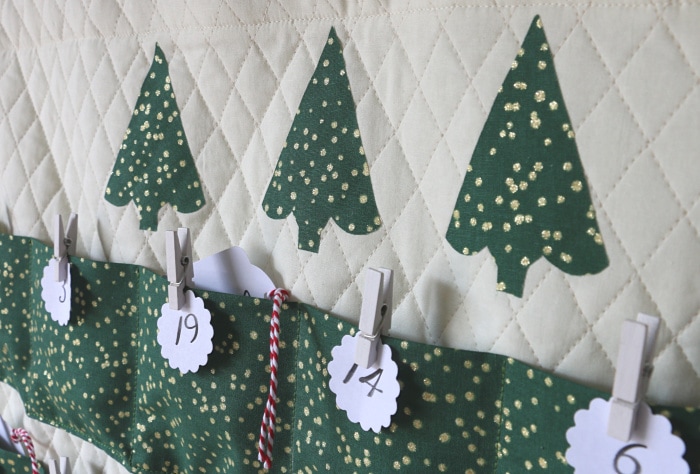
Decorate the Top
Now we get to decorate the top of our advent calendar! Again, you can do a few different things here depending on your aesthetic, time and desire, but I’m going to show you how you can applique a simple shape in no time at all.
First, you need a fusible. There are a lot out there, but I had this Clover fusible on had which I like and will use. The thing to note about fusible is whether or not you can sew it down after it is fused. They sell both kinds. This fusible is sewable, but I am not going to sew it since I don’t have plans to wash this, only dust as necessary BUT if you want to do this method on a table runner or something else, then it needs to be sewn down.
Appliqué

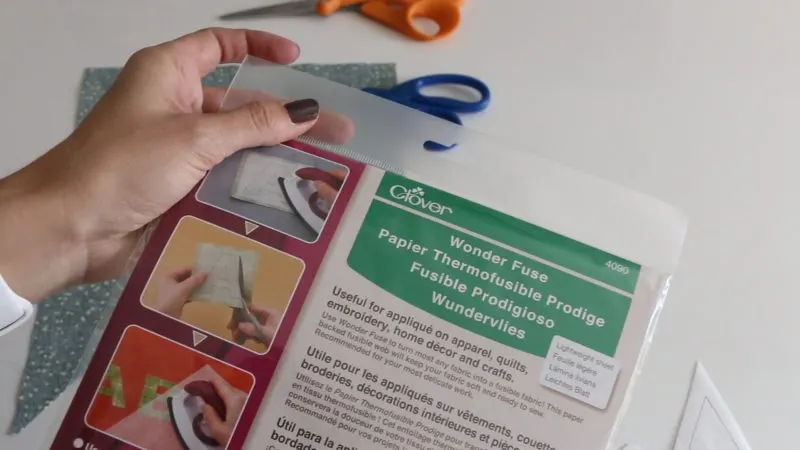
Follow the manufacturer instructions for your fusible.
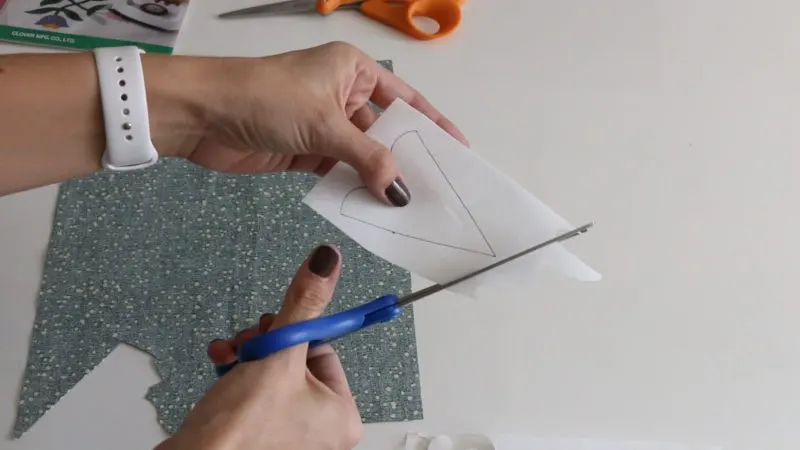
Find a simple shape (canva and pickmonkey are great) you would like to use and trace it on the paper side of your fusible and cut around generously. If you do lettering it needs to be in reverse.

Press to the wrong side of your fabric for 5 ish seconds.
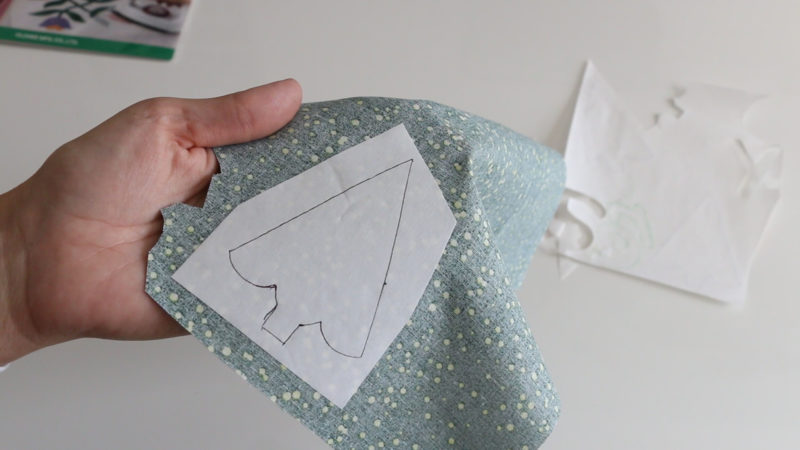
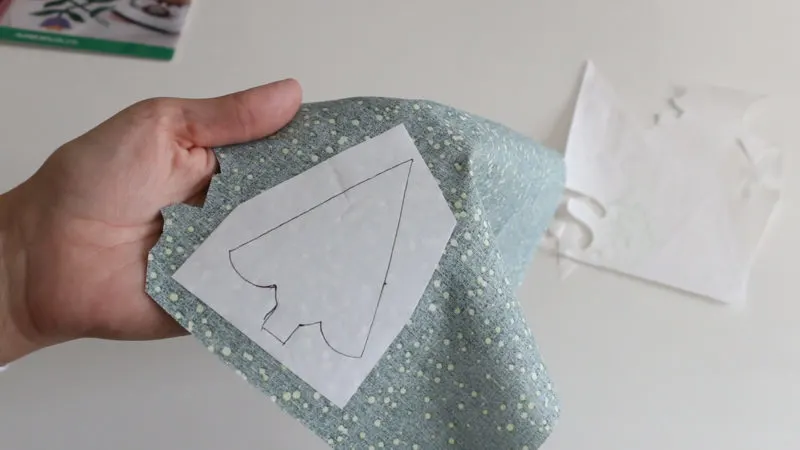
Cut around the shape carefully. You basically now have a fabric sticker.

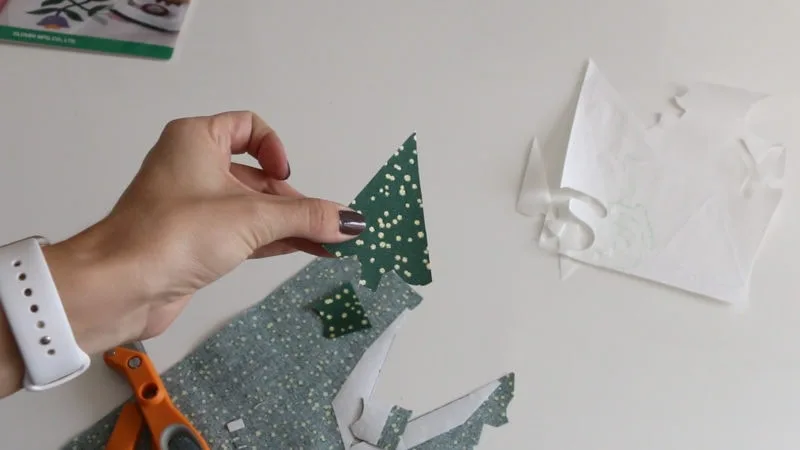
Carefully peel off paper (make sure webbing stays on the fabric), place on your advent calendar and using a pressing cloth, iron it down making sure the glue all melts and the image is secure.
Trim dowel if needed (I used a saw and mitre box) and insert in dowel pocket. Use ribbon or trim for hanging.
Buy treats and/or write notes for each individual day. Whether you want to read scripture, include random acts of kindness or fun activities to do as a family – the choice is yours! Have fun with it! Or just put candy in it… no shame in that game – you did after all just make this!

What do you think of this advent calendar diy? I’m super happy with how it came out, I hope you love it too!
More Sewing Tutorials
Looking for some more simple sewing tutorials? Below is a list for you to check out!
- Easy Drawstring Bag Sewing Tutorial
- Easy Zippered Vinyl Box Pouch Video Tutorial – Beginner Friendly
- Small Box Pouch with Handle – Easy Sewing Tutorial
- How to Make Burp Cloths from Vintage Hankies
Here is the Advent Calendar DIY YouTube video!
An image for you pinterest board!