

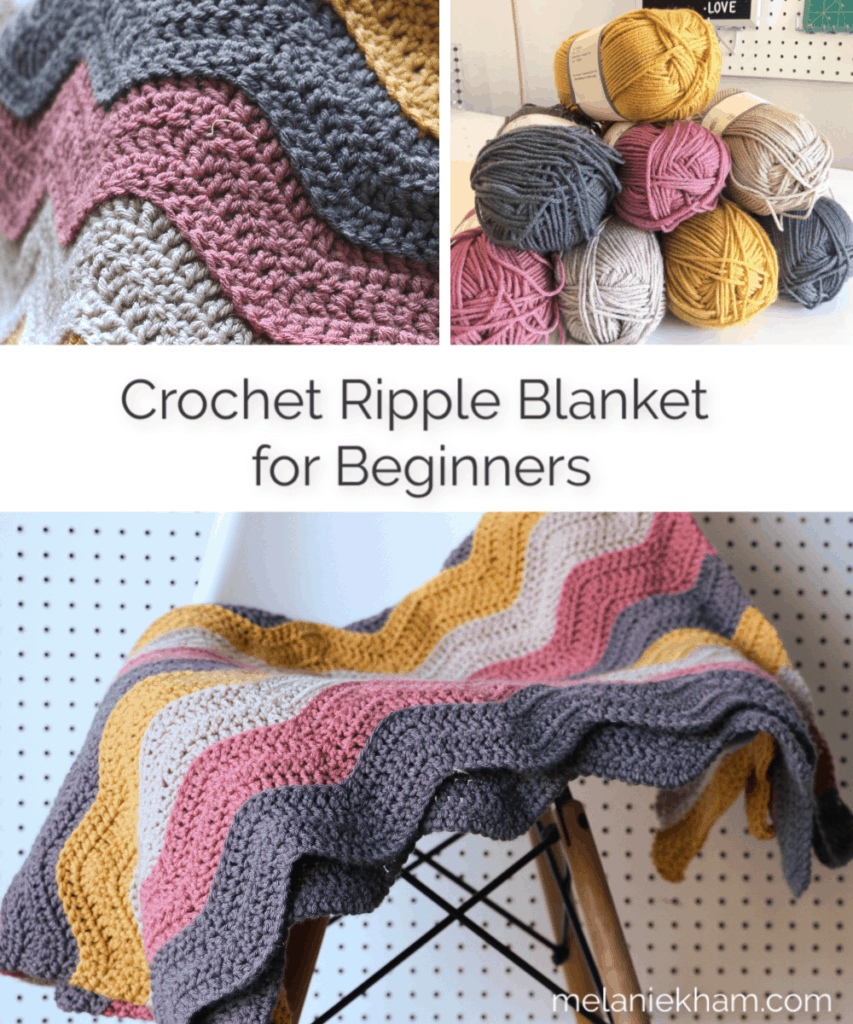
A new crochet blanket pattern?! Why, yes – yes it is. Today I’m excited to share with you this crochet ripple blanket – an easy project that is great for beginners and doesn’t take tons of counting or brain power ;). File this under, “crochet while watching Netflix” or “crochet while your kids are wandering around and you occasionally need to remind them to do their homework or put their clean laundry away.” It’s that type of crochet ripple blanket project. These are my favorite types of crochet projects!
Crochet Ripple Blanket
this post is not sponsored, but does contain Amazon affiliate links. Thank you for the support!
Quick question, are you signed up for my newsletter?! I don’t send out tons of emails (maybe 2-3 times a month), but it’s a great place to be in the know on my latest projects all in one spot.
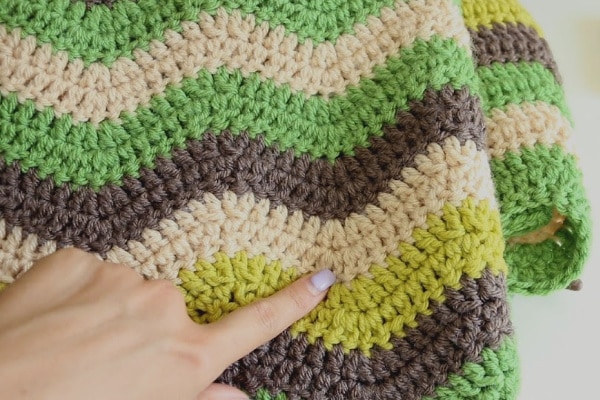
The FIRST crochet blanket I ever made.
Ok, now let’s get to it. First, I want to show you a version of this crochet ripple blanket – the first crochet blanket I ever made. It was 2010 and my husband had just come home from Afghanistan. We weren’t doing much besides watching our 18 month old son run around. In a season of reconnection and rest, and this is the perfect blanket to work on. Even as a new crocheter, I followed along without getting frustrated or having to count too much. Notice on this green version that the stripes are 2 rows each. The new version is 4, but you can certainly adjust that to 2 if you prefer.

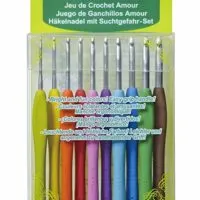
The amazing thing about crochet is that it doesn’t take much to get started. You need a good set of hooks, these are the ones I like, and some yarn. Here is the yarn I wanted to use for this crochet blanket pattern.
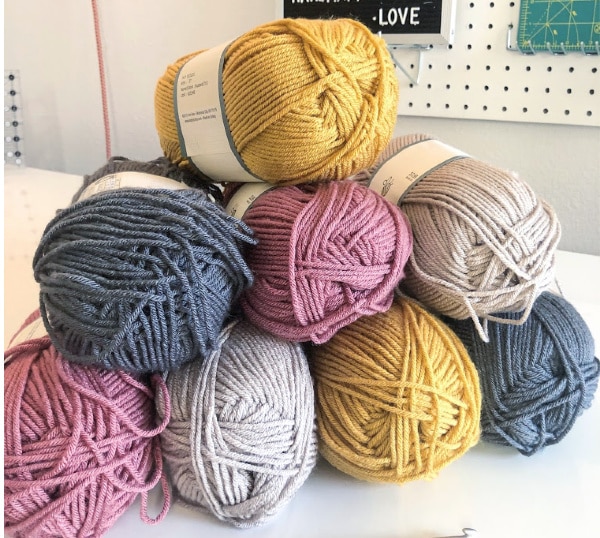

The Yarn Details
This yarn is called Yarn Bee Soft and Sleek, Low-Pill fiber from Hobby Lobby. It is 5 oz, 258 yards and recommends a 6mm or size J crochet hook. It is $3.99 and I used the colors, dark grey, linen, mustard and mauve. This is the amount of yarn I started with and it made the blanket 65 inches wide x 37 inches.
I will get 1 more ball of each color and that will make the blanket 65 x 55 which is a great throw size. Each ball of yarn creates 2 stripes of 4 rows each. I wanted to get this crochet blanket pattern up for you so I have not done that yet ;).


Hear Me Carefully. You do not have to use this yarn for this crochet ripple blanket. Every major yarn brand has a nice worsted weight yarn like this with a great color range. Choose the one that you gravitate toward color wise and where you have the availability to shop.
Almost all of my crochet patterns have the ability to swap for different yarn, because I don’t believe in pushing one brand – there are lots of great ones!
If you want to swap yarn, try to get one with a similar weight and amount of yards that this one has. That way the sizing from the pattern will be similar – and when in doubt, buy some extra yarn and keep your receipt ;).
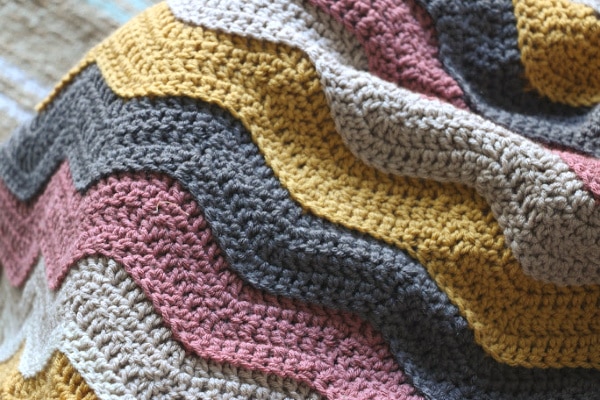

What do you think about this little ridge detail that I added? Have you made my chevron blanket? It’s similar, but many of you don’t like the “holes” that happen in that blanket ;).
Side note/tip
It is always good to have extra yarn. For this crochet blanket pattern, for some reason 1 linen color ball was a bit smaller than the rest which messed things up a bit.
I had almost the exact same amount of leftover yarn for the other colors, so I think that ball was defective. This has happened before, so its always best to error on the side of caution and get some extra if your budget allows.

Size Details
Do you want to make this blanket a different size? Want to make a baby size? Bed size? You totally can! Now, I will say that I can’t be sure about the amount of yarn that you will need for difference sizes than the pattern, but I can help you with a best guess. And it will change even more if you pick a different yarn brand or hook size – BUT DON’T LET THAT SCARE YOU!!
It’s ok! What the worst that can happen… you buy too much yarn?! That doesn’t sound like the worst thing to me ;). If budget is a consideration, you can always keep your receipt and return what you do’t use.
Crochet Ripple Blanket Pattern and Video Tutorial
Learn how to make this crochet ripple blanket with Melanie Ham! Step by step free pattern and video tutorial to make this easy for beginners and advanced crocheters alike. Time is estimate and there are many factors, don't worry about the time - enjoy the process 😉
Materials
Yarn of Choice - I am using Yarn Bee Soft & Sleek
- 3 balls of Linen
- 3 balls of Dark Grey
- 3 Balls of Mustard
- 3 balls of Mauve
Tools
- Crochet hook that coordinates with yarn choice, I am using a 6mm hook/ J.
- Yarn needle
- small scissors
Instructions
- Your blanket is in multiples of 16 +3. My example will use 208 +3 for a width of 65 inches.
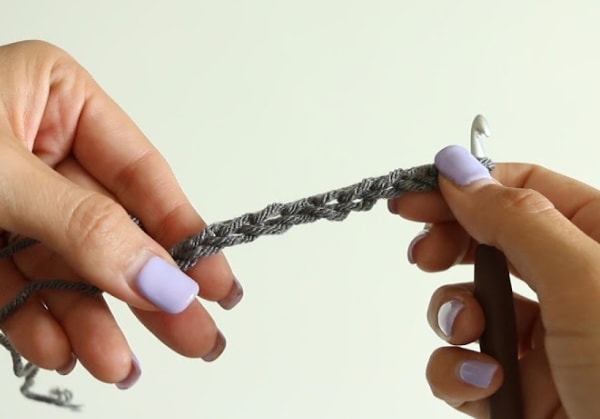
- Create a slip knot on your crochet hook. Make your foundation chain of 211. Let the hook do the work for you. You do not want tiny foundation chains or loosy goosy ones.

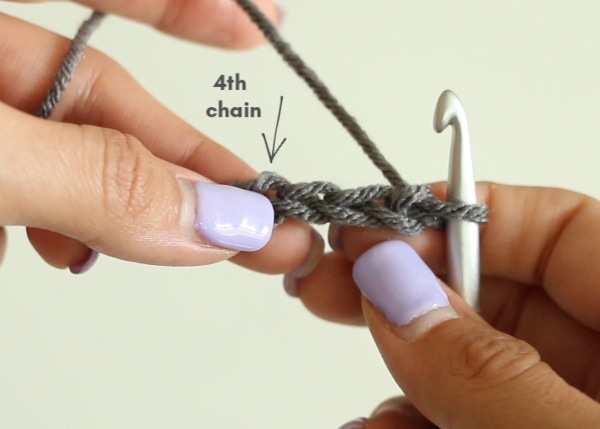
- In the 4th chain from the hook (the 208th chain) you want to place a double crochet (dc). That extra 3 stitches counts as 1 dc, so you just created your second dc stitch. These 2 stitches are part of your "ending."

- Stitch 1 dc in each of the next 5 chains.

- dc2tog for the next 2 foundation chains. stitch another dc2tog in the next 2 foundation chains. *See the notes section or video for help if you need it.
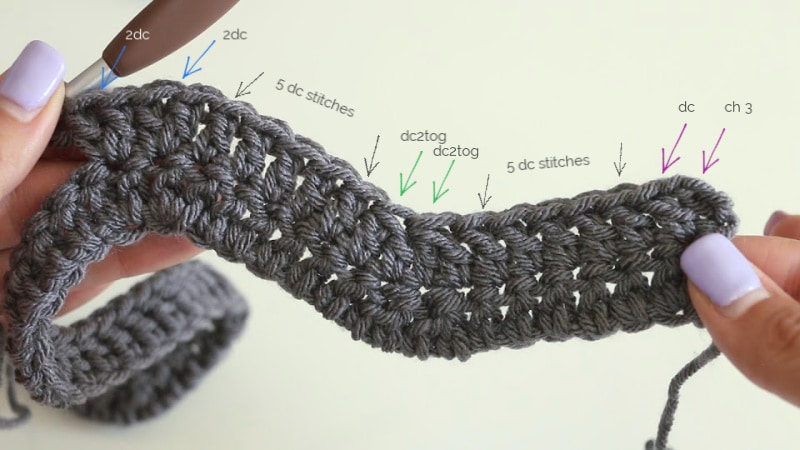

- dc in each of the next 5 foundation chains; 2dc in the next chain. stitch another 2dc in the next chain. (2dc means placing 2 double crochet stitches in the same chain or stitch).
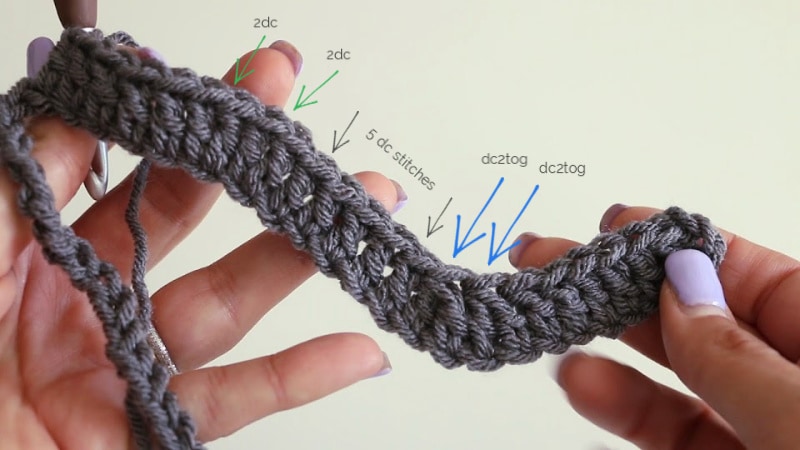
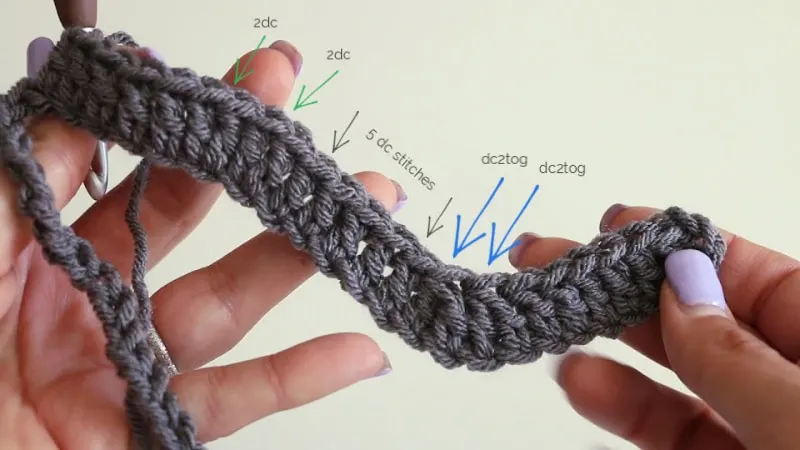
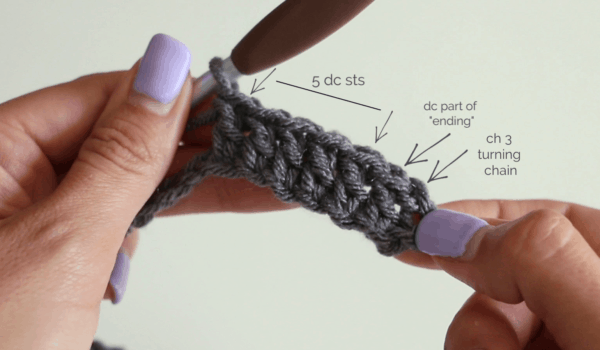
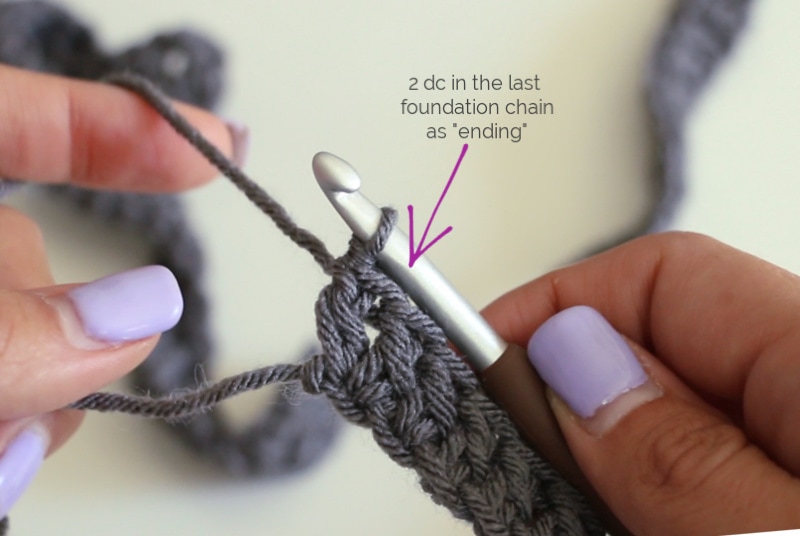
- Repeat the pattern, 5 dc stitches, dc2tog, dc2tog, 5 dc sts, 2dc, 2dc, 5 dc sts until your reach the end of your first row. Once you have finished your repeat you should have 1 foundation chain left. Place 2dc in that last chain to finish out the row. This is your "ending" just like at the beginning of your row. You need to have 2dc at the beginning and end of each row to make the blanket turn out correctly.

- Chain 3 and turn your work (This counts as 1 dc for "ending"). Dc in first stitch. 1 dc in each of the next 5 stitches, 2 dc2tog, 1 dc in each of the next 5 stitches; 2dc, 2dc and repeat to the end of your row.
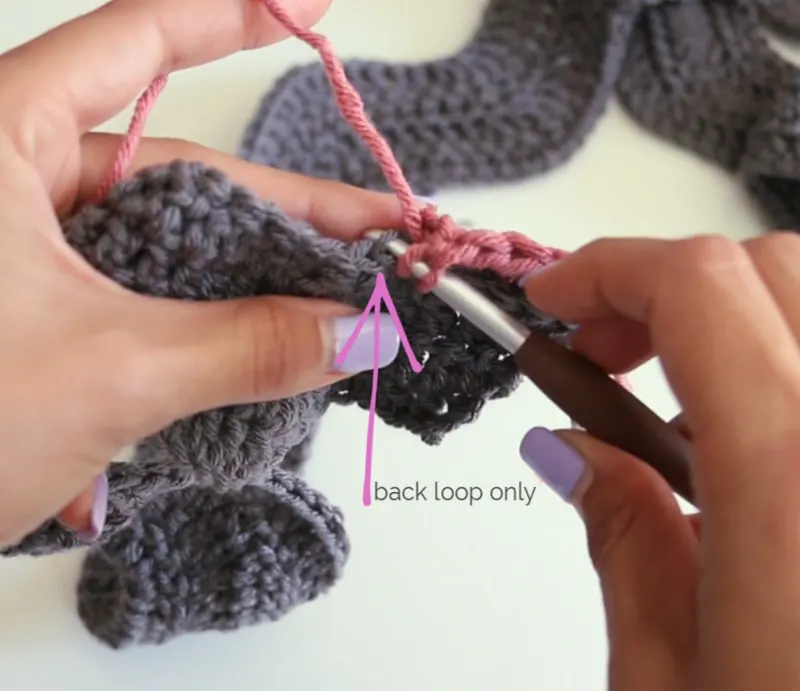
- Repeat in the same manner for each row with color A for 4 total rows. At the end of row 4 change your color to Color B. Chain 3 and turn. In the first row of any new color change, you are going to stitch the same pattern but in the back loop only. You will only do this on the first row, repeat the remaining 3 rows as normal. The first row of Color C and D will also be back loop only. This step is optional, but creates the subtle "ridge" look.

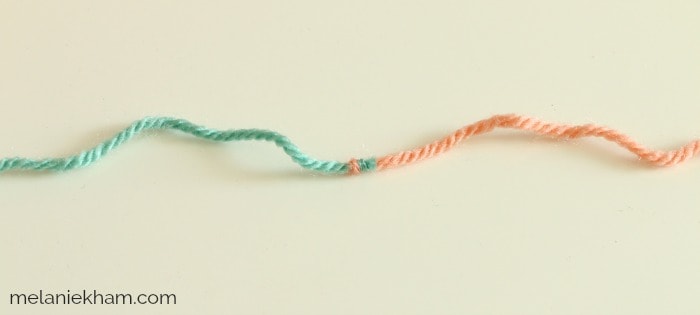
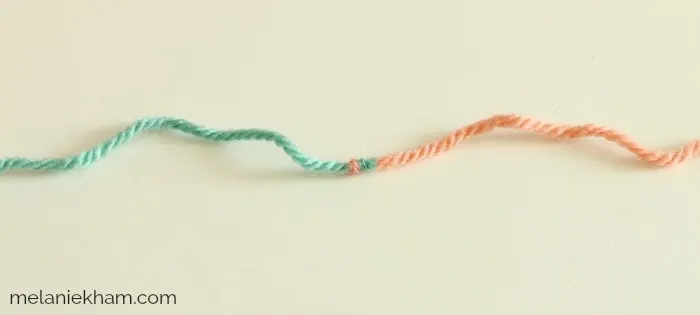
- When you run out of yarn, use the magic knot to join the new ball of yarn in the same color.
- Once your blanket is finished, fasten off and weave in tails.


Congratulations! You have mad your very own Crochet Ripple Blanket!
Notes
I am using US crochet terminology. Here is the UK terminology.
US dc = UK tr
US sc = UK dc
US dc2tog = UK tr2tog
US 2dc = UK 2tr
US double crochet - yarn over, insert hook, yarn over pull through 2 loops, yarn over pull through 2 remaining loops.
US dc2tog - yarn over, insert hook, yarn over pull through 2 loops, yarn over, insert into NEXT stitch, yarn over pull through 2 loops, yarn over pull through remaining 3 loops.
1 ball of yarn as pictured will yield 2 stripes. Continue until all yarn is used up or until your desired blanket size and look is achieved. Wash blanket per label washing instructions.
Recommended Products
As an Amazon Associate and member of other affiliate programs, I earn from qualifying purchases.


Lb
Wednesday 13th of November 2019
Love this, was able to make quickly, not a big fan of crochet blankets, but the ridge makes it look "Fancier" love the colors and yarn not a lot of fuzz, Would recommend to a beginner. Thanks
Leah Lone
Monday 4th of November 2019
I love the colors you chose, it looks like an easy pattern. Thank you much for your tutorials.
Blessings, Leah
Shelly M Solway
Sunday 3rd of November 2019
I Cant Wait to try this as always amazing Thank You so Much! Can this be down loaded to PDF or only Print? Thank you again for amazing classes and time to help people you are amazing !
Jeannetta McFarlin
Friday 1st of November 2019
Beautiful blanket, I love! love! love! your amazing crochet blanket, blog, and website! Thank you for sharing with me. I enjoyed reading about your crocheting journey.
Be Blessed Jnetta
Melanie
Tuesday 29th of October 2019
I would give it more than 3 rows before you give up, Maybe try a sample size and do 6 or 7 rows to see if you can get the hang of it without having to make long rows ;)