

Hey Everyone!
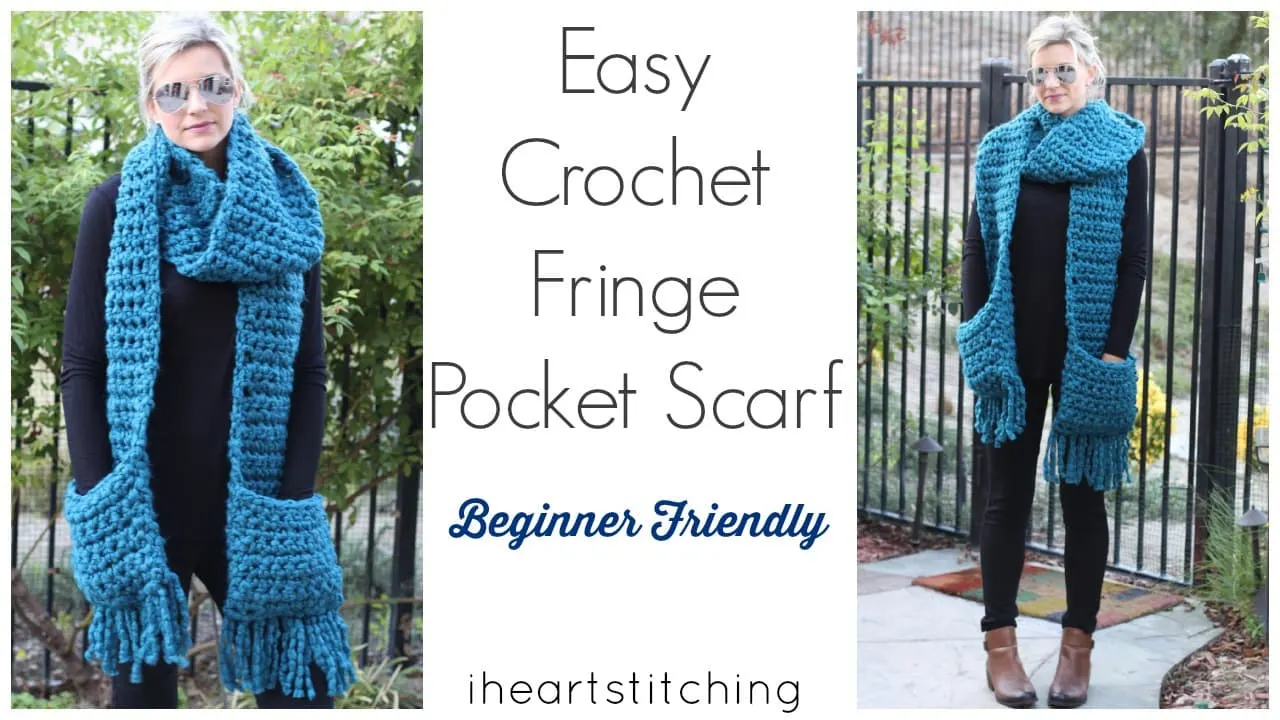
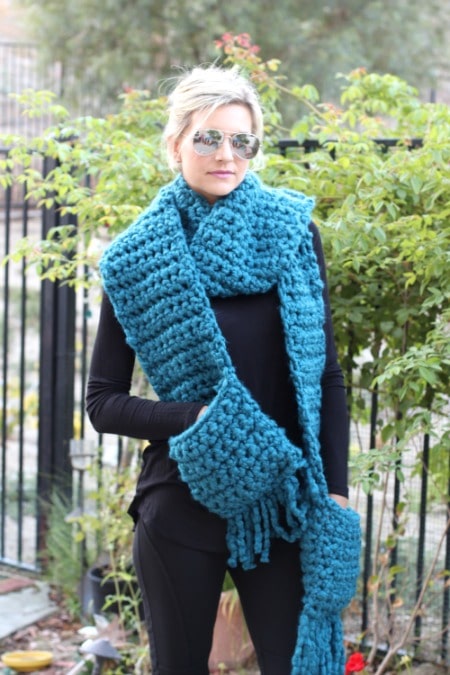
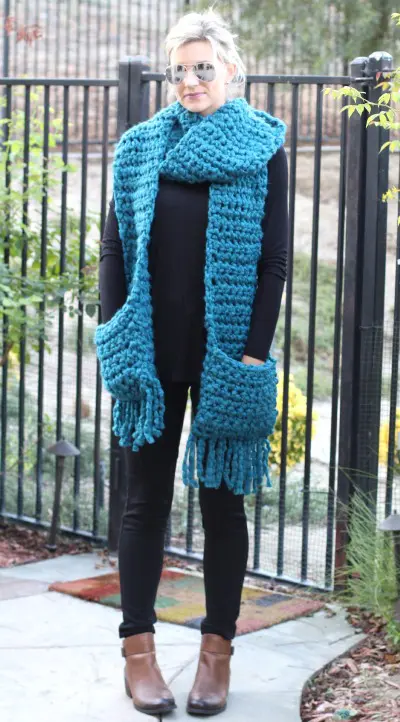
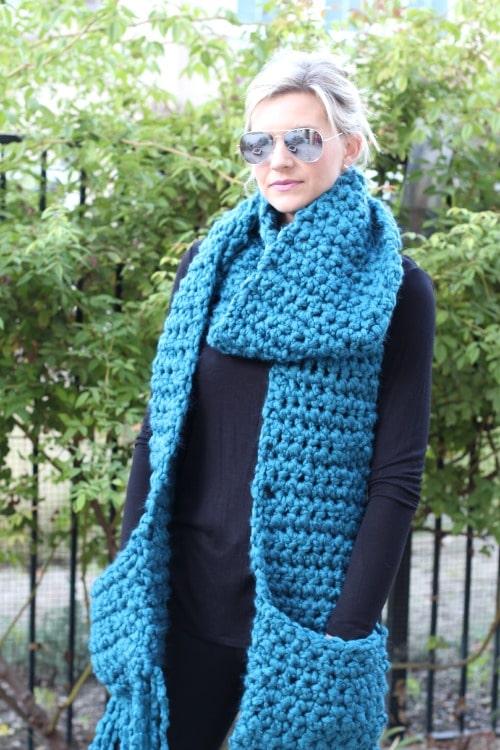
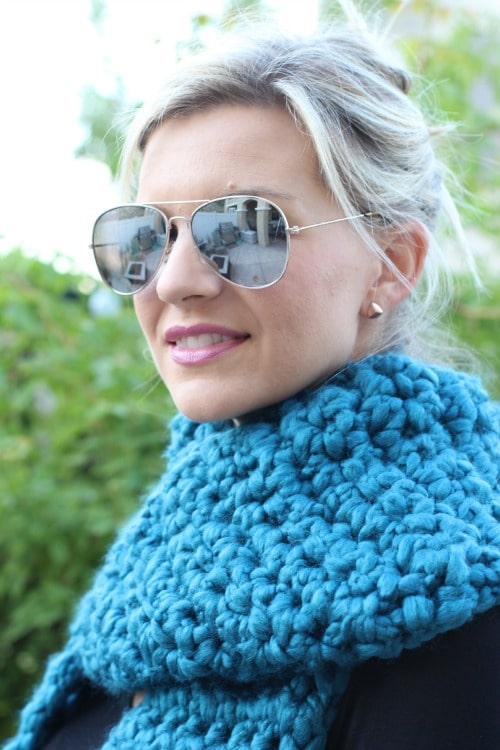
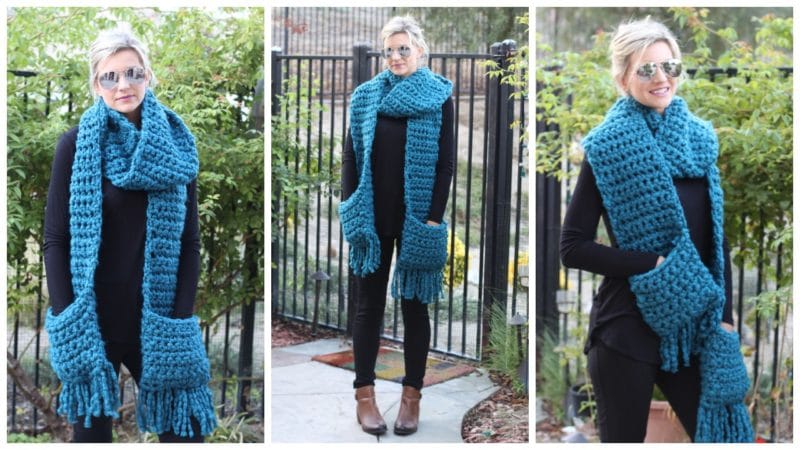
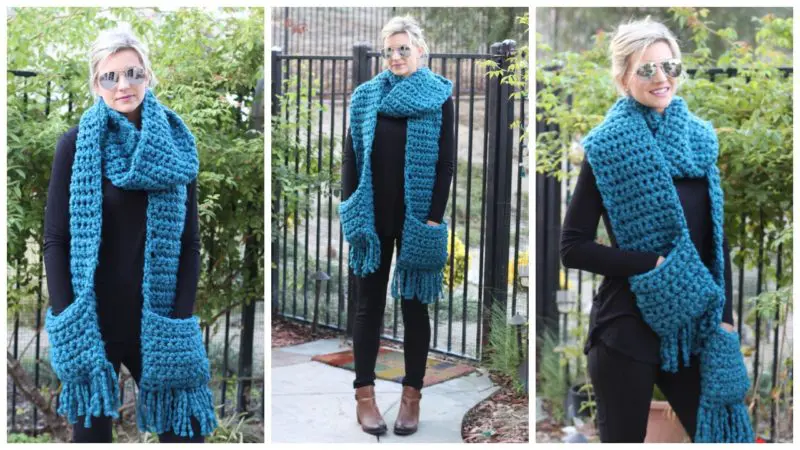
I’m really excited about today’s tutorial! An easy crochet fringe scarf with pockets! This project is such a statement and so fast to make. I did it over 2 days and that included filming. Scroll to the end to find out ways to modify this pattern to make it your style as well as the video tutorial 😉

Crochet fringe scarf MATERIALS:
6 skeins of Patons Cobbles Yarn (Look at the end of the post for alternatives) about 215 yards (each skein is 41 yards)
-If you make your shorter than mine (I am tall and have long arms, then you will probably be able to do 5 skeins).
Speed Hook… which is a 16mm or Q (I think the hook that that package recommends is WAY too small)

CHUNKY FRINGE SCARF INSTRUCTIONS:
Slip Knot and Chain 11
sc in 2nd chain from hook and sc in each chain on the foundation chain to the end.
chain 2 and turn
sc in 2nd stitch from hook and sc in each stitch to the end. There should be 9 single crochets in each row.
When you get to the end of a skein, take the 2 ends and tie a knot leaving at least a 4 inches tail to weave in.
Continue until scarf reaches desired length, mine is 99 inches not including the fringe. Keep in mind I am 5’9, so you may want it shorter. The weight of the scarf WILL stretch in out a bit too, so error on being a tad short at first. You can always make the loop around your neck looser if it stretches BUT I want you to be AWARE of this. Try on your scarf to make sure it is the right size before your tie off your end and add the pockets and fringe.
Once your scarf is the desired size, trim yarn and tie off end (pull trimmed yarn through the loop on the hook and give a slight tug to secure)
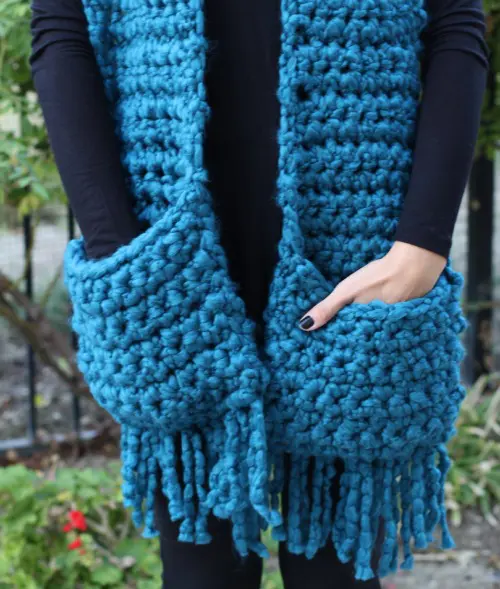
Make 2 pockets (same size as scarf)

Slip knot and chain 11
sc in 2nd chain from hook and sc in each chain on the foundation chain to the end.
chain 2 and turn
sc in 2nd stitch from hook and sc in each stitch to the end. There should be 9 single crochets in each row.
continue for 10 rows of sc and tie off leaving a long tail.
Attach Pockets
Place pocket on top of the scarf and using the long tail, sew it to the scarf looping it through the ends on the sides and bottom. Using a smaller hook may help to weave it in. Weave in the ends.
Make sure pockets are sewn on the same side of the scarf.
Fringe
Cut 20-22 14 inches strands of yarn for the fringe.
Take 1 strand and fold in half. Place folded part through the loops at the base of the pocket/scarf and pull the free ends through the loop to secure. Continue along the entire bottom of the pocket. I placed 1o fringes on each side and fill free to add more to fill in any gaps.
Be sure to weave in all the ends from adding new skeins and the pockets. A smaller hook will help you or you can use your fingers.
You are done!
Be sure to tag me on instagram (@melaniekham) or upload a photo to my facebook page!. I’d love to see your creations!
Copyright: You may sell finished crochet fringe scarves made with this pattern, but please link back to this post and give me credit as the designer. Thank you.


MODIFICATIONS:
I purchased 6 skeins of this Patons Cobbles yarn which is $7.99 each skein. It is 50% wool which is part of the reason for the cost. I used a Michaels coupon on 2 of them, but that is still a good amount of money so I wanted to share some alternatives (which aren’t necessarily less expensive but maybe you find them on sale) and also share some ways you can modify this pattern to make it your own. Here are some great bulky yarn alternatives. (I love LionBrand Hometown USA and I can get them at WalMart for $2.97 a skein).
You can make this crochet fringe scarf with any bulky yarn you like! The bulkier the better!! Keep in mind the speed hook may be too large for some of the other yarns, especially 100% acrylic yarns that have a little more softness to them so keep that in mind. The acrylic yarns may stretch more too!
Other ways to modify:
You don’t have to add the pockets or the fringe, feel free to personalize this to your taste.
If you want to make it WIDER OR THINNER, choose how long you want your foundation chain to be and ADD 2. Then you continue to follow along with this tutorial. (for example mine is 9 chains + 2 for the turning chain)
Looking for some other crochet scarf tutorials?
- Easy Crochet Infinity Scarf in 3 hours
- Basic Crochet Scarf – Beginner friendly
- Easy Velvet Crochet Infinity Scarf
- Easy Crochet Cowl
Here is the video tutorial! CLICK HERE if you can’t see the video.
tamsiracuse
Friday 28th of November 2014
Can I make the pockets by folding the bottom up and stitching rather than making a whole new piece? Thank you for your time and I can't wait to get started on this project, just waiting for the package to arrive from Jo-Ann Fabrics!!
VBrown
Friday 1st of January 2016
This is a little over a year later but I did fold the bottom up to make the pockets. Just have to make sure you extend the length of the scarf to allow for the change. I made my scarf a little narrower also. I'm almost done and love it!!!
I am a beginner and appreciate the video tutorials. Thanks Melanie!!
Bibi
Monday 17th of November 2014
CANNOT WAIT TO TRY THIS! IT LOOKS AWESOME!!!
Carmella
Friday 14th of November 2014
Can't wait to start this project.....I even thought about changing the color of the pockets or fringes....I love your tutorials....thanks for thinking about us beginners...be blessed!
Relanda
Sunday 2nd of November 2014
I love this and can't wait to make it. My first crochet project was your bulky infinity scarf. I love your instructions. Always so easy to follow.
jeannie bartlett
Wednesday 29th of October 2014
i love your easy to follow instructions. im new to this craft and have been able to make afew of your projects. cant ait to try the new scarf