
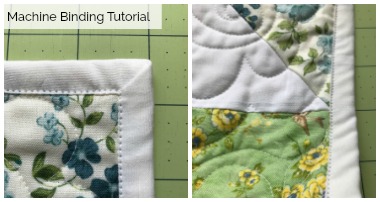

In today’s post, Mama Lisa is sharing her way of machine binding her quilts. This is a fantastic machine binding tutorial just for you! Machine binding is quicker than hand binding and can be more secure. My Mom and I both prefer the look of hand binding better, but it’s great to have your machine binding mastered as well because it’s quite a bit quicker and many people prefer it over hand binding. Did you miss the first post on binding? Here it is!
Machine Binding Tutorial
Back again for part 2 of machine stitching your binding to your quilt. This post is heavy with descriptive text and lots and lots of pictures! I wanted to show every step I could with good close pictures to make it easier to understand. I looked for this type of post or video when I was learning and really couldn’t find one that had all the tips and close ups that I needed. So, hopefully this very thorough tutorial will give you all the words and visual clues you need to dive in and try in on your own quilt. So here we go…
Sew to the Back of the Quilt
Now that all the strips are prepared and we have tested out our length by “walking” it around the quilt ensuring we have enough length and that the seam joins avoid the corners, it’s time to stitch the binding on the quilt. The first portion of the process where we first sew the binding onto the quilt, do the corners and join the ends is the same whether you flip to the front or the back and finish by hand or machine. The specific steps I’m sharing are stitching to the back of the quilt, flip to the front and machine stitch down the binding to the front of the quilt.
In the first post, when we “walked” the binding around the quilt, we had it pinned onto the right edge of the quilt. Now to sew the binding to the quilt, go back to that pin, make sure you have at least a 12” tail and that the binding is attaching to the back side of the quilt.

You can use a ¼” foot, regular foot or a walking foot to attach the binding to the back of the quilt. Begin by taking a few stitches and then use the reverse to go back a couple of stitches and then sew ¼” aligning the binding to the edge of the quilt as you go. A common issue at this point is the quilt sandwich wanting to drift out from under the presser foot. To aid this, keep the weight of the quilt that is to the left of the presser foot up on your table or a surface next to your machine so that it doesn’t pull or drag left. A walking foot can also help to keep it aligned and straight and I’ve used quilting gloves or gardening gloves with the rubber finger tips or dots which helps to provide traction to the quilt sandwich as you maneuver around the quilt.
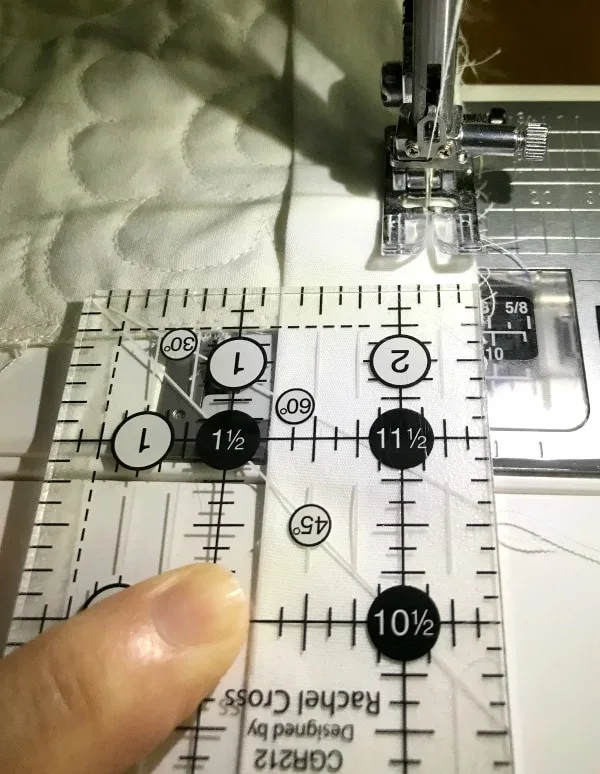
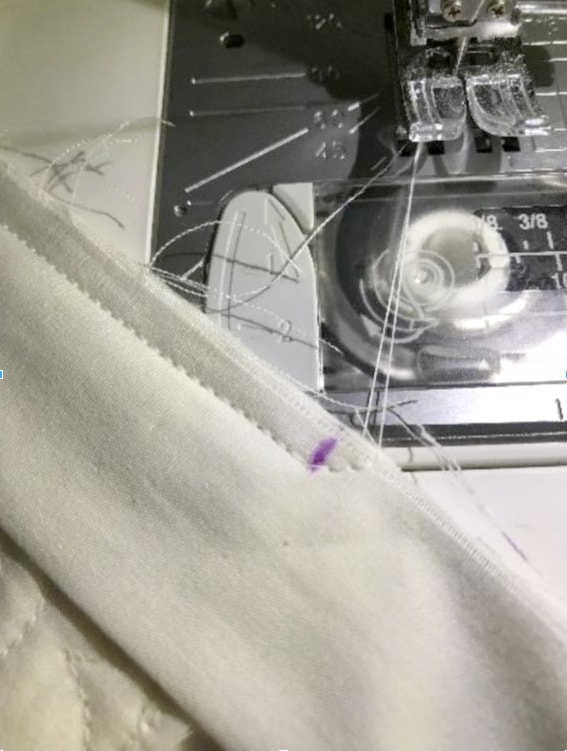
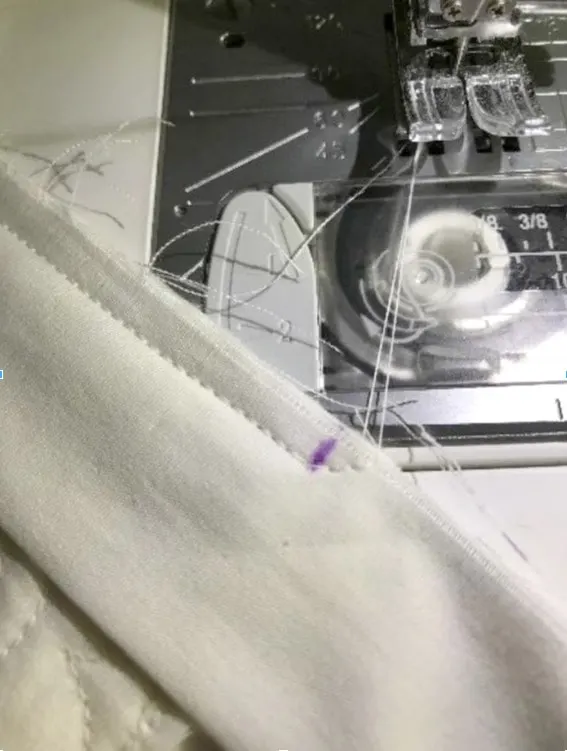
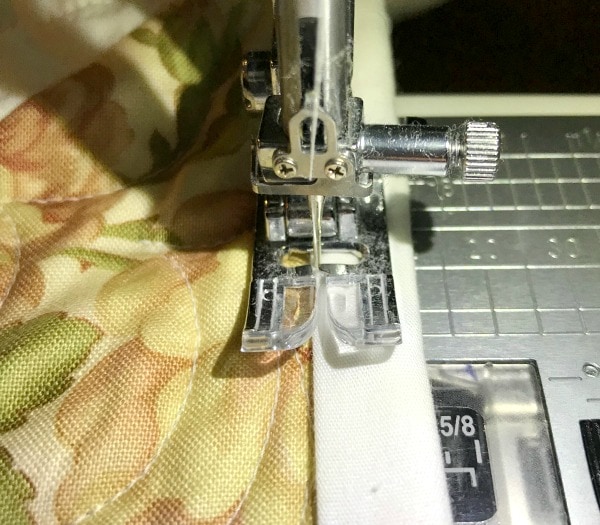
Needle Position
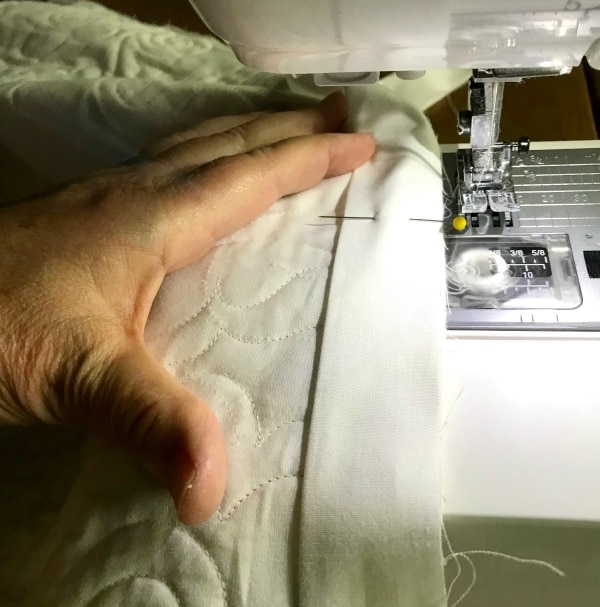
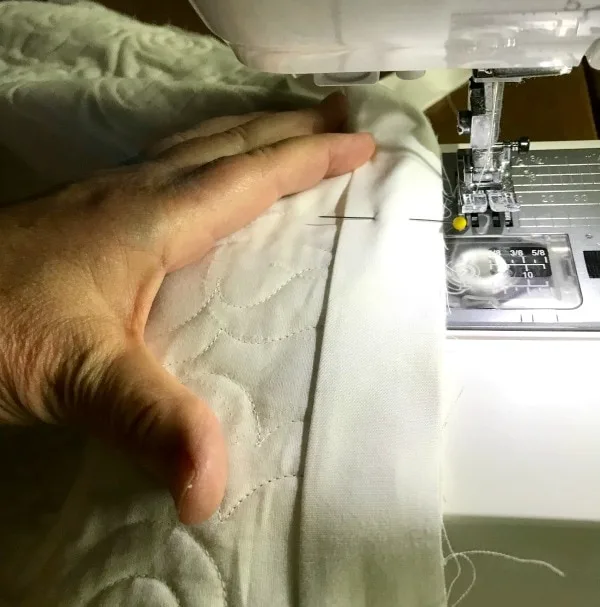
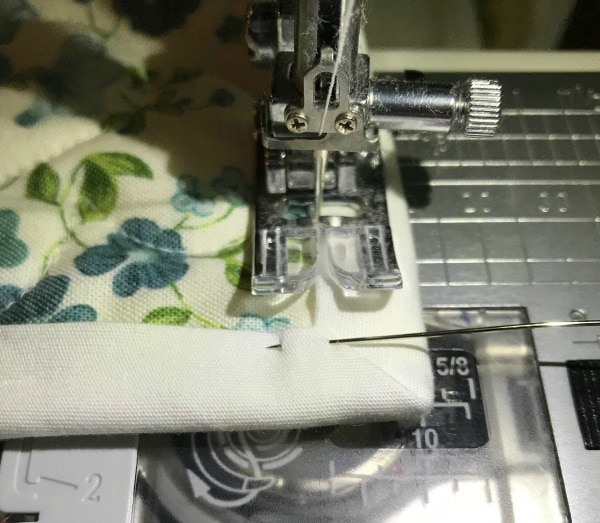
As you can see in this photo, my needle is slightly to the left of the ¼” mark on the ruler. This is because on this machine it is more important to have the presser foot all the way on the quilt sandwich, aligning with the edge. This aligns the feed dogs to help grab the sandwich on the bottom of the quilt and move it through and helps the quilt not to drift as much. The slightly bigger seam typically works fine, but you could also adjust your needle position to stitch at ¼”. This picture also shows the binding is attaching to the back of the quilt sandwich, folded edge to the left, raw edges to the right. Stitch down the edge of the quilt and stop about 1 inch from the corner and put your needle in the down position to hold your place. Take a small ruler and measure ¼” from the edge of the corner as shown below and make a mark that is ¼” from both edges. This mark is the single most important tip I’ve learned to ensure my corners are neat and match up at a 45 degree angle.
The Corners

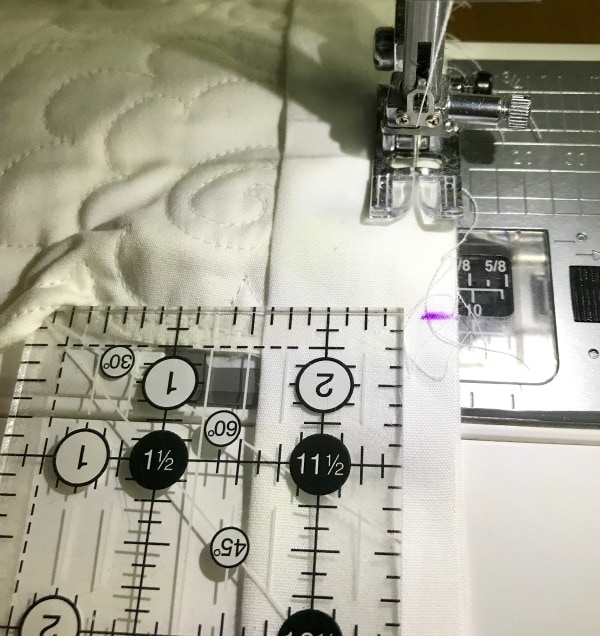
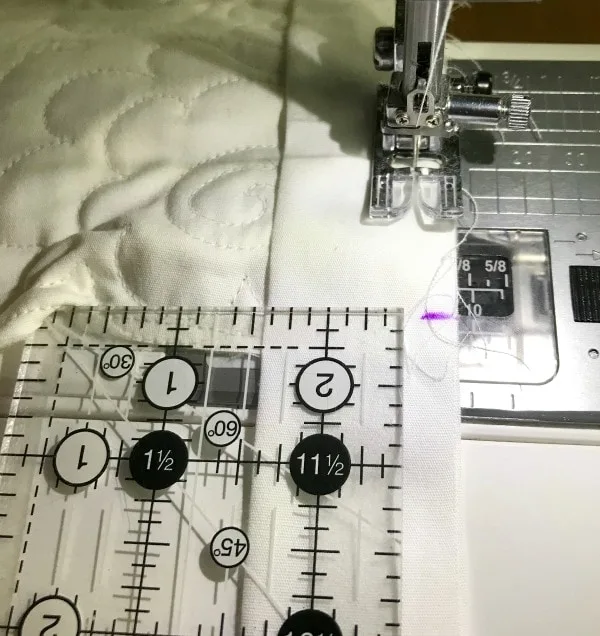
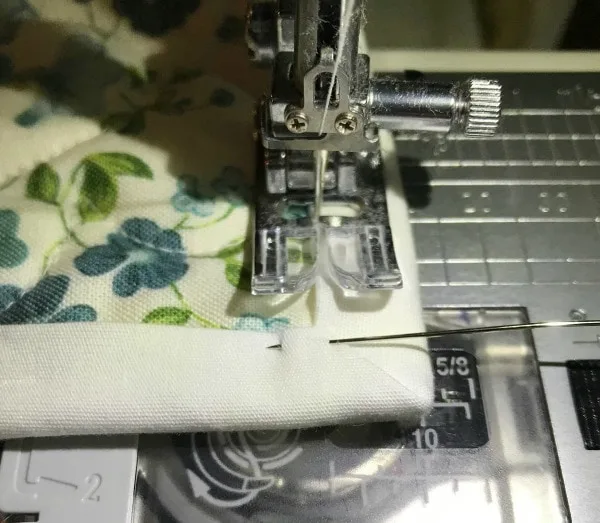
Now sew slowly to that mark and stop with the needle down. Double check your position to ensure the binding hasn’t moved considerably. Remember you want your needle to be at the ¼” position from both edges of the quilt. Now pivot your quilt sandwich and binding to sew off the quilt at a 45 degree angle as shown below.

Now raise your presser foot and pull your quilt sandwich towards you slightly, no need to clip threads. Fold the binding up perpendicular and making a 45-degree fold as shown and then fold the binding back down across itself as shown. Check that the first fold is a 45-degree angle up to the corner and that the second fold is aligned straight across the top with the edge of the quilt and the binding is now laying flat against the next edge of the quilt to bind.
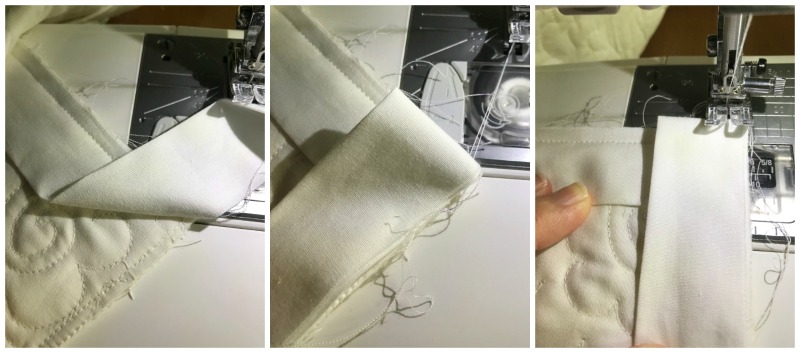
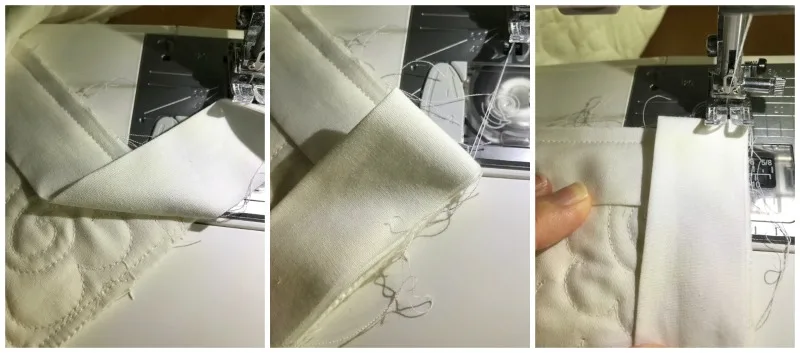
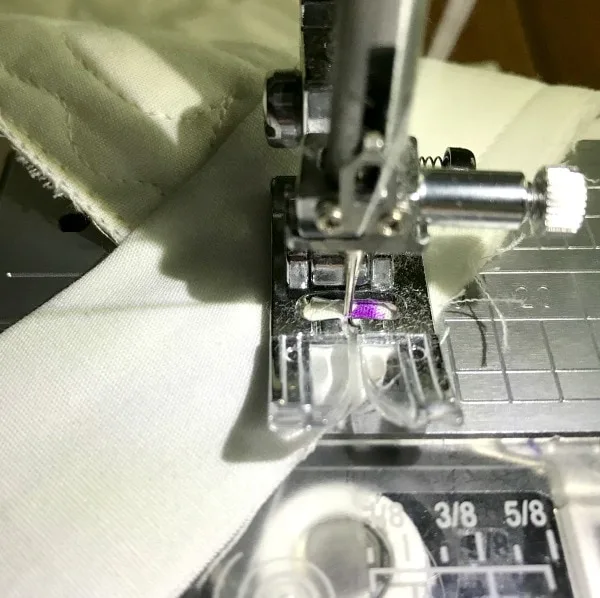
Now with the needle in the down position, move the quilt under the presser foot and align at ¼” to begin stitching down the edge of the quilt. Lower the presser foot and guide the sandwich through stitching and securing the corner. Continue stitching down the side of the quilt and repeat at the corners until you are around the quilt and back to the side where you started.
Trim the Extra
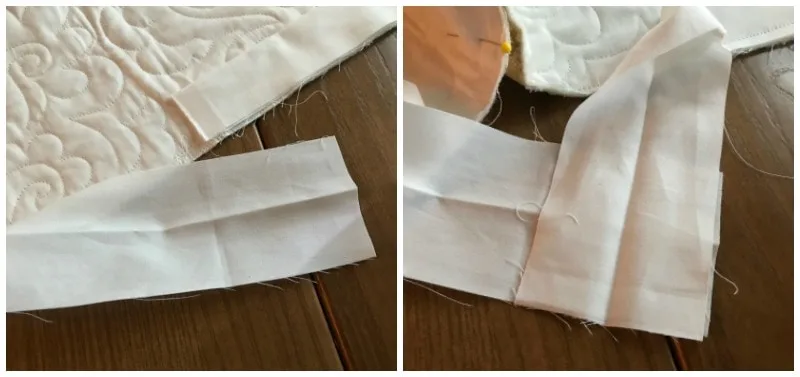
As you sew the last side of the binding stop about 18 inches from where you started and take a few backstitches to secure, raise the needle and cut threads. Now you should have about a 12” tail from when you started and at least 12-18 inches of the binding remaining as you ended. Take the quilt sandwich out from the presser foot and lay the side of the quilt and binding to be attached flat on your table. Guide the binding from both ends and lay it flat against the quilt to about the mid point that remains to be bound and fold the tails back over the binding such that the two folds meet in the middle as shown.

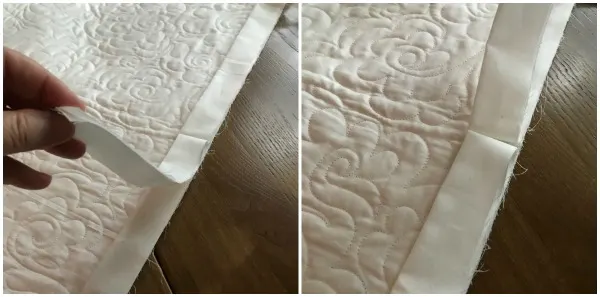
Now cut ONE tail at the fold as shown.

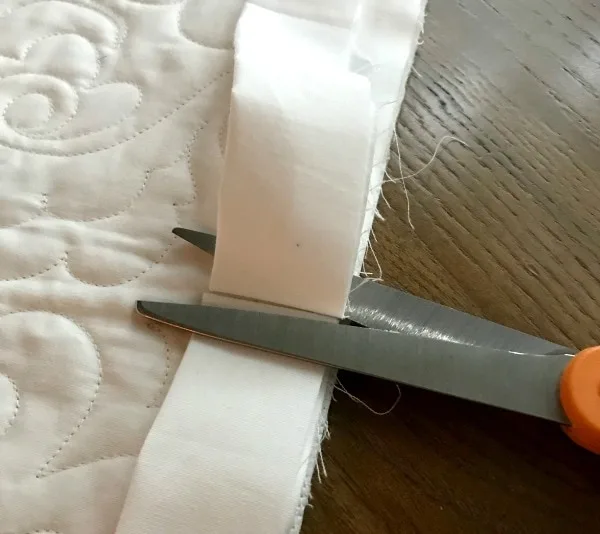
Take a small piece of the binding you just cut, open it and lay its full width across the binding strip you just cut as shown.

Lay the other tail OVER the scrap piece of binding and cut where the scrap ends as shown.

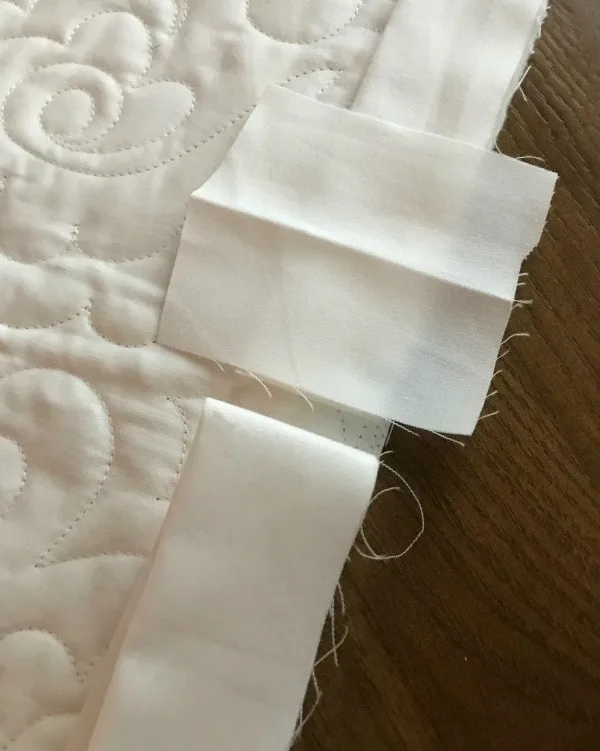
Take the scrap piece out and bunch up the quilt edge that needs to be bound and secure with a pin so that you can work with the ends more freely.


Take the end closest to you, rotate out and open the fold so the right side is facing up then take the opposite end and rotate it left so that the right side is facing down.
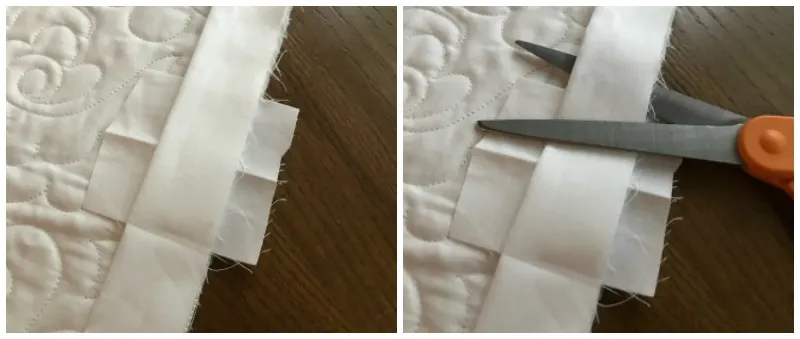
Bias Join

Line up the ends, rights sides together at a 90 degree angle and pin in place if needed. Now take a ruler and draw a line from corner to corner then sew on that line. This can take some wiggling, fiddling and maneuvering to get under the presser foot but keep the weight of the quilt up, the squished part squished and with a little patience it will work.
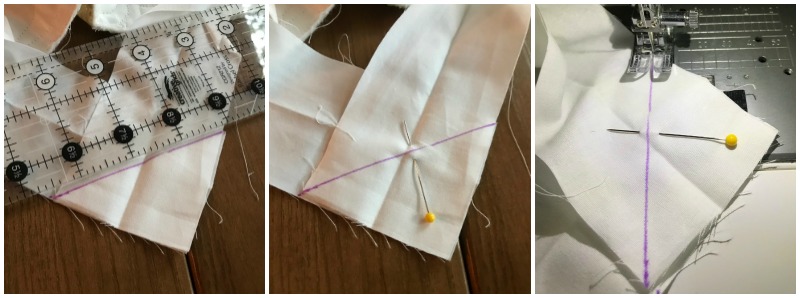
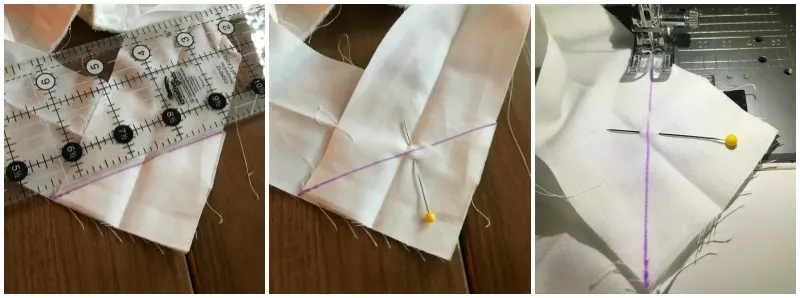
Once it is sewn and before trimming the seam, remove the pin and test it to make sure the ends are joined without being twisted and that it lays flat against the quilt edge. Now trim the seam where you joined the ends to ¼” and finger press open. Fold the binding back over and lay flat against the back of the quilt. Go back to the point where you ended and backstitched and sew the remainder of the binding down securing with backstitching at the beginning and end.
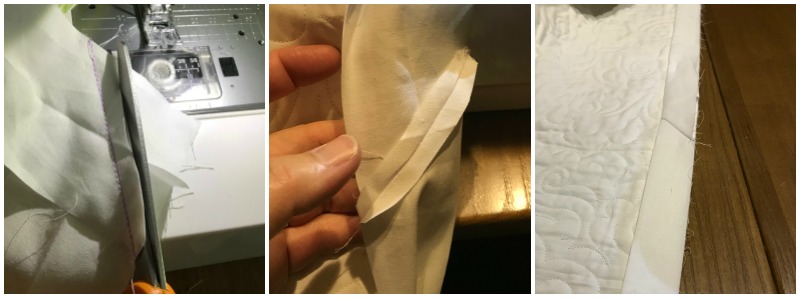

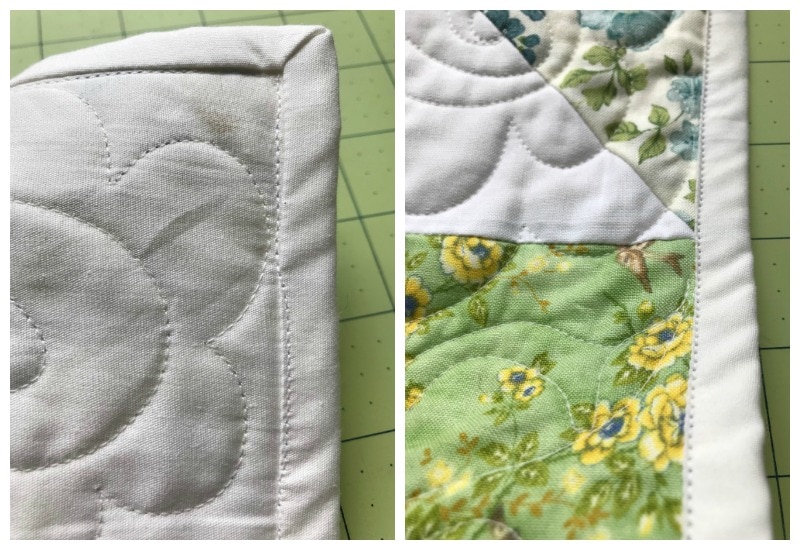
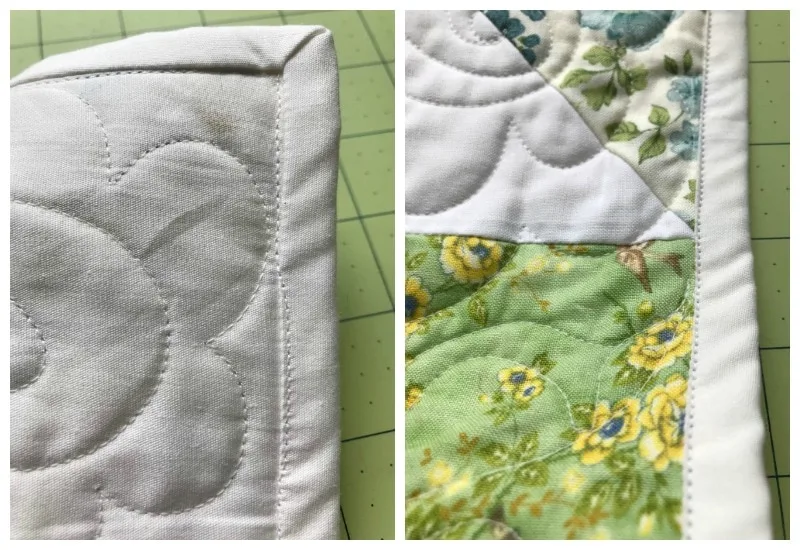
Yes! It’s now Perfectly Attached to the Back!
Yay – The binding is now all attached to the quilt and only have one last step, securing it to the front. Now, if you had sewn the binding to the front of the quilt, all the steps would be the same and you would flip the binding to the back and secure with hand stitching. Since we secured it to the back of the quilt first, we are flipping it now to the front of the quilt and securing it with machine stitching.
Sew to the Front
Flip the binding to the front where the edge of the binding is just a tad, not more than an 1/8th of an inch, beyond the stitching. Line up the center guide of the presser foot with the edge of the binding and put your needle down. The key to this method is having a visual queue to look at along the presser foot that aligns to the needle path and thus the stitching. This visual queue or guide will help to keep the stitching directly on the edge of the quilt and aids so that the stitching doesn’t veer to far left or right. On the picture below, my guide is the arched edge of the inside of the left prong of the presser foot. That arch lines up directly on the edge of the binding and the needle falls right on the edge. Now to keep it there, I do go a bit slower and feed small sections. Then line up the next section of binding, sew it and repeat until I get to the corner.

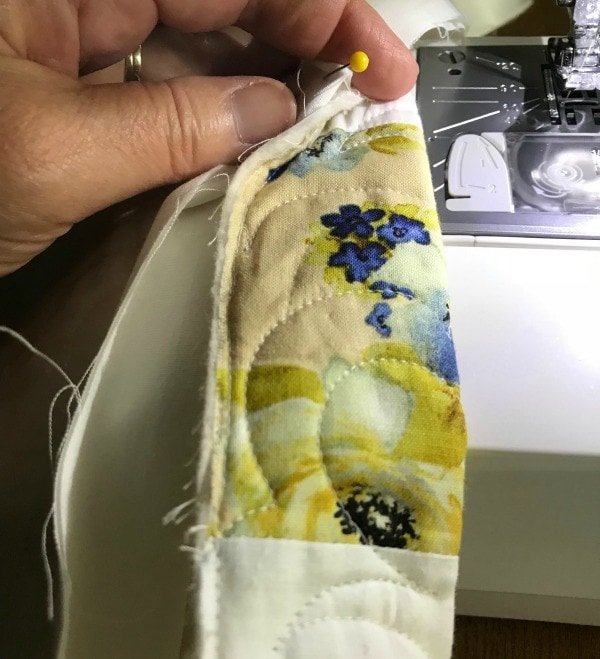
As I approach the corner, I stop about an inch or a bit more and fold the binding into a 45 degree mitered corner and ping where I want the two sections of binding to meet.
Now stitch slowly to the corner and if needed, remove the pin and hand crank the needle for the stitches right at the corner to ensure you catch the edge of the binding for the side you are moving towards. Once you are right at the corner and have stitched the binding for new edge, put your needle down, raise the presser foot and pivot the quilt sandwich and start sewing the new edge of the quilt. Repeat the process until you are all the way around the quilt, backstitching a few stitches at the end.
Here is a pic of the stitching at the corner from the front and the back. You can see on the picture of the back of the quilt is the line of stitching next to the binding from where it is stitched down on the front.
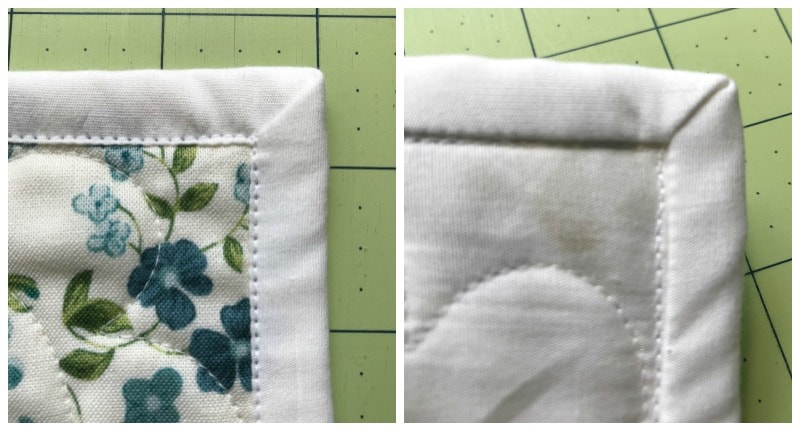
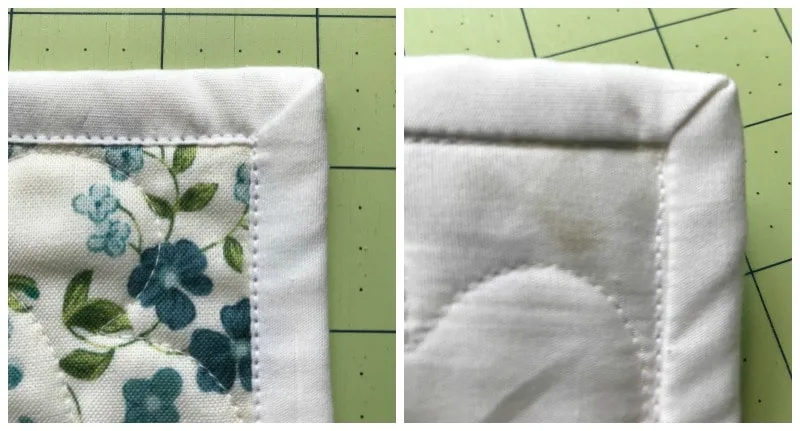
In the following picture you can see that the stitching from the front caught part of the binding on the back. The goal is to stitch next to the binding but when this happens, I do not pick it out since it’s on the back, I think it’s acceptable. However, if you want to pick it out, it’s only a small section and you just need to back tack your stitches where you start and end to secure.
Want the ad free PDF?! Click HERE! Here’s Part 1 of the binding series!
Alex S.
Tuesday 11th of September 2018
Hi. I would like to know if there is a difference between a Juki HZL DX7 and Juki DX 2000QVP. We are looking for a machine for my wife. The 200-300 dollar machines from the stores are not good enough. She passed beginner 101, now she wants to do patterns, multiple stitches, begin quilting, she does mats, coin purses with zippers, crafting stuff, smaller items because of the small brother machine. She wants bigger projects and not go broke buying everything separately. Juki seems to win all reviews. She wants a machine strong enough to do a little of everything, multi-project but a semi-heavy duty. Thanks