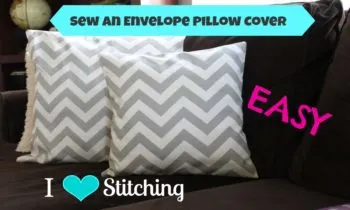
Hi Everyone! Today, I’m excited to share how to sew and envelope pillow cover! This project is perfect for a beginner and doesn’t use a ton of fabric, in fact, this is the tutorial I recommend for all of my beginner sewers.
How to Sew an Envelope Pillow Cover
Fabric Measurements
MEASUREMENTS:
Pillow form 14 x 14
(1) 15×15
(1) 15×10
(1) 15×11
Pillow form 15×15
(1) 16×16
(1) 16×11
(1) 16×12
Pillow form 16×16
(1) 17×17
(1) 17×12
(1)17×13
Pillow form 18×18
(1) 19×19
(1) 19×13
(1) 19×14
12×18 pillow form
(1) 13×19
(1) 9×19
(1) 8×19
27 x 27 pillow
(1) 28 x 28
(1) 28 x 19
(1) 28 x 17
Front Piece = Pillow form size plus 1 inch (For example and 16×16 inch pillow form needs to be 17 x 17 or a 12×18 form needs to be 13×19)
Back Piece and Overlap – There needs to be 6-8 inches added to the measurements for the overlap. For example if you have a pillow form 17 x 17 then take 17+6 = 23 or 17+8 = 25. Divide that number by 2. So the back pieces will each be either 17 x 11.5 or 17 x 12.5. Add an inch for the seam allowance so the back flaps would be 18 x 11.5 or 18 x 12.5.
These numbers are flexible because the overlap is forgiving and each person may have different amounts of fabric.
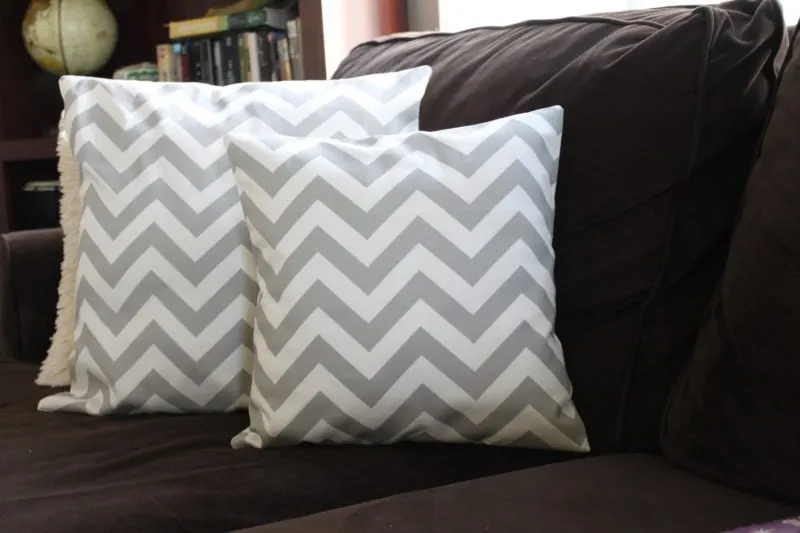
Here you can see the back of the pillow and the “envelope pillow closure.” I hope you enjoyed learning more about how to sew an envelope pillow cover!
Check out the video for all of the instructions! Once you master this pillow, give THIS ONE a try!
Unfortunately I can’t reply to each person’s individual measurement questions. Use this to make your own measurements.
I was on-line looking to purchase new throw pillows and saw a bunch of covers. That led me to your tutorial on how to make an envelope pillow cover. I don’t love sewing but that looks pretty simple. And with small grandchildren, it would be especially nice to be able to remove the cover and wash it. Thanks for the excellent tutorial and I’ll definitely be making a Joann’s run tomorrow. Not only will I save money, I’ll be able to get exactly what I want instead of settling for what’s available. Win-win.
I have a few of your tutorials booked marked and reference them all the time!
Love your happy outlook as well!! Thank you!
Thanks for the easy to follow video and instructions just made to 16×16 covers! I LOVE your blog I just found it and can’t wait to see and crochet other things.
I found the measurements, Thank you!
Thank you, Melanie, for your helpful video with clear instructions! It took a bit longer than you predicted but I spent most of the extra time measuring and remeasuring before cutting the pieces from scraps left over from curtains made by a professional designer. I had just enough fabric for a 14″ cover. For the next one, I imagine that at least a yard of fabric would be practical especially for fabric with a distinctive pattern such as the chevron design you made.
Maybe I’ll do some more sewing now!
Haven’t sewn in 25 years!! Saw your directions and decided to try it. First I had to get out my mother’s old sewing machine which hadn’t been used in 20+ years and hope it would work. It did!! Took awhile to remember how to thread needle, bobbin, etc but I got going. Pillows were very easy and I am very happy. Unfortunately, I ended up doing one all over because I wasn’t thinking and put a right side to wrong side and didn’t discover it until I finished.
One question: I did sew a second seam close to the first as the top material was one of those with a loose enough weave that you can easily pull threads and get a fringe. (Bottom was a cotton calico.) But, is there a better way to protect against this?
Thanks for your video and clear directions.
Buy a little bottle of Fray.Check at any fabric store or Walmart. It’s a liquid and if you run a small amount along fraying edges it will stop the fraying as soon as it dries….. just a few minutes.
Great tutorial! I am teaching my granddaughter to sew. She is 8 years old and this is our first project together. She is so excited! Love it! Thank you!
I love your ideas and instructions. It’s great to get new ideas. Thanks
I made a total of 12 I started off with the first six and three of them went to my grandmother for a Christmas gift and kept asking where I bought them each one turns out just perfect
Thank you, looks easy and I can’t wait to make new pillow covers. Your directions were great!
Thanks for the tutorial! I just bought my first machine and this was my first project. They turned out awesome and gave my bedroom and living room a nice update!
Love the simplicity of this project. Following the instructions here I made a cushion cover this morning in a bright attractive fabric to replace an ugly cover I inherited from my mother in law! My fold away couch now looks a lot more decorated. Many thanks for clear instructions.
I am attempting this project at the moment… looks great, thanks! I have one question though; would the envelope opening not sit better on a rectangular pillow on the height rather than the width? Thanks!!
I am attempting to do the rectangular envelope pillow using your formula for the 12×18 form, however I am not getting the same measurements that you got. I am attempting to make a cover for a 12×16 form. Please help!!!!!
How the heck do you cut out the material without a pattern?
You measure it.
I want to do an 18×18 pillow and I am just wondering how much fabric I would need to purchase to make one or two and 3 pillows. Trying to price out this project and I am very new to sewing.
I just made this for s 12 x 12 pillow form….so easy!! I put a flower applique on it as a surprise for my granddaughter. Thank you for this tutorial Melanie!! 🙂
Can you explain where the measurements are?
They are written right in the post, did you find them?
What would the measurements be for an 11×11?
It would be helpful if you did a version of this considering that some might like to use a serger for the seams.
This is the best video tutorial for making pillow covers. The pillow covers I made for my grandmother she thought I bought. So thanks for the great video
Where can I find the information on measurements to allow for the 2 pieces that make the back sure of the envelope pillow?
Hello, I am getting ready to make some pillows/cushions for a friend that just bought a boat and I just happen to see your video on envelope pillow covers. The only thing I didn’t get is the measurements for the two back pieces. The cushions are
20X20 so I will cut the big piece 21X21 for seam allowance. So what size do I cut the back sides for the fold over and seam allowances? It should not take me long to finish them as being I have all fabric and pillows on hand now.
thank you!
Amalie Chambers
I would go by her measurements given for the back envelope sizes for the 18 X 18 size and increase the last two measurements up an 1 additional inch more up for the cuts. This is what I see she does with the pillow measurements given when going up the next larger size for 14 to 16 and 16 to 18. Hope this this helps!
Good morning! Where are the measurements?
I can’t find the measurements! Ugh.
Hi- AWESOME Video!!! loved it. I’m working on Christmas presents and one thing I want to do for a teacher/co-worker is give her a pillow and make a few seasonal envelope covers she can switch out. I was wondering if I’m not looking in the right spot..but you said you were posting the measurements below….I don’t see them. Did you take them down already? 🙂 Thanks so much for sharing your knowledge…it’s so helpful!
Do you have written instructions? I would prefer the written form for me to follow for the Envelope Pillow Cover for Beginneres and I am also looking to make my own pillow cases for beginners as well.
smokey_diane@shaw.ca
Hi Melanie, I love your pillow making post so much (and your YouTube tutorial that led me here) that I linked to your blog as a part of my how to make envelope style porch furniture cushion covers. I’m about to subscribe to your blog just so I can come back and really take a good look around your site. You are a very accomplished woman! 🙂
–Karen
why oh why haven’t I made a pillow yet-ha! The video was really clear and precise Mel!