

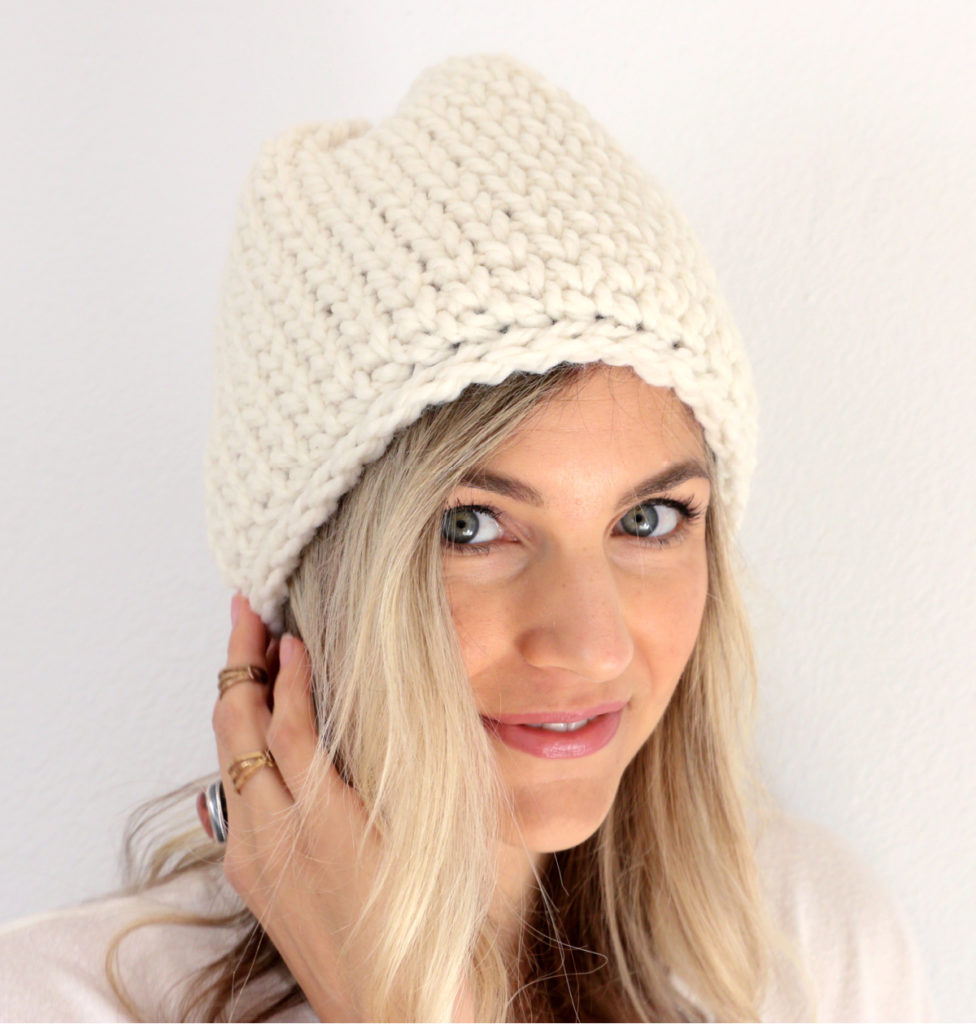
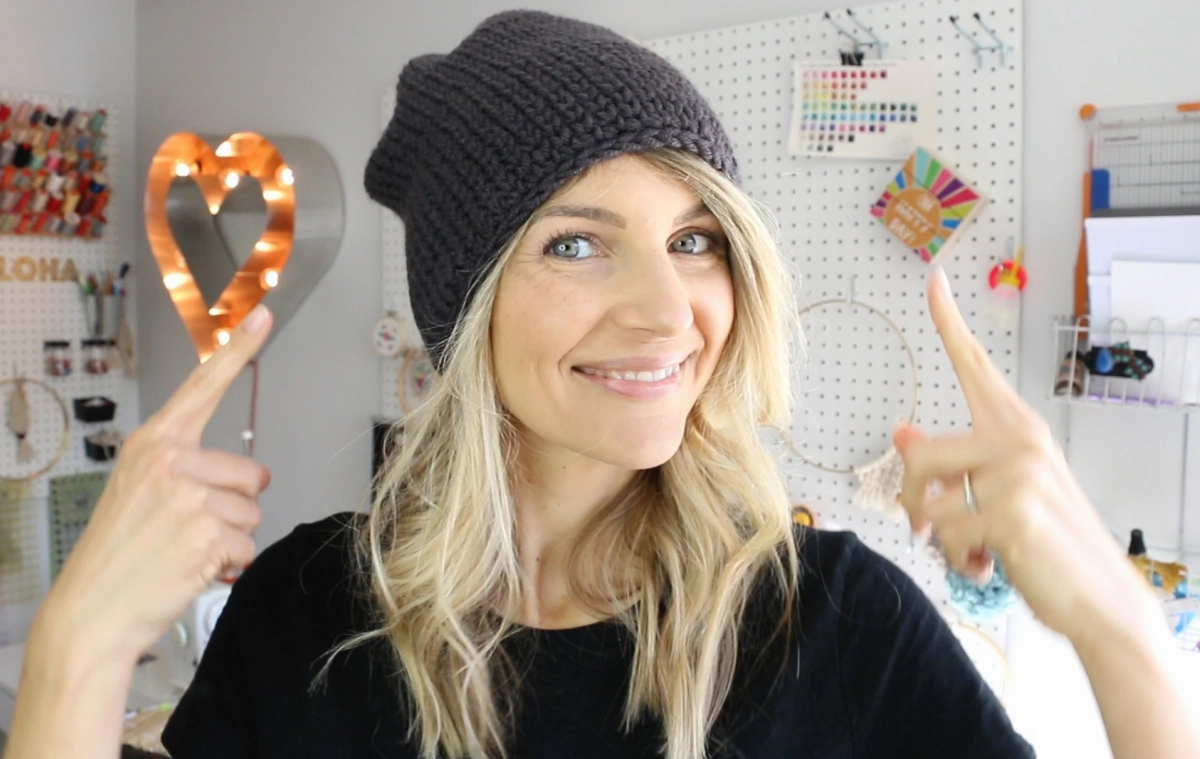
I’ve had this idea in my head for a year and now it’s here! Introducing the waistcoat crochet hat tutorial! I saw a hat similar to this at Target last winter and it was one of those moments where I thought, I can make that. I love that this stitch looks like knitting, but it’s actually crochet. One of these days I’ll teach myself how to knit ;).

Waistcoat Crochet Hat
This crochet hat features the waistcoat crochet stitch. This stitch is really simple and great for beginners, but there are a few things to watch out for as you make this hat or utilize this crochet stitch.


What type of yarn to pick?
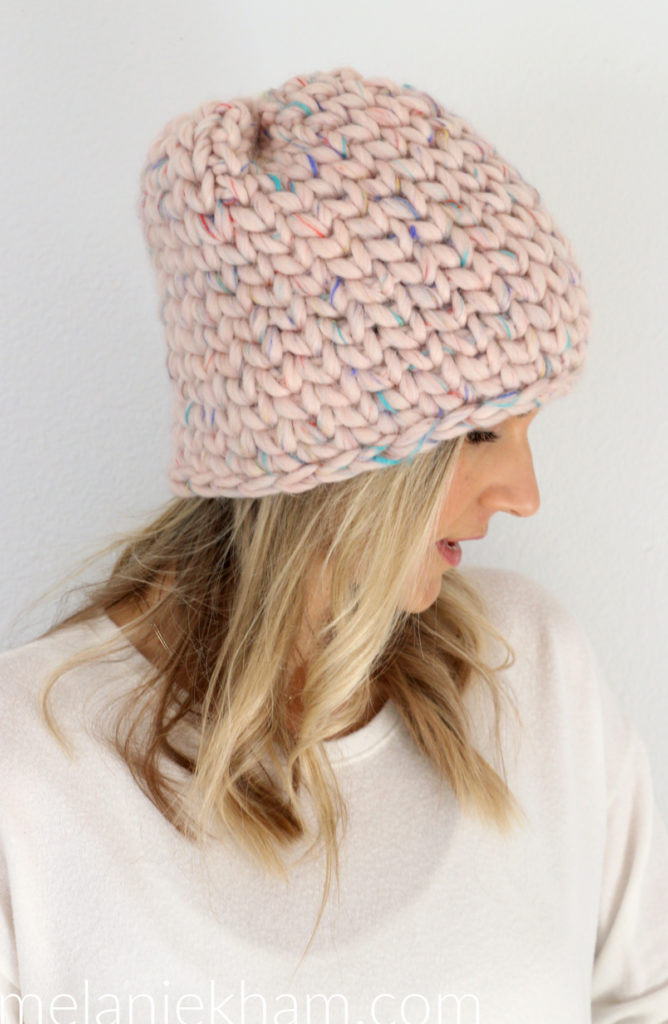
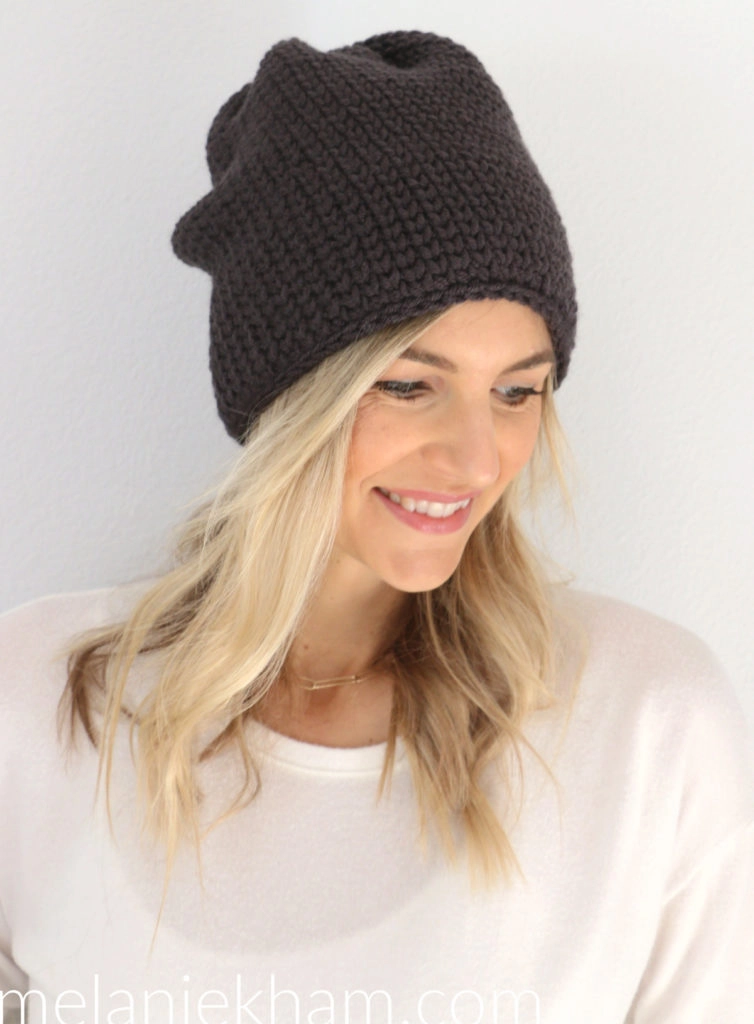
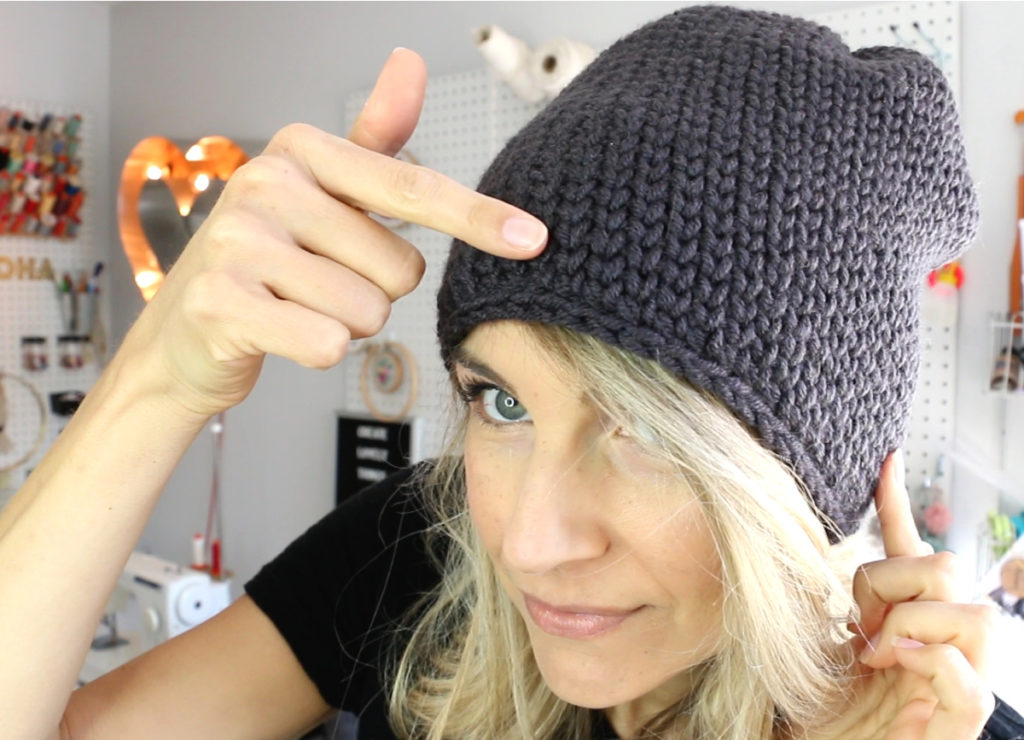
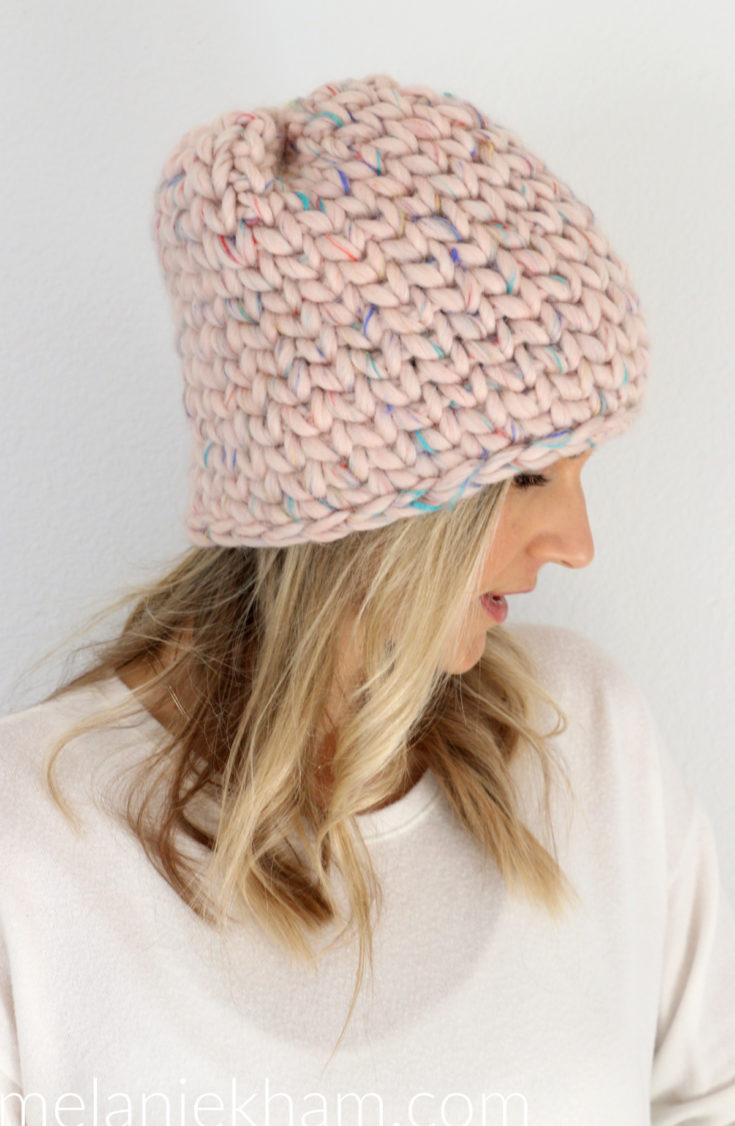
I have created 3 hats as samples for you to see how different yarns work up. My favorite is the pink hat which is the Buttercream Cozy Yarn in the color pink multi. The grey version is a thinner yarn, at a size 5 so you can see how they look with different yarn choices. The thicker the yarn, the faster it will work up. The white hat that I make in the video is also a size 6, it’s the Big Twist natural blend in the color winter white.

Melanie’s Other Crochet Hat Patterns
Chunky Shell Crochet Hat
Slightly Slouchy Crochet Hat
Crochet Granny Cluster Beanie
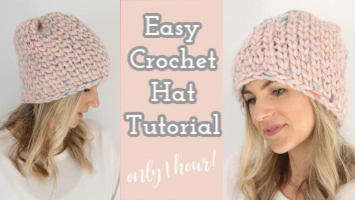
Waistcoat Crochet Hat Tutorial

Learn how to make this waistcoat crochet hat! This beginner friendly crochet hat pattern features the waistcoat stitch that looks like knitting, but it's crochet. This hat is easy and fast!
Materials
- 1-2 balls of size 5 or 6 yarn (see notes section for more)
Tools
- Crochet Hook (Needs to be AT LEAST 2 hook sizes larger than the package recommends)
Instructions
- Start with a slip knot.
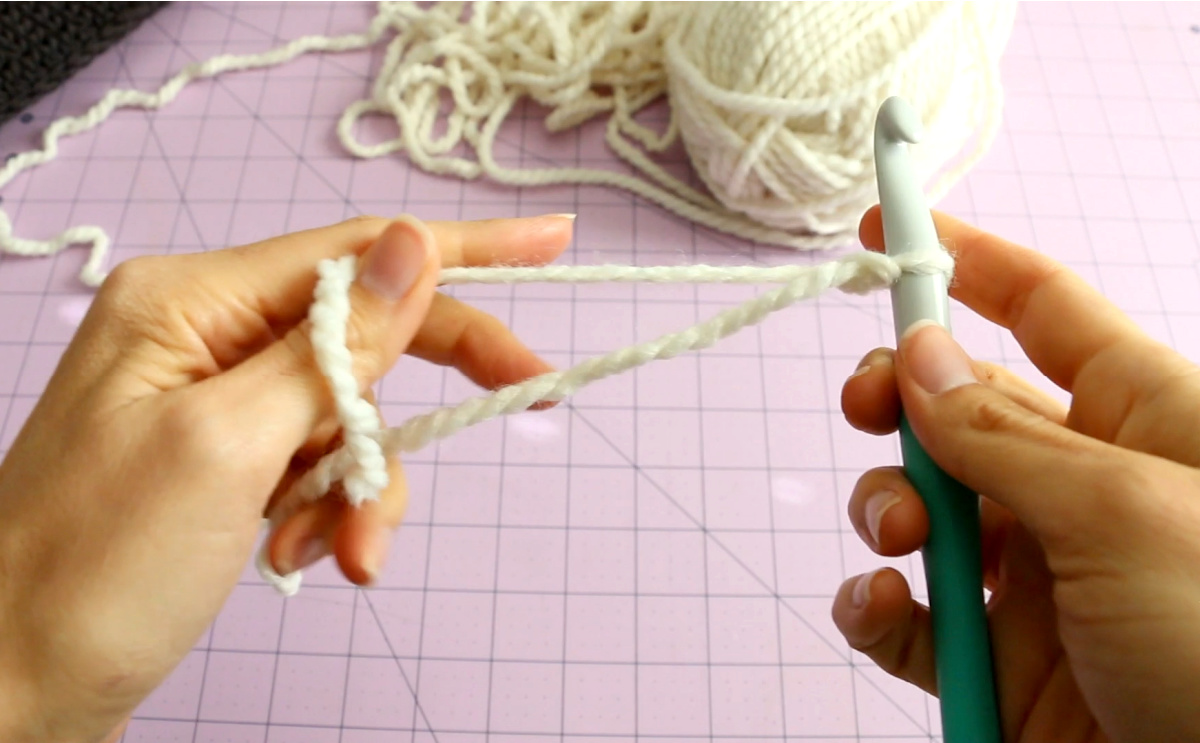

- Chain as many as necessary to fit loosely around your head. For women, that is usually 20-21 inches. Error on the larger side, there is nothing worse than a hat that fits too tight. It's ok if it fits loose.
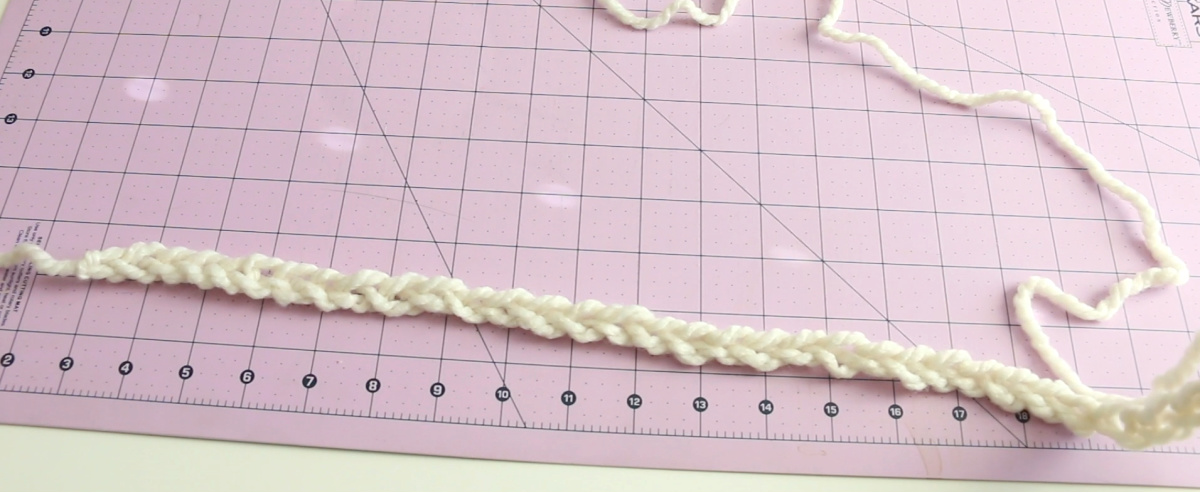

- Lay the foundation chain out flat so that you know there are no twists. Insert your hook into the front of the first chain, yarn over and pull through to create a circle.

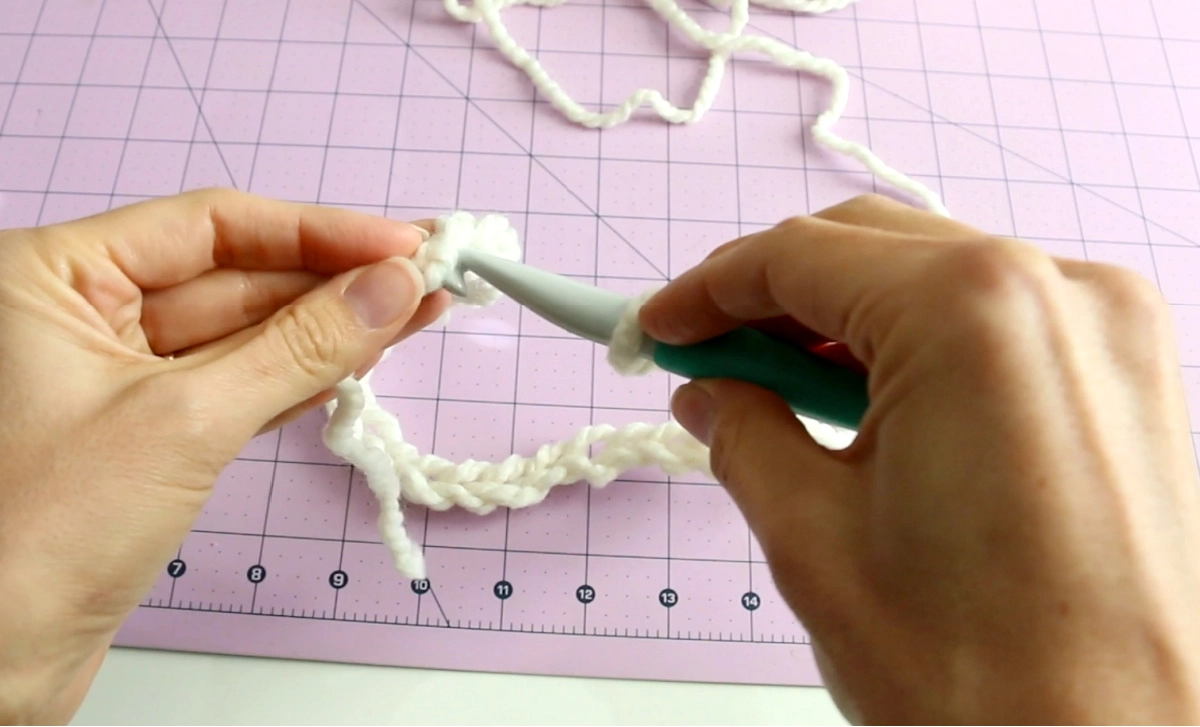
- Chain 1 and place 1 single crochet (sc) stitch in each chain all the way around.
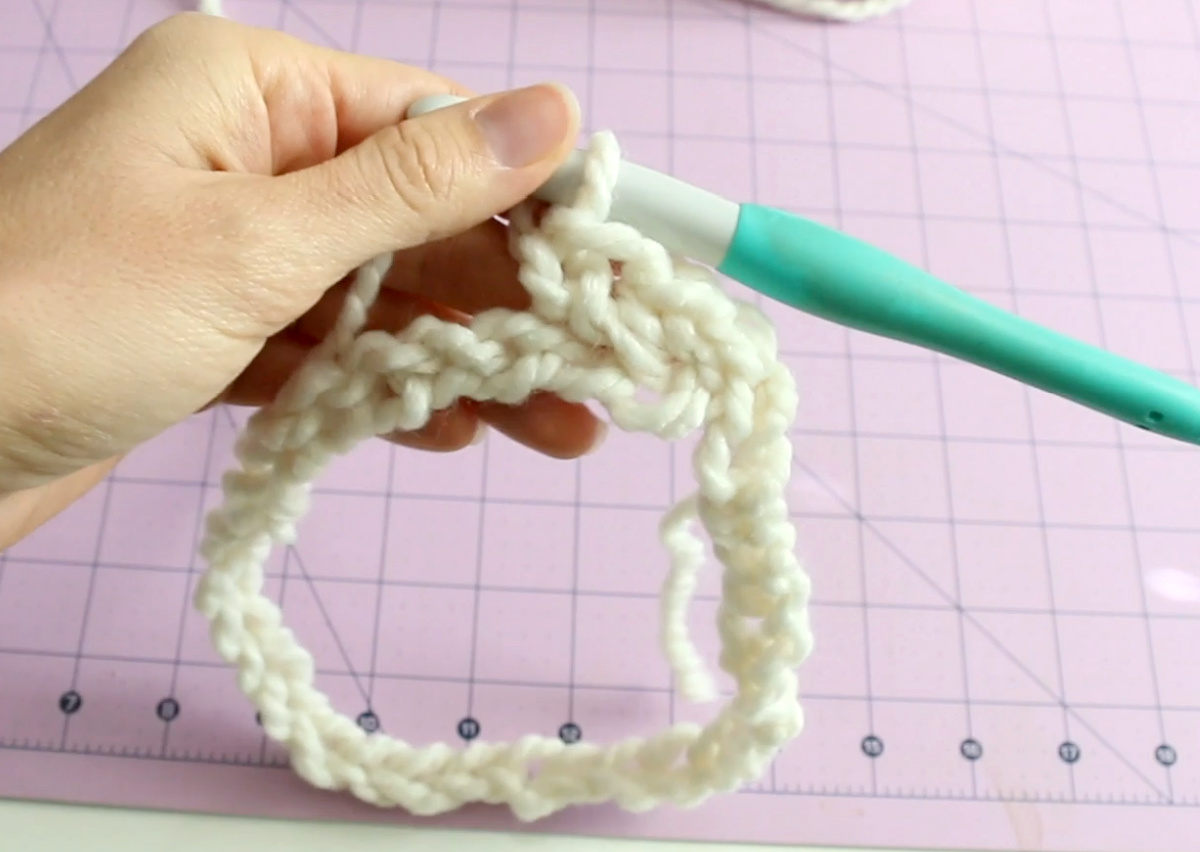

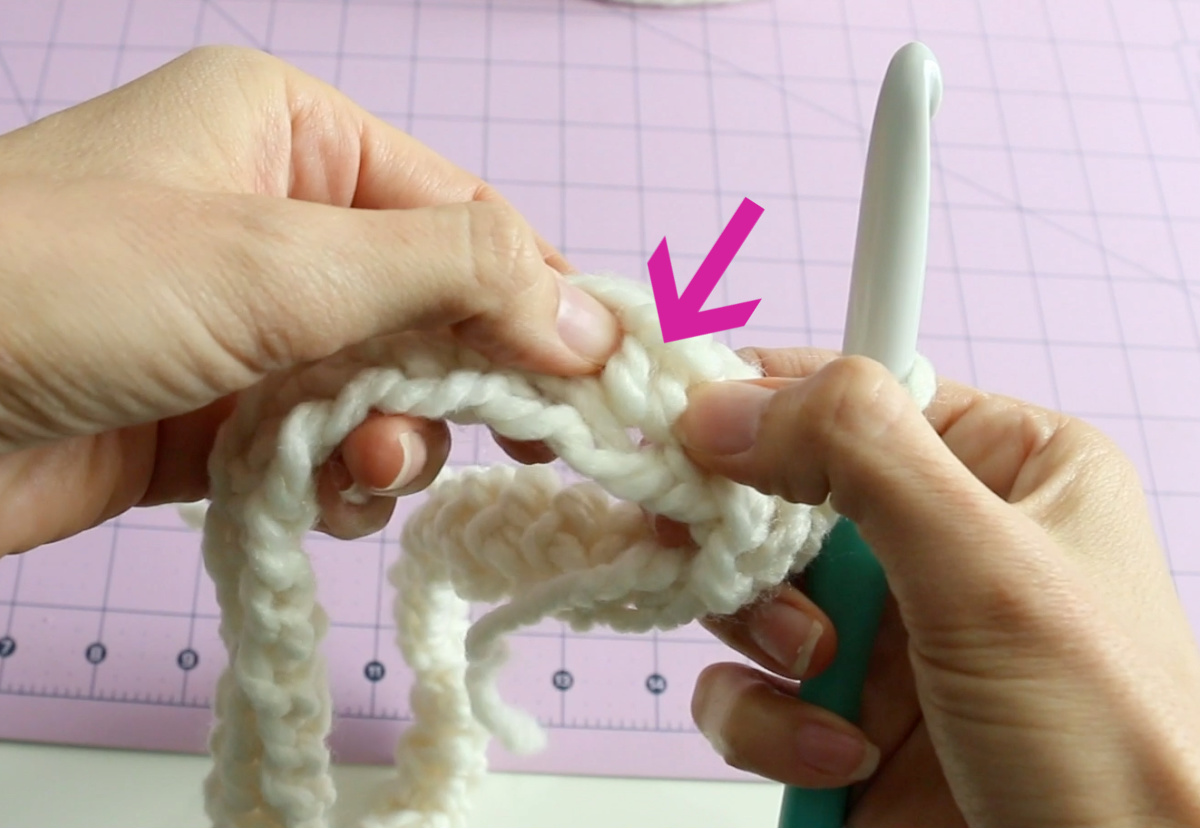
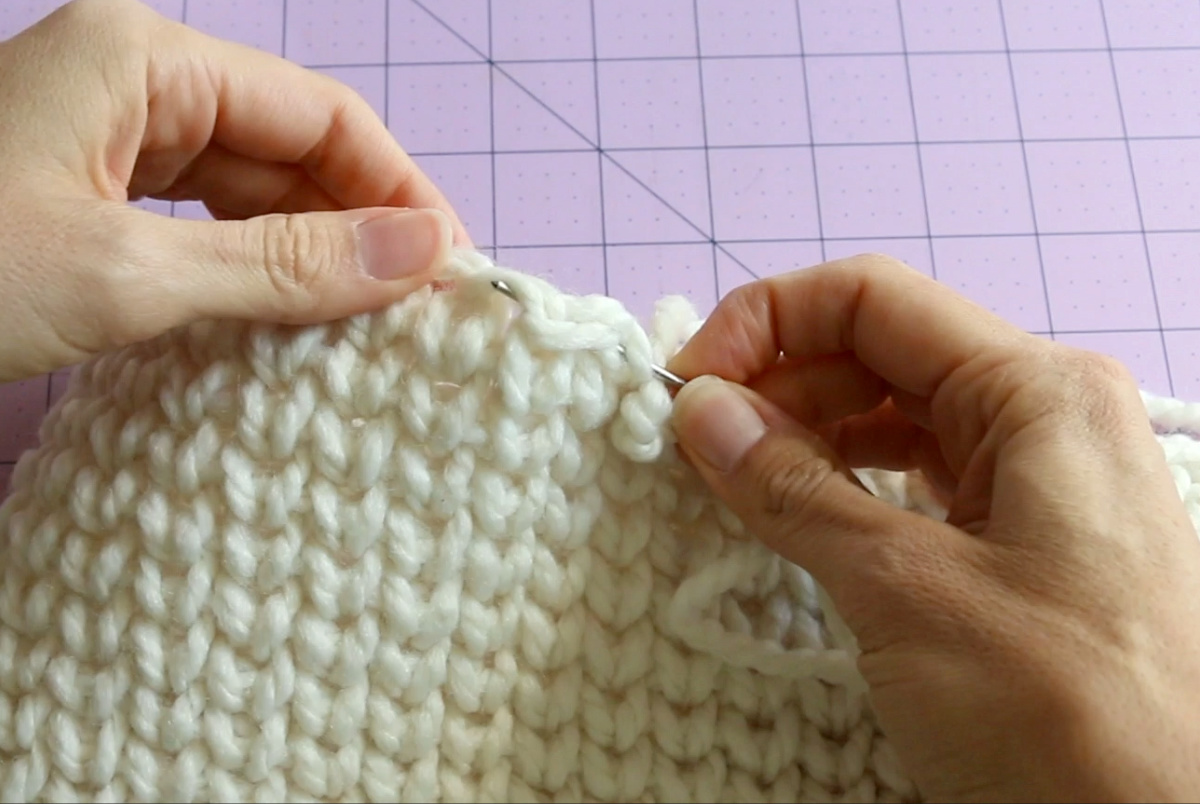
- Once you get back around to the beginning, instead of stitching in the top of the previous sc stitch, you will insert your hook right in the center of that sc stitch, yarn over, pull through, yarn over and pull through both loops on the hook. That is the waistcoat stitch.

- Repeat this in each stitch going around your hat until the hat measure 8-9 inches tall. The grey version was longer to make a slouchier fit.

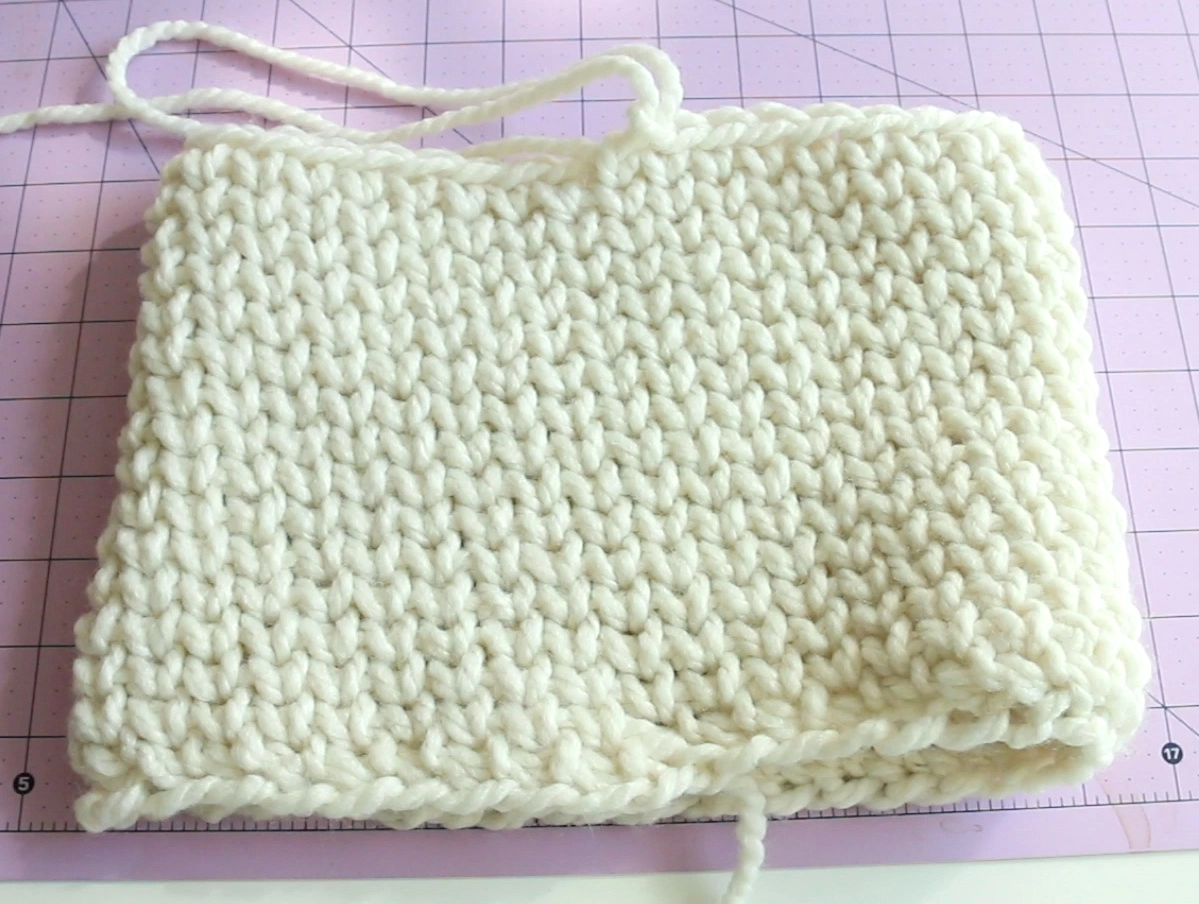
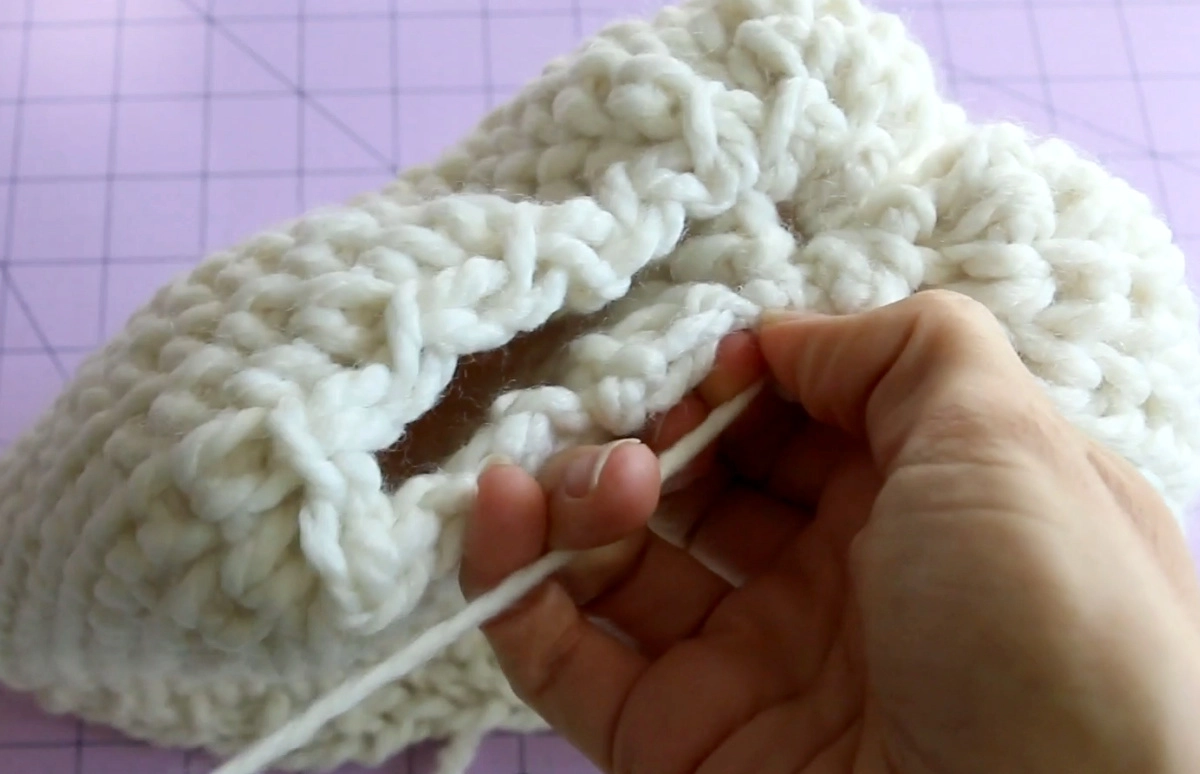
- Once your hat is the desired size, fasten off and leave a 8-10 inch tail. Using your yarn needle, weave the strand in and out of the top row of stitch, pull to cinch up the top and close the opening from the inside of the hat. weave in the tail to secure and trim.

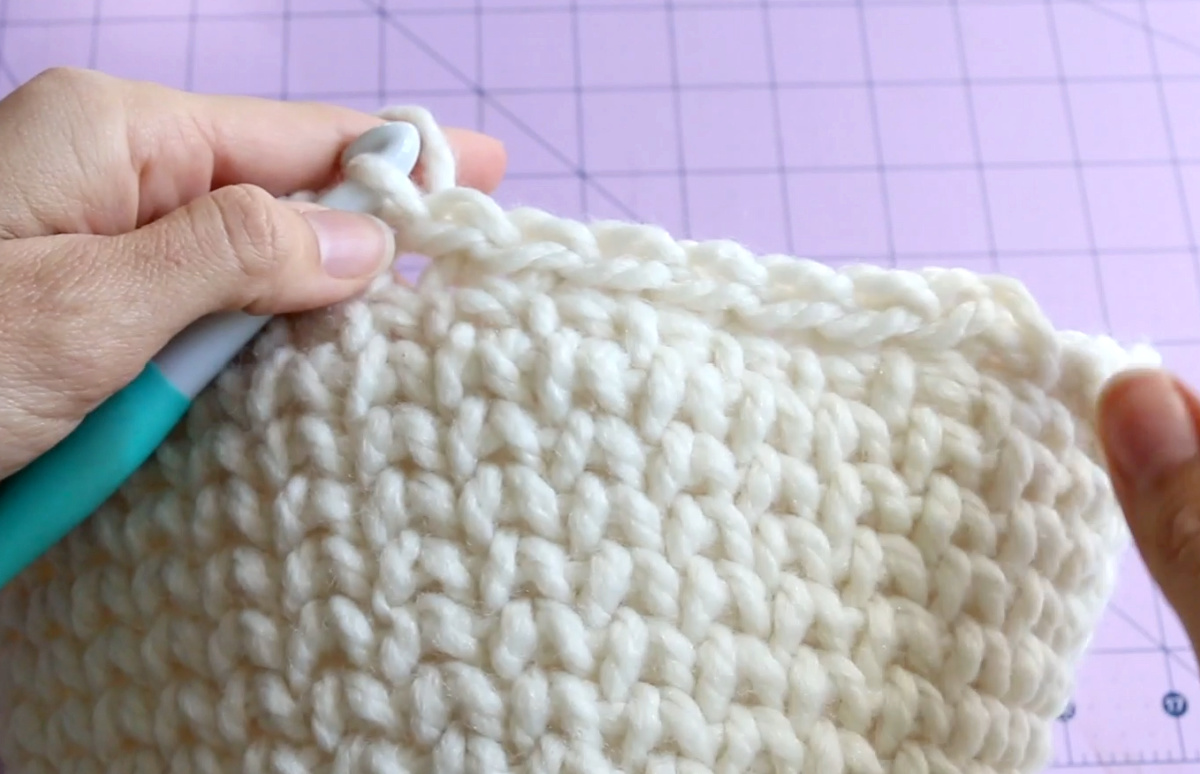
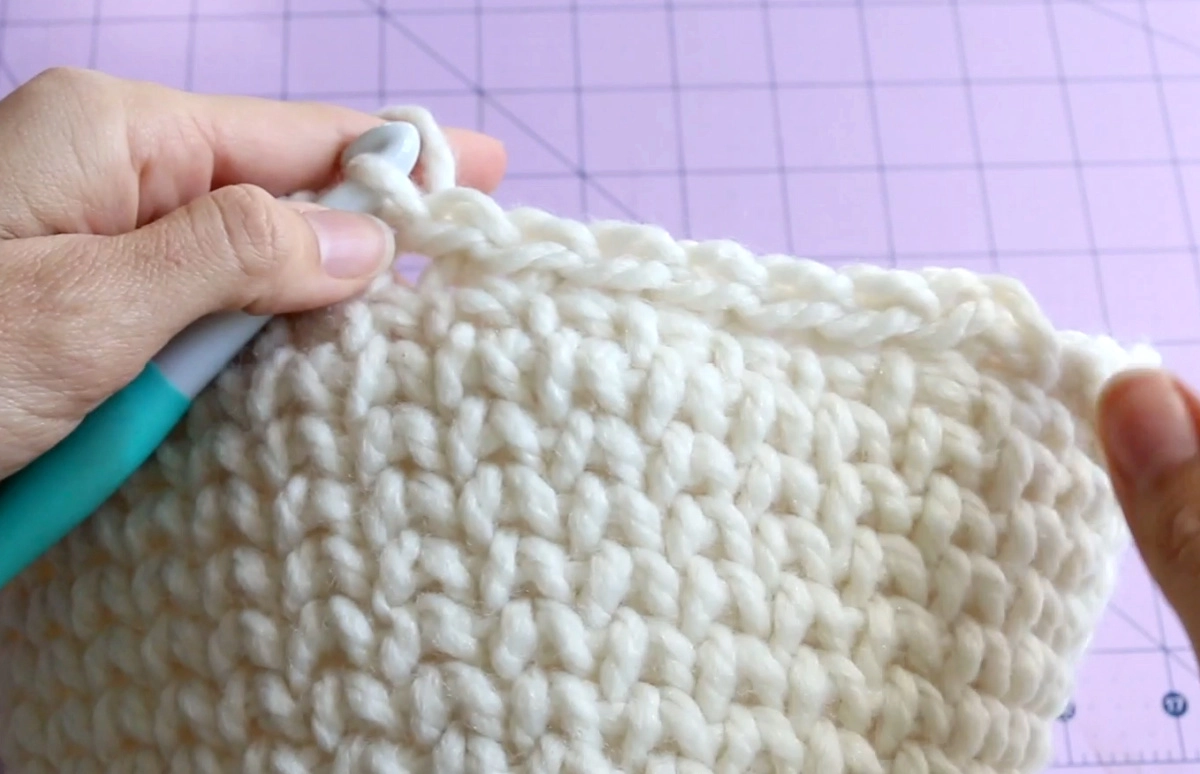
- Take the remaining yarn and attach to the hat edge. We will be making a slip stitch border. Pull up a loop, insert your hook in the next stitch, yarn over and pull through, then pull through the loop on the hook. Do this all the way around to make a slip stitch border. Fasten off and weave in tails.
Notes
If you would like to make a yarn pom pom to go on the top, you need 2 balls for sure.
If you are on the fence on how much yarn, buy 2 balls - you can always make a 2nd for a friend!

Recommended Products
As an Amazon Associate and member of other affiliate programs, I earn from qualifying purchases.


kathy
Tuesday 8th of December 2020
I made this hat and I love it! I did make a ribbing rather then the slip stitch boarder and used double strand 4 ply. But Thank -you ! I will be doing a few of these for our local shelter cuz they are wonderfully warm.
Jan Correa
Friday 27th of November 2020
Thank you for continuing to share with us your talents and instruction. Sending you warm hugs and aloha from Hawaii. Praying for a speedy recovery, and for comfort and healing for you and your family.
Amy
Tuesday 24th of November 2020
So excited to follow this tutorial and make this hat today! What fun! Thank you for sharing your talents, Melanie!
Carolyn Sachs
Sunday 22nd of November 2020
Melanie:
I crochet in rectangles and squares, have never really made anything that wasn't a blanket or a scarf. Looking forward to hopefully trying out this very cute hat. Just so you know.... praying for you here in Virginia for health and healing! You look beautiful in every single hat!!
Caren Leifried
Friday 20th of November 2020
Hey Melanie! Any chance you could link the grey yarn that you used? I’m going skiiing next month and I want to make one for me and my daughter!! Continually praying for you! Thank you! ❤️