

Happy Friday Everyone!
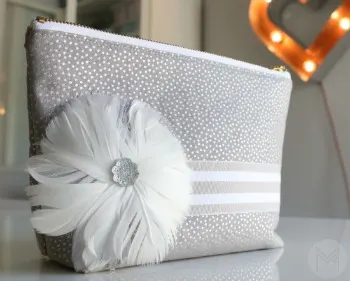
I have a new tutorial for you today! I made this stand-up zip pouch as part of a DIY Wedding Collaboration with some other Kin Community YouTube Channels. This is a great pattern to use and embellish for a wedding AND you can make the bag in different fabrics for future gifts, it’s a great go-to zip pouch and very easy to make.

As part of the DIY Wedding collaboration, I filled mine with wedding day essentials. A great bridesmaid gift, mother of the bride gift, etc. You can choose different types of embellishments to compliment wedding colors or the recipients personality!

Materials
Scissors
Rotary Cutter and Mat
Water soluble pen
Small ruler
Outer Fabric
Lining Fabric
Fusible Fleece
9 inch zipper
Clover Wonder clips and/or pins
Embellishments of choice
Coordinating thread

Instructions
-Cut 2 pieces each of the outer and lining fabric and fusible fleece to 10.5 wide x 8 inches long
-Take the small ruler and create 2 1.5 inch squares with the water soluble pen along the bottom edge (the 10.5 inch bottom edge) of all pieces of fabric.
-Use scissors to cut the squares out on all pieces of fabric
-Attach ribbon embellishment as desired… mine was 3 1/4 inches down from the top. Cut the ribbon about 1/2 wider than the width of the fabric to allow for wiggle room. Pin in place and sew as close to the edge of the ribbon as possible. Walking foot is helpful here.
-Iron on the fusible fleece to the outer fabric. Glue side of the fusible fleece to the WRONG side of the outer fabric.
-Place the zipper teeth side down onto the TOP of the outer fabric (the right side). Then place the lining fabric right side down (right sides of outer fabric and lining fabric should face each other) and pin or clip into place.
– Using a zipper foot or narrow foot, attach the zipper. Begin under the zipper pull, back stitch and continue to the end. Move the zipper pull down and complete the top part of the zipper until where you began.
– Take the other pieces of outer fabric and set on the table right side facing up. The the zipper and place teeth side down along the top edge. Place the lining fabric right side down and clip or pin in place. Attach the zipper in the same manner as before moving the zipper pull as needed.
– Take the pouch to the ironing board and press. Make sure the underside is pressed as well.
– Top stitch about 1/8 of an inch away from the zipper on both sides with a coordinating thread. A walking foot is helpful for this step.
– Lay bag out flat with zipper facing up. Unzip the zipper more than halfway.
– Take the outside pieces and place right sides together and place the right sides together on the lining as well, creating a rectangle shape. Pin in place all the way around making sure that the zipper teeth and tape are going toward the LINING of the bag.
– Backstitch and begin sewing along the side of the lining toward the zipper with a 5/8 seam allowance. (You will need to leave about a 3 inch hold in that side of the lining to allow for turning later). When sewing along the zipper, be sure not to sew on top of any metal teeth so that you don’t break a needle.
– Sew around the entire bag backstitching slightly a the little square openings.
– Once you get back around to the side of the lining that has the hole, backstitch leaving a 3 inch opening.
– Now it’s time to box out the bottom. Place the side seam and bottom seam together and in opposite directions and pin in place. Do this on the bottom lining pieces and outer pieces. Use a 1/4 inch seam allowance and sew into place backstitching well.
– Flip bag right side out and using your finger pop out the boxed corners and make sure the zipper is popped out too.
– Backstitch and close up that 3 inch opening
– Place the lining inside the bag and zip it up making sure everything works properly
– Iron any wrinkles out
– Attach any other embellishments as desired. You can use hot glue, fabric glue or whatever adhesive would work for your specific embellishment.


What do you think of this project? Let me know what you think!
You can also click HERE to see all of my other zip pouch tutorials 😉
Here is the video!
Patterson
Wednesday 9th of December 2015
What does it look like inside – how do you cover the seams with tape? Do you go all around in one piece or do you do each bit separately?
Lisa
Sunday 16th of August 2015
Thank you so much for all your great tutorials. I have started sewing again because of them! You are a great inspiration! Is it possible to ask for a tutorial? How 'bout a tote with a zipperpocket inside? Best from Lisa from Norway
Vanessa
Wednesday 5th of August 2015
On my way to the store to buy what I need to make this pouch!!! Can't wait!!
Sandy Bird
Sunday 19th of July 2015
Thank you so much for the tutorial for the stand up pouch. You really made it easy to follow. I made mine while watching you make yours. Of course I had to stop and pause several times times. I've never made anything like it before. Thanks so much
Monica
Tuesday 14th of July 2015
Great tutorial!