

I love making simple tutorials for you to make your own, and this is a great one for that! Learn how to sew a simple apron! This would be a great gift, hostess gift or use special holiday fabrics for yourself! I designed this apron to be simple, functional and use only 1 yard of fabric.

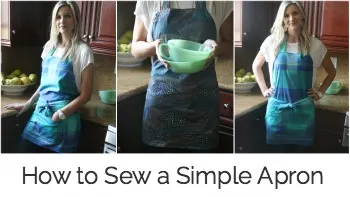
How to Sew a Simple Apron – Only 1 yard of fabric!
Materials/Supplies:
1 yard of fabric 42/44 inches wide. (I am using this plaid from Anna Maria Horner’s Loominous line, I’m obsessed!)
Coordinating thread
Point turner or chopstick
Typical sewing room supplies like scissors, pins, rotary cutter/mat, iron and ironing board and sewing machine of course!

This was the sample I made to figure out the measurements and instructions. The fabric is from the Hello Bear collection designed by Bonnie Christine.
Click HERE for the “How to Sew a Simple Apron” PDF Instructions!
Instructions
*I did not prewash my fabric, but you totally can (and probably should). I recommend washing it on the gentle or hand wash cycle and tumble dry low or air dry to keep as much of the fabric in tact as possible. You can also zig zag your sizes to that it won’t fray too much. Just be aware that if you don’t prewash, your apron might shrink a little in the wash – wash on cold and tumble dry low.
Begin with your 1 yard of fabric. Lay your fabric out with the selvedge on the left and right. Fold the selvedge over 13.5 inches and cut. Make sure you have 15 inches remaining on your fabric cut for the strap and ties and set that aside.
Trip off selvedge edges.
This is the main body of the apron. Cut 8 inches off the bottom for the pocket. Set the pocket aside.
Take the main body of the fabric and fold in half lengthwise. Lay on your mat with the fold to your right. Place a pin on the top edge 5 inches from the fold. Place another pin 13 inches from the top of the apron body on the side (not the fold side). Align your ruler matching up the pinned points and cut to create the angled line for the sides of the apron.
Get the remaining piece of you fabric to cut the straps. You need 4 strips cut 3 inches wide for the ties and 2 strips cut 2.5 inches wide for the neck strap. There will not be much fabric remaining so do your best not to make a cutting mistake.
Trim 3 inch side ties so they are all the same length (should be about 36 inches).
Trim both 2.5 inch neck straps to 24 inches.
Sew the ties and strap. Place the neck strap pieces right sides together and sew around using a 1/4 inch seam allowance. Back stitch at beginning and end and leave a several inch opening for turning right side out. Do the same thing for the side ties.
Trip the corners and turn right side out on neck strap and 2 side ties. Use a point turner or chopstick to pop out corners. Press.
Take straps back to sewing machine and stitch all the way around using a 1/8 inch seam allowance. Set aside for now.
Make the Pocket.
Place the pocket right sides together and sew using a 1/4 inch seam allowance, leaving several inch opening for turning right side out. Trim corners and turn right side out. Press. Place 2 stitches 1/8 of an inch apart along the top of the pocket and set aside.
Hem the apron body.
Take the apron body and starting with the top edge, fold over 1/4 inch and press and then fold over another 1/4 and press again. Pin in place. Start with the top, then move to the sides and the bottom last. You can make your bottom edge a little larger hem if you like.
Now line up only 1 side of the neck strap with the edge of the neckline and pin. Leave the other side free so that you can decide the length and make small adjustments.
Pin the side ties in the same manner.
Sew all the way around the apron body back stitching at the beginning and end.
Try on the apron and pin the neck strap at the appropriate place for your body. Also, while you are trying it on, decide where you want the pocket and pin that in place as well.
Before you stitch the pocket down, make sure it is centered and straight.
Sew the free end of the neck strap in place back stitching and beginning and end.
Sew along the side, bottom and other side of the pocket to secure it in place backstitching at beginning and end.
Stitch an additional reinforcing stitch along all ties backstitching well. Place an additional top stitch along the bottom hem if desired.
Trim threads.
DONE! See, you can sew a simple apron – it’s not too bad!
I also have a great half apron tutorial as part of my Learn to Sew Series!

What kind of fabric do you envision for YOUR apron??

Mandy
Wednesday 23rd of December 2015
I made this with some cute Cocacola fabric for a Christmas gift- it turned out great! Very easy pattern. I also added 2 buttons and a buttonhole to make the neck-strap adjustable. A nice 1-meter project; it took me about 3 hours total.
One problem I had, though, was that I had a 16 inch- width cut, which was not large enough to make 4 (3-inch) straps plus 2 (2.5-inch straps). Not sure how you are supposed to be able to cut those pieces from the 15-inch wide piece the pattern calls for. I just cut the neck pieces slightly narrower, which looks absolutely fine.
melanie
Monday 23rd of November 2015
I can't wait to make a few of these for gifts! Thanks for the tutorial. I plan on using lightweight denim from Joann's to make these!
Dian
Friday 30th of October 2015
Love aprons - especially the simple ones. I even have the same green bowls that you are holding!
Jane
Friday 30th of October 2015
I'm a plus size do I need to buy more than 1 yard of fabric?