
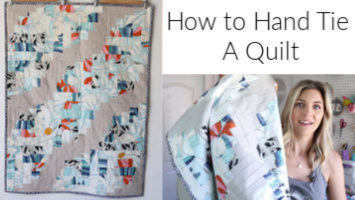

Hi Everyone! Today I have a quilt technique video for you, how to hand tie a quilt! Now, I don’t know about you but I remember growing up with handmade quilts and blankets from my great grandmother. A few of them had those adorable yarn ties throughout.
This method is a way to quilt your quilt without machine or longarm quilting and a faster way of doing it by hand. I think straight line stitch in the ditch quilting would be faster, but this option provides a totally different result so I want to teach it to you. I’ve been wanting to share how to hand tie a quilt technique for awhile.

More Quilt Tutorials?
Are you looking for some additional quilting techniques, tutorials and resources? Here are some great ones!
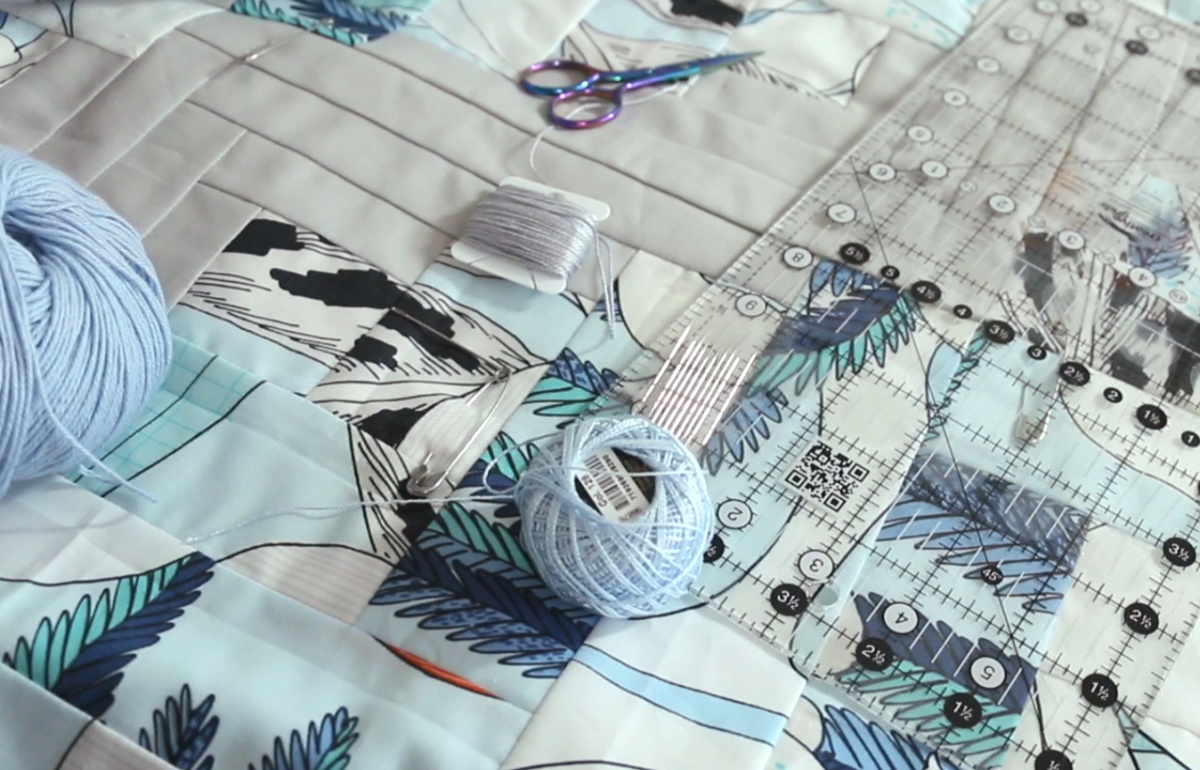
I will be using Pearl cotton 5 for this, but Pearl cotton 8 works as well. I tried this with yarn, which you can totally do. However, I found it to be hard on my hands. I figured that for most of you, doing that throughout an entire quilt could be difficult so I opted for the Pearl instead.
How to Hand Tie a Quilt

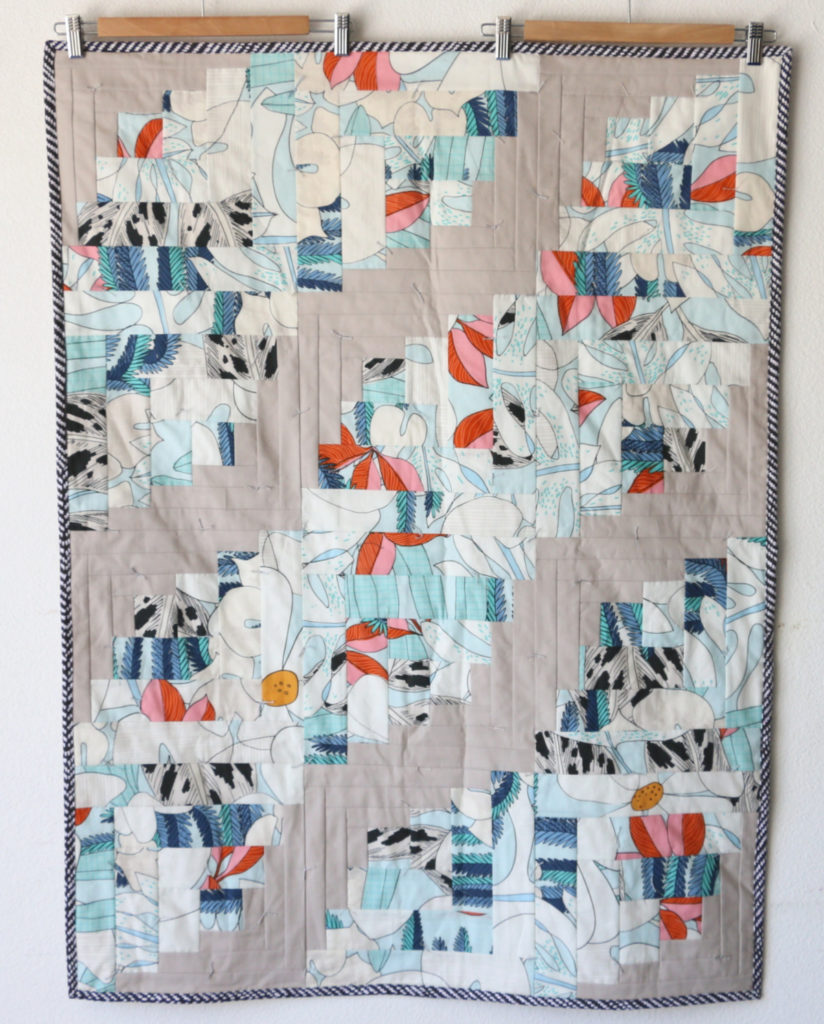
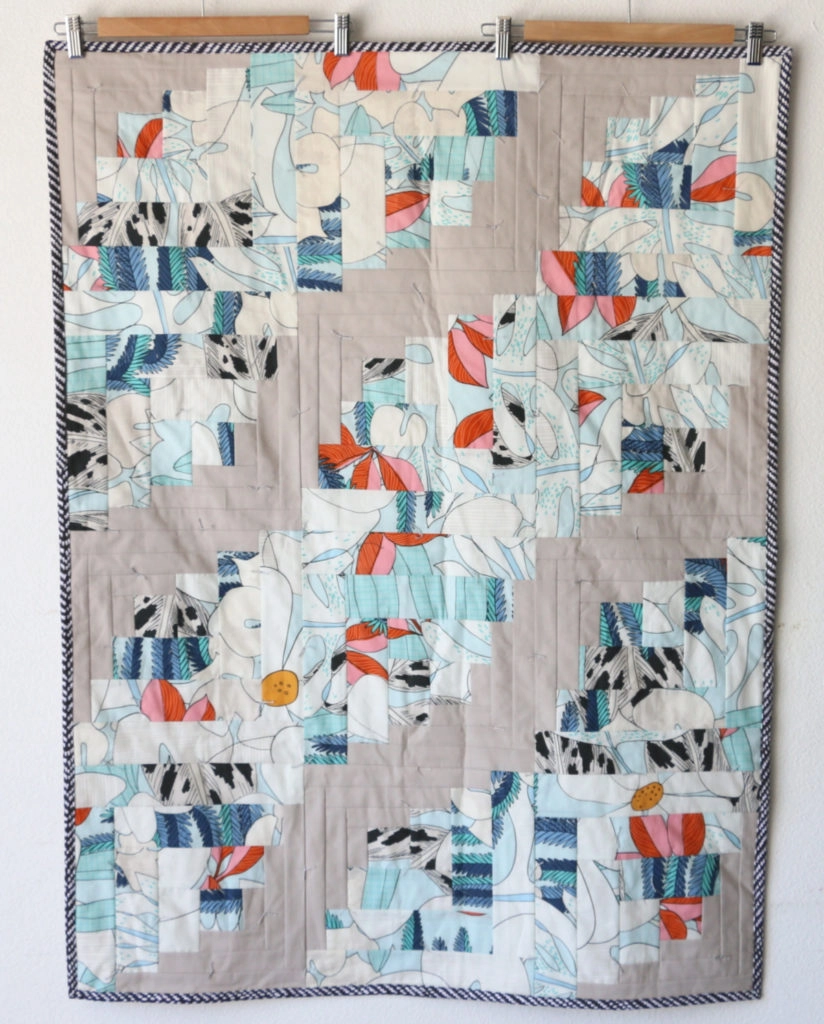
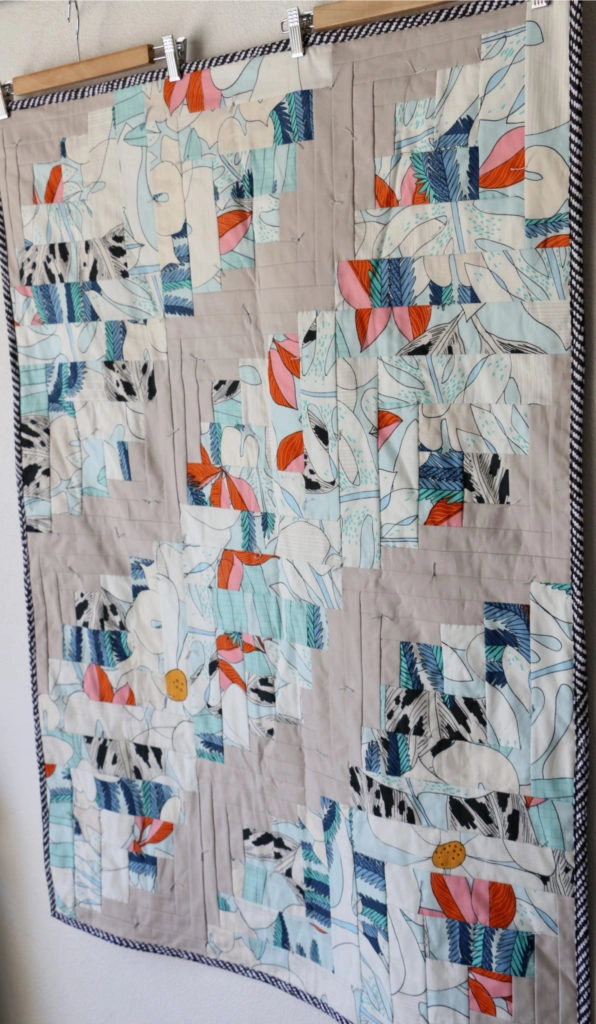
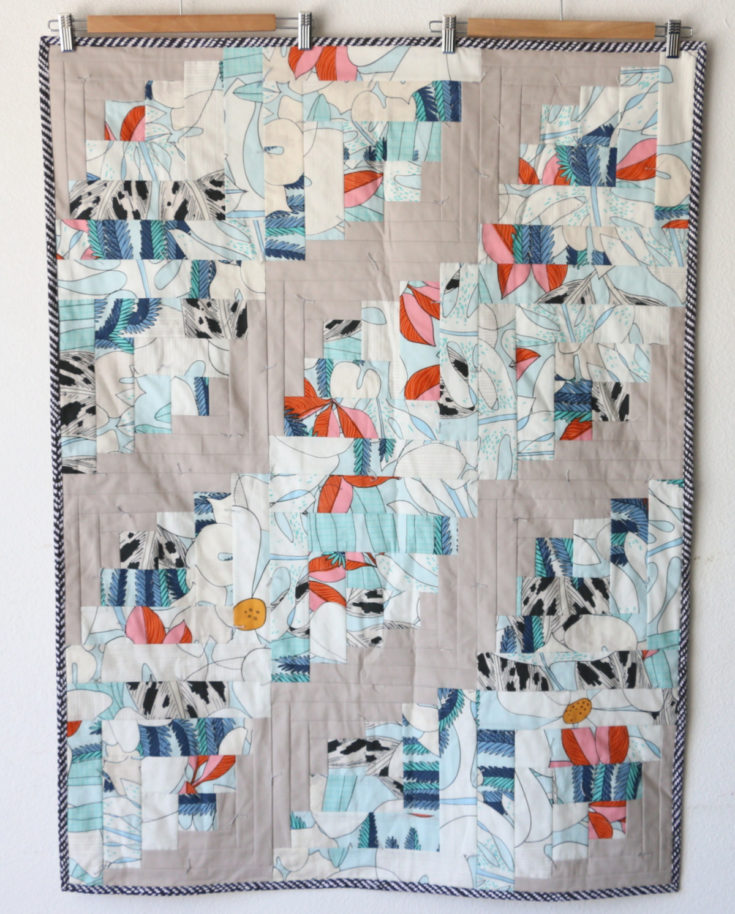
Are you curious about this quilt pattern?? I thought you might be ;). This is the Curvy Log Cabin Quilt from my 2019 quilt along. I do a new quilt along every year (hint hint a new one is coming), but I re-packaged this one for those of you that still want to follow along with the class! If you use the coupon code CURVY it will get you 15% off!
This print is by Sarah Watson from her Terrestrial fabric line. This print is called Epiphyte and the binding is the herringbone canvas from the same line. The grey solid is Kona Cotton Ash.
This how to hand tie method is in there as well as 20 other videos dedicated to help you make this quilt or one of the other versions.
How to Hand Tie a Quilt
Learn how to hand tie a quilt in this simple tutorial as an alternative to machine quilting.
Tools
- Embroidery Needle
- Scissor snips
- Ruler or tape measure
- Marking tool (optional)
Instructions
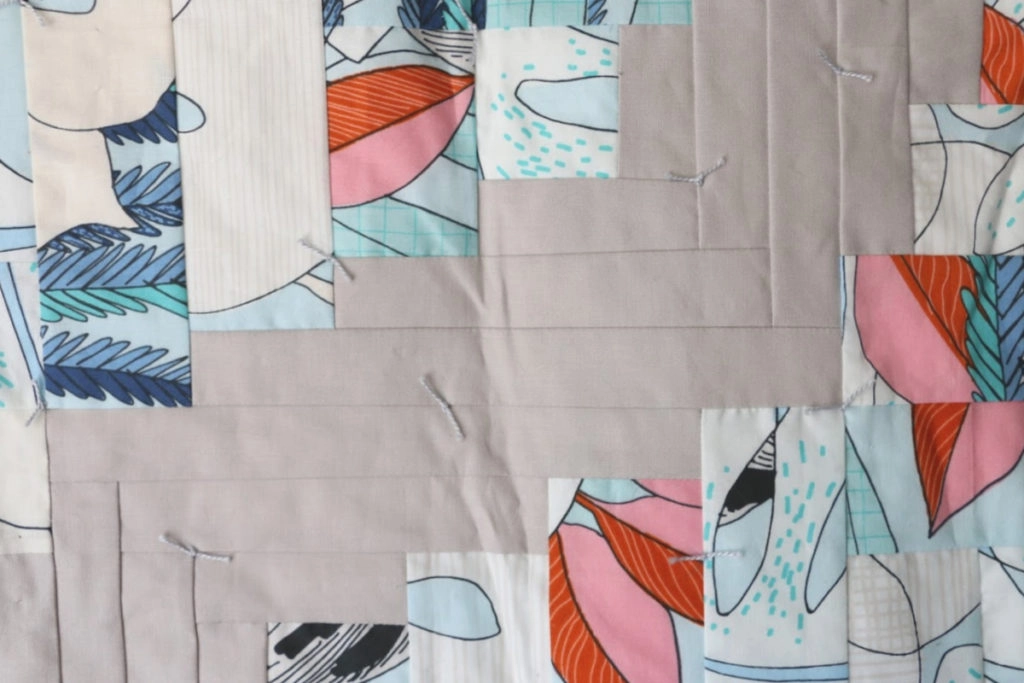
- Here are the materials you need in order to hand tie your quilt. Your quilt should be basted. Here is a great table top basting video if you need one. Your pearl cotton of choice, ruler to measure between ties, embroidery needle and marking tool to mark your spots.

- First, you need to know what kind of batting you used in your basting and how far apart you can space your ties. Batting can recommend anywhere from 4-10 inches, so that makes a big difference in the space between the ties. Decide where these ties should be a mark them

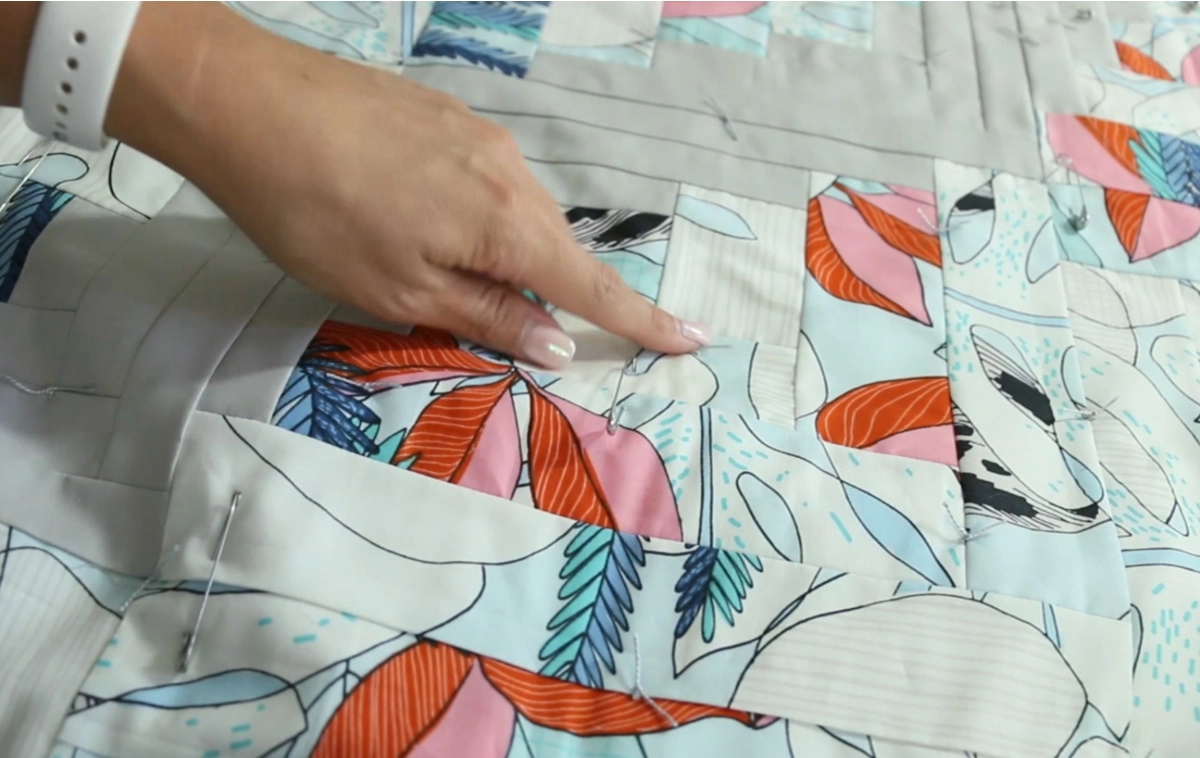
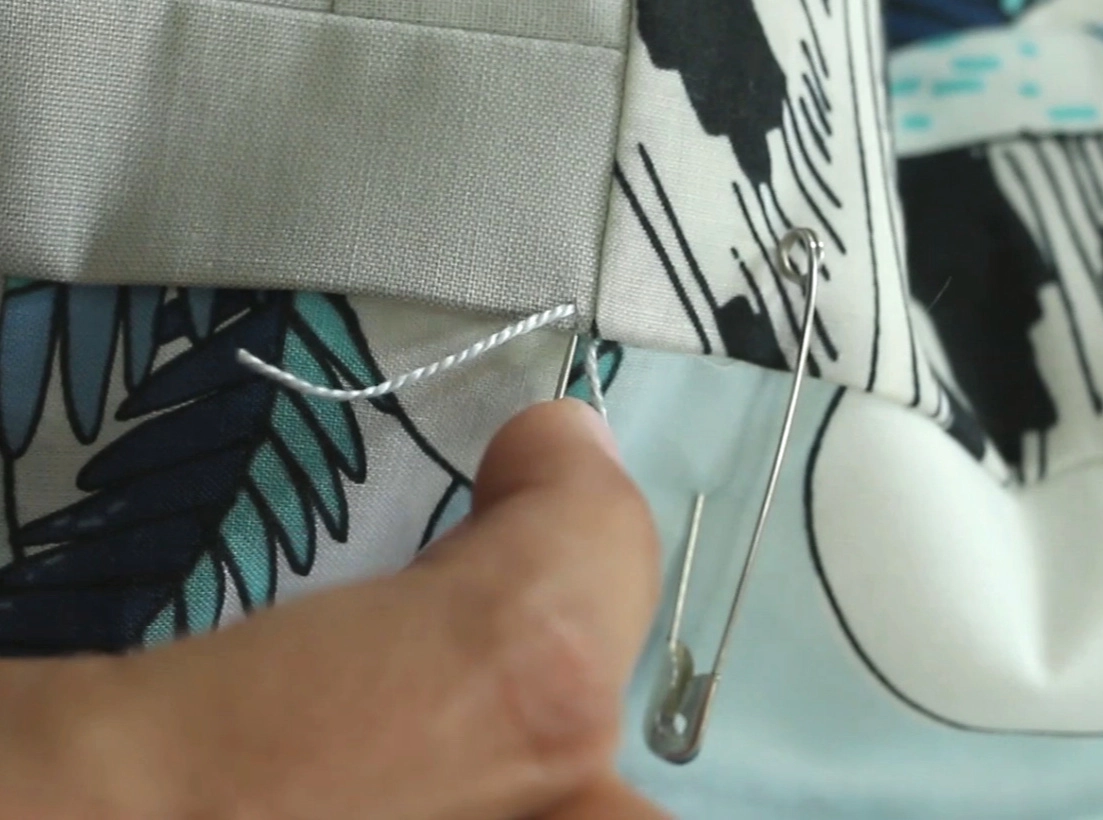
- Thread your needle and pierce your quilt at the marked point leaving 3 inches of thread on the top of the quilt.

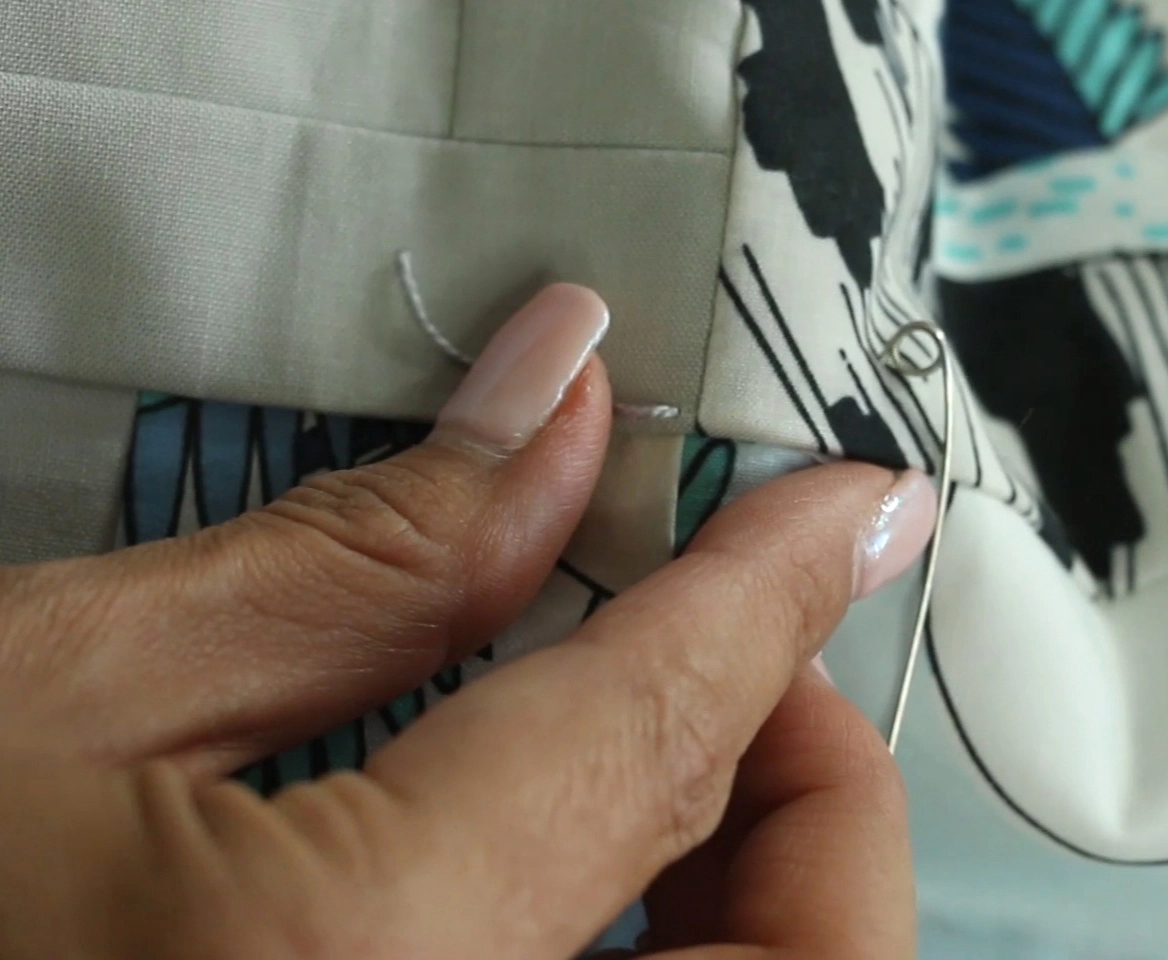
- Bring the needle back up about 1/8 inch away from where you went into the front of the quilt.

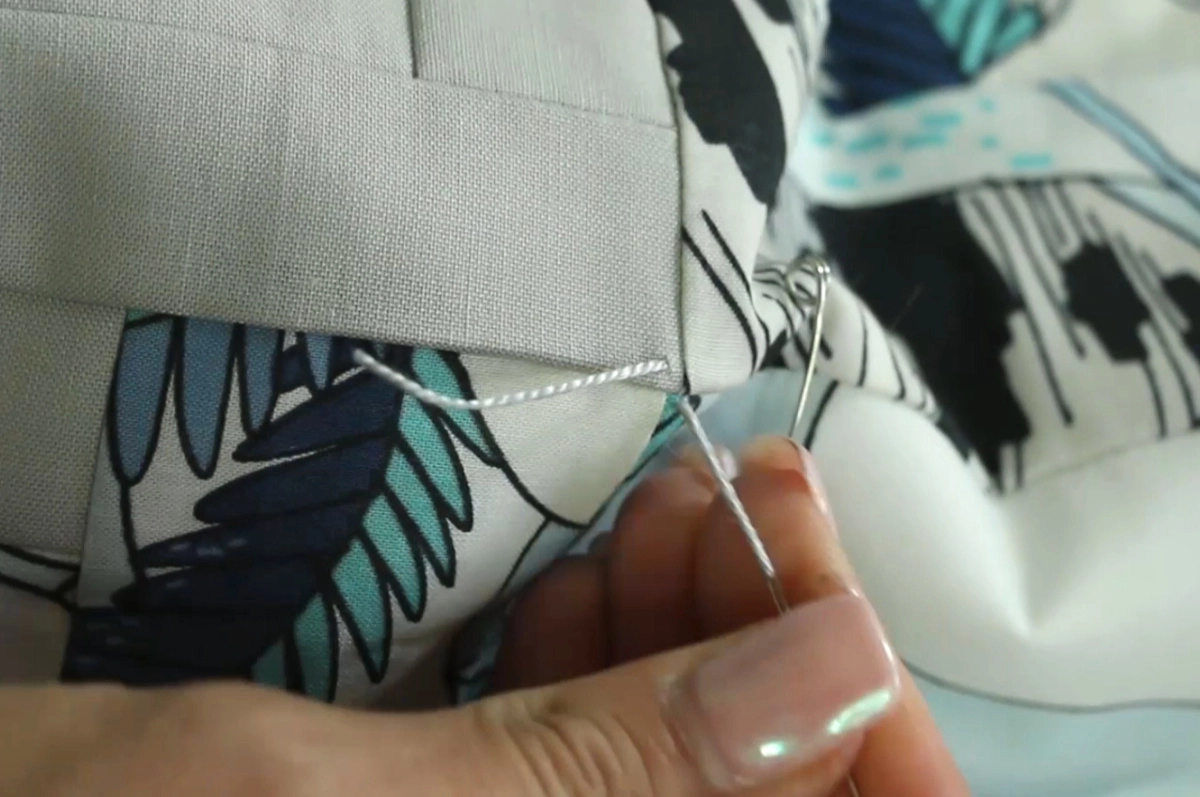
- Go back through the front of the quilt again near where you went through the first time.
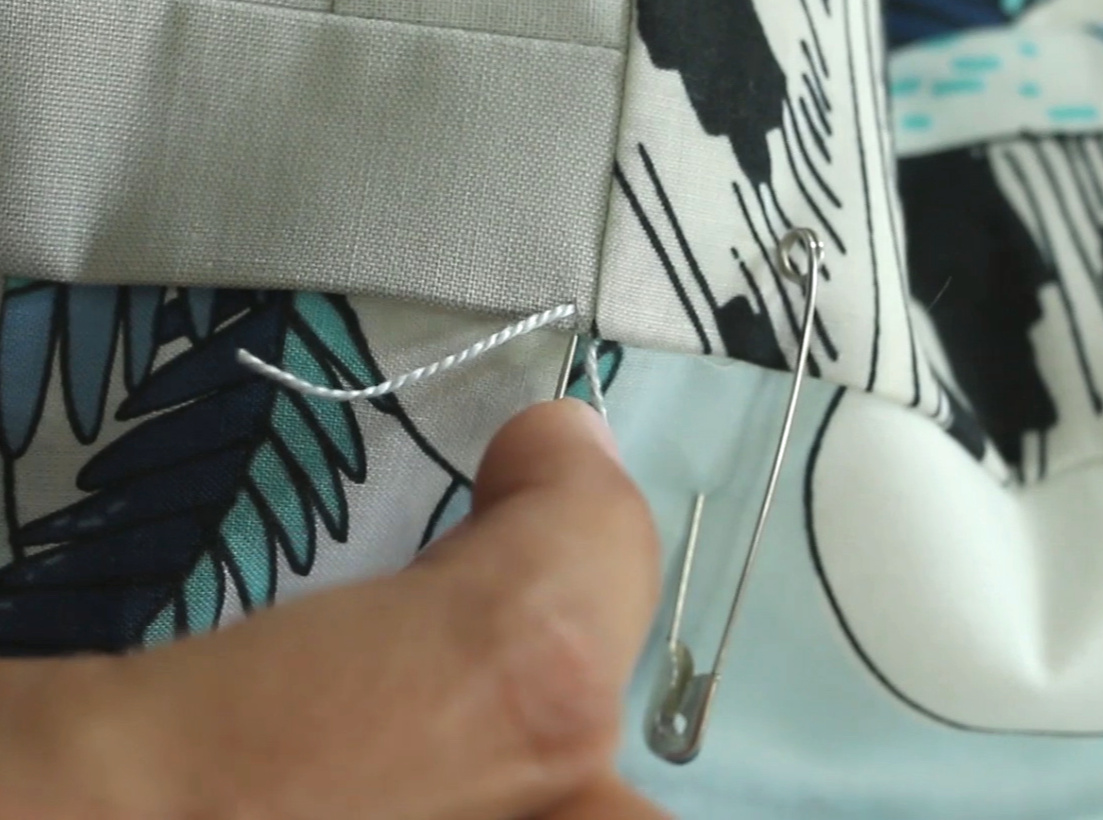
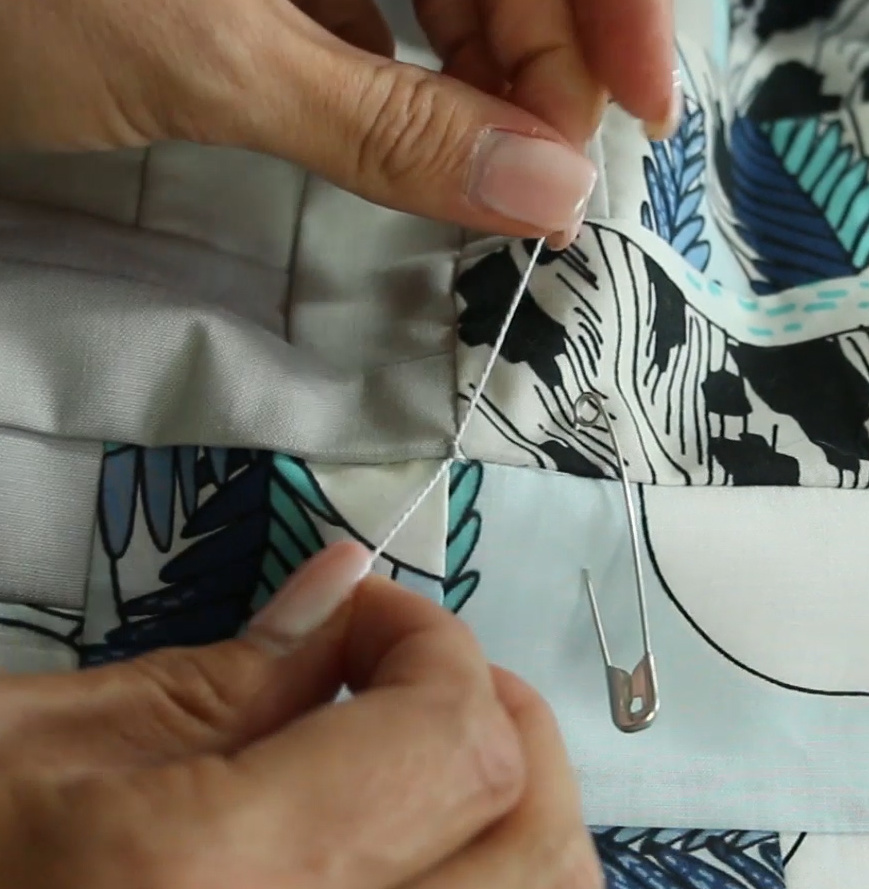
- And then back up again.


- Trim thread 3 ish inches and then tie into a double knot with the original tail.

- Trim threads to about 1/2 inch or as desired.
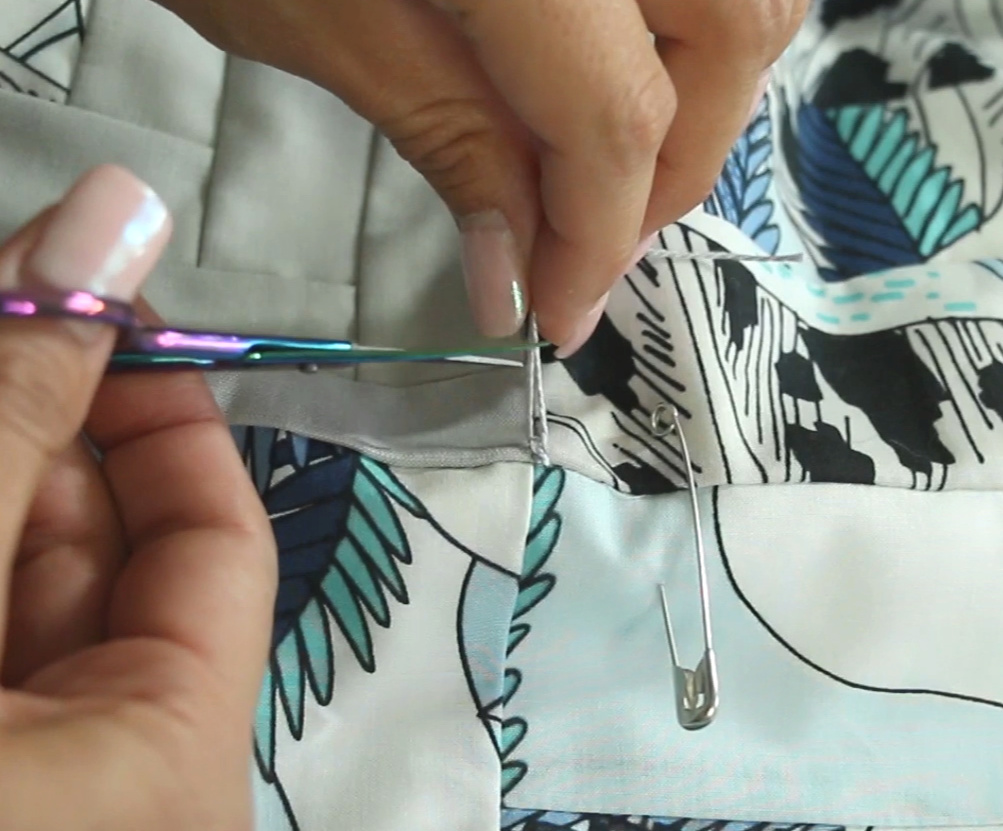

- Repeat at markings throughout your quilt until you feel that it is secured.


Notes
The great thing about this style of quilting is that it is portable, you can work on it at sports practice or on the couch in front of a movie. It has a drapey feel upon completion. It has the hand finished feel without having to hand quilt the entire thing. I don't think it's the quickest way to finish a quilt, machine quilting with a walking foot on minimal lines wins for that one but this is often an option people are looking for.
Ron Sanderson
Friday 12th of June 2020
Hi Casey, thanks for that, it helps a lot. I must have overlooked the 2.5" measurement in the notes. This saved me cutting up a whole bunch of material incorrectly! Very much appreciated. And good luck with your project.
pat
Thursday 11th of June 2020
"Today I have a quilt technique video for you, how to hand tie a quilt! " I don't see a video, just pictures.
Ron Sanderson
Monday 8th of June 2020
I have a question regarding your video "How to sew a bench cushion in 2 hours". Sorry to post it here, but I didn't know how else to reach you. I'n very much a novice sewer, but watched your video and it is very very helpful. My questions is - when cutting the side pieces, do I add a 1/2" seam allowance to them or are the pieces the same height as the foam plus batting? Thanks.
Casey
Thursday 11th of June 2020
Hi Ron - Funny, I'm doing the same project today and pondered similarly. I'm only here to help out (not my blog!). In the hand notes on the tutorial page for this, it shows the final size of the foam plus batting as one measurement -- and the side piece cutting measurements have the 1" added for .5" allowances. The other important part for the velcro side opening, where there are 2 pieces for one side, it to make sure the final piece (with velcro together) measures the same height as your other pieces. Does that make sense? In the video/tutorial, hers was 3.5" tall (for a 2.5" piece of foam and batting). Hope this helps in some way!
AmelIa
Saturday 6th of June 2020
I love all your videos, got a sewing machine a few weeks ago and have made 2 quilts and tonnes of face masks for our NHS using your online tutorials - so thank you! I’d love to embroider my sons initials into his quilt - can’t seem to find any advice for this online, is this something you could help with? Thanks, Amelia
Ann g
Saturday 30th of May 2020
Thanks for this. I’ll be using this technique on an upcoming project. Could you share the name of the print fabric in this quilt? It’s so great!
Melanie
Monday 1st of June 2020
Sure, its by Sarah Watson - her Terrestrial line. The fabric print is called Epiphyte.