

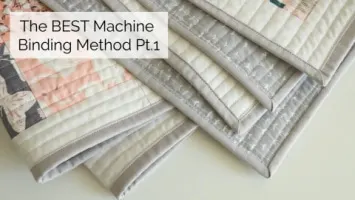
Hi! Today is part 1 of a highly requested tutorial – Machine Binding! And not just any machine binding… The BEST machine binding method and my favorite way to teach you how to bind a quilt.
I have another binding video tutorial that I taught in my classes, but I never loved that method, even though it’s a standard way of doing it. It was good enough and I wanted to share it with my students, but I always went back to hand binding. That method was sew to the front and then flip the binding around and sew from the front again in the “ditch” hoping a praying you catch the binding on the backside.
The reason is because I don’t like to sew blind… ever. Maybe that makes me a control freak, but I’m sorry – after spending hours on a quilt I don’t want to last step to be a meh result. I want to be excited about it!
If you already know how to make quilting binding with a bias join, you can jump to Part 2 which is here ;).
How to Bind a Quilt


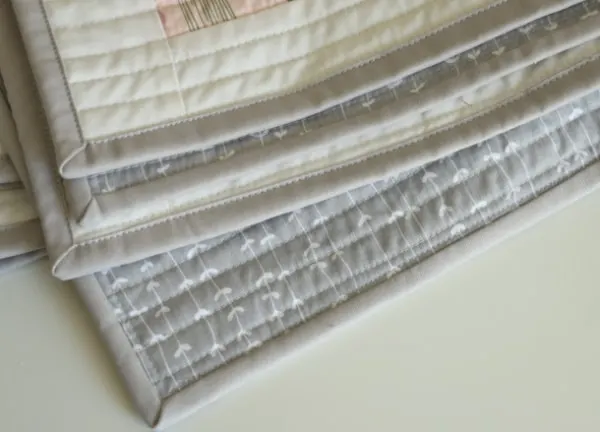
This method gets me excited… because look at that stitch 😉 It’s so pretty… and straight! And not hard… there’s a trick!
How to Calculate How Much Binding
The first thing I want to cover in how to bind a quilt is how to calculate your fabric requirements for your quilt binding. If you are following a pattern, this was done for you, but I want to go over the math really quick.
Add up all 4 sides of your quilt
Once your quilt is squared, measure all 4 sides and add them all together. Mine was 216 inches and will use that number for our example. For machine binding you need to do a bias join.
Take total + 10 and then divide by wof = # of strips
Take your total inches (216) and add 10 inches for the corners and the join (226). Divide by width of fabric (wof). I use the number 38 (bias join) or 40 (straight join). Some wof is 42 and some is 44 so these numbers work for either size.
226/38 = 5.95 Round up, so the number is 6.
# of strips x 2.5 = how much yardage
We need 6 strips of fabric, no multiply that number by how wide you want your binding to be. 2.5 inches is a good number.
*Note: Quilts with curved corners, scallops etc. need binding that is cut on the bias, not just a bias join. That is a whole different thing. This tutorial is for square or rectangular quilts.
6 x 2.5 = 15 inches of fabric. So you need 6 strips cut from 15 inches, a half yard cut (18 inches) is great so you have a little wiggle room.
Robert Kaufman also has a great online calculator.
Which quilt binding fabric should I choose?
My Mom, affectionately called Mama Lisa, wrote a little post about that!

Prepare your binding Strip
Video Part 1 goes over all of these steps in detail 😉

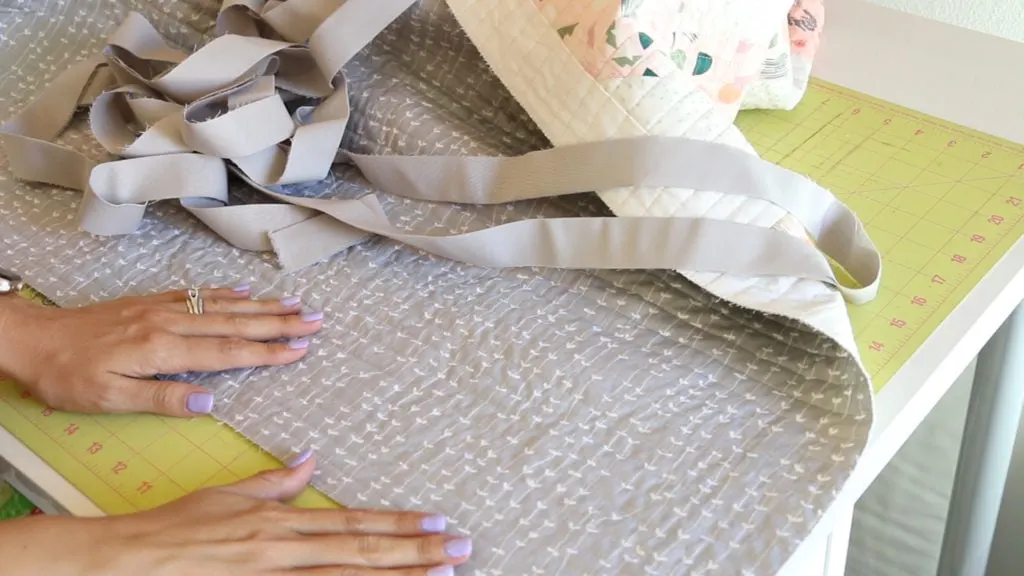
- Cut 6 strips, 2.5 inches wide
- Join with the bias join (2:40 mark of video) or below
- Starch your strip and press wrong sides together, seams pressed open (5:40)
- Zig Zag outer edge of quilt to flatten all those layers and prep for sewing the binding on. (7:04)
- Clip binding strip to the back of your quilt making sure there are no seams landing at the corners (8:10)
Here’s the how to bind a quilt by machine video tutorial! Part 2 coming in a few days!
Mari Lea Viesselmann
Thursday 29th of August 2019
I am looking at purchasing a new sewing machine and have been looking at Zuki. Which model of Zuki do you have?
Carol
Thursday 22nd of August 2019
Hi Melanie thank you so much for the tutorial on binding
Susie in the country
Sunday 18th of August 2019
i love the quilt you showed in your garage on your current instagram feed. where can I find the pattern? a new quilter but would love to make it someday! Or you could do a tutorial on it! lol thanks for sharing your many talents:)
Melanie
Thursday 22nd of August 2019
Hi Susie! That quilt is found here ;) https://melanie-ham.mykajabi.com/offers/jQGtKCTn?coupon_code=BINDING
Hayley Oakley
Saturday 17th of August 2019
Hi Melanie, I love your tutorials, I made my first quilt last week following your beginner videos, it looks great and your instructions were so easy to follow and you are just so lovely, you have a beautiful nature.
I have been stuck at home for 2 years after suffering a stillbirth, lymphoma diagnosis, chemotherapy, cervical cancer and radical hysterectomy. I am getting better now and have been trying to keep myself busy with indoor craft activities. I got my first ever sewing machine for my birthday this year and have had so much fun following your tutorials and making the quilt. It’s a gift for my friend who is having a baby and has been looking after me during my treatment.
I love the colours of the quilt you are using in your best binding tutorial and how you have done a straight stitch pattern over it. Are you able to post to your blog or email me a full size picture of it, I’m keen to follow the style for my next quilt. Do you have any tutorials for this style quilt?
I’d like to make a quilt for my bed, do you have any tips on how much fabric I would need for a kind size bed please?
I look forward to hearing from you.
I will post my quilt to my Facebook and tag you once I have gifted it to my friend.
Thank you for inspiring my creativity. X
Melanie
Thursday 22nd of August 2019
Hi Hayley! I'm glad you have been enjoying my videos! The full size picture of the quilt and all the details for that pattern is here https://melanie-ham.mykajabi.com/offers/jQGtKCTn?coupon_code=BINDING. Figuring out the fabric requirements for a king size bed will depend on the pattern you choose, amount of fabrics, borders, etc. )
Doreen Tavares
Friday 16th of August 2019
Thnk u so much for that video. Can I ask when will part 2 be available?