


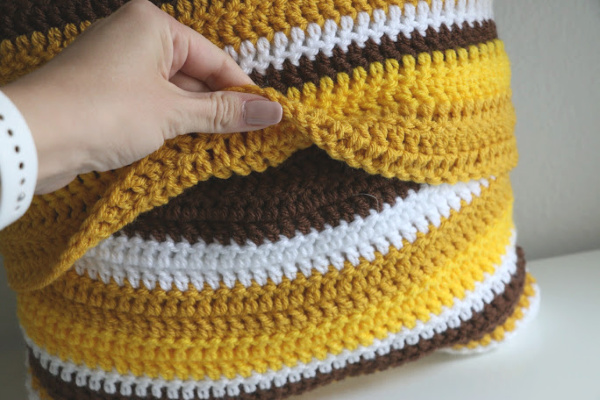
Hi friends! Today, I wanted to share this adorable sunflower granny square crochet tutorial! I had a different tutorial planned for today, but given that at this moment it’s difficult to go to stores, I changed it up to a project that features yarn you can find. I also wanted to share a project that is full of sunshine and not a huge undertaking financially or with your time.
Need to know How to Join Granny Squares?
Here is a great post and video I did on joining granny squares 3 different ways. Pick whichever method you like best.


Yarn I used
I used Paintbox yarn because I like their color selection, plus they have good prices. This post is not sponsored by them, just wanted to bring you a yarn you can get shipped to you in the U.S. and U.K while our stores are closed. Each ball is only $3 and they are constantly running sales. Of course feel free to use any other types of yarn that are similar, but your finished block may be a little different if so.

Some other Granny Square Projects
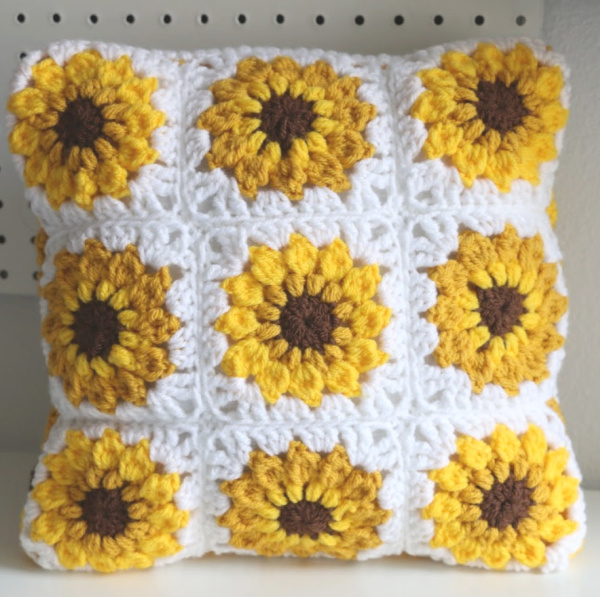
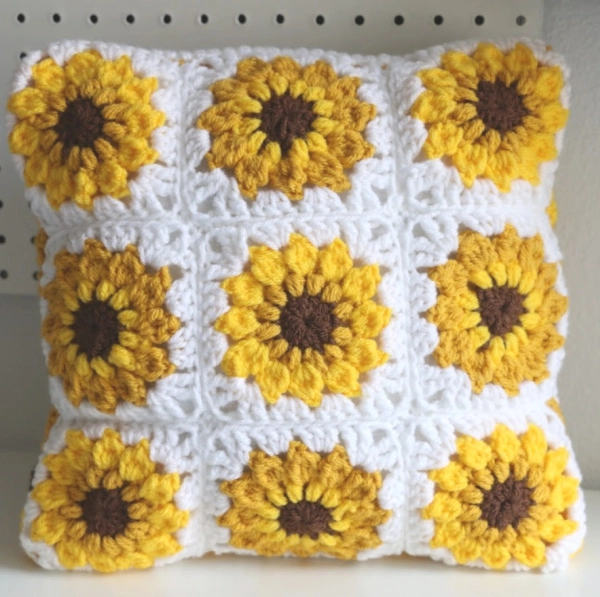
Sunflower Granny Square Crochet Tutorial
This pattern is for the sunflower granny square crochet block. Each block measures 4.75 inches.
Stitches used: half double crochet, small puff stitch, 4 dc bobble stitch, treble stitch, double crochet, chain
You only need 1 ball of each color to make this pillow if you choose to do so. Other wise, here are the amount in yards you need for each block. This will help you calculate how much yarn you would need if you'd like to make a blanket.
Center (Brown) - 1 2/3 yard
Puff round (Yellow 1) - 2 2/3 yard
Petal round (yellow 2) - 6 1/3 yard
Background (white) - 6 1/3 yard.
Paintbox yarn skeins are 149 yards.
Materials
- 1 ball of Brown yarn ( I used Paintbox yarn simply chunky in color Coffee Bean 310)
- 1 ball of Mustard yarn (I used Paintbox yarn simply chunky in color Mustard - 323)
- 1 ball of Bright Yellow yarn (I used Paintbox yarn simply chunky in color Buttercup 322)
- 1 ball of background ( I used Paintbox yarn simply chunky in color paper white 300)
- Optional: 14 pillow form
Tools
- 6mm Crochet hook
- yarn needle
- small scissors
Instructions
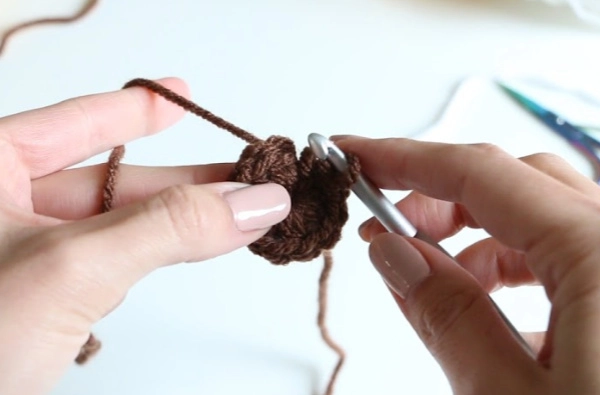
- Begin with a magic circle using the brown yarn and create 12 hdc in the magic ring. slip stitch back to beginning. Trim and fasten off.

- Attach new color (one of the yellows) and draw up a loop. chain 1, yarn over, insert hook into same stitch, yarn over and pull through. Pull through all loops on hook. ch 1.
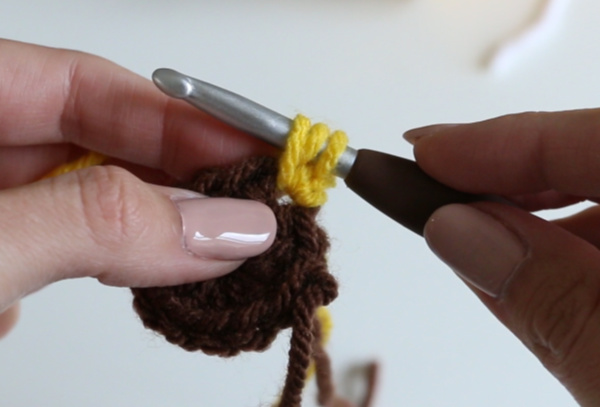

- yo, insert hook into next stitch, yo, pull through, yo, insert hook, yo, pull through, yo, pull through all 5 loops on hook. ch 1. Repeat until you have 12 of these small 2 loop puff stitches. Trim and fasten off.
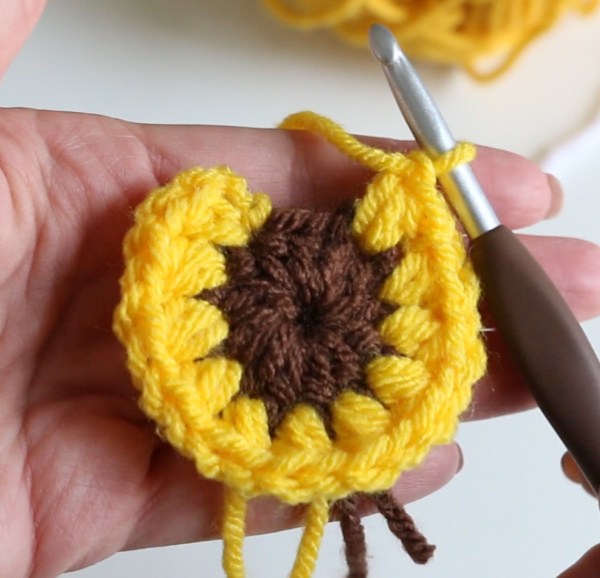

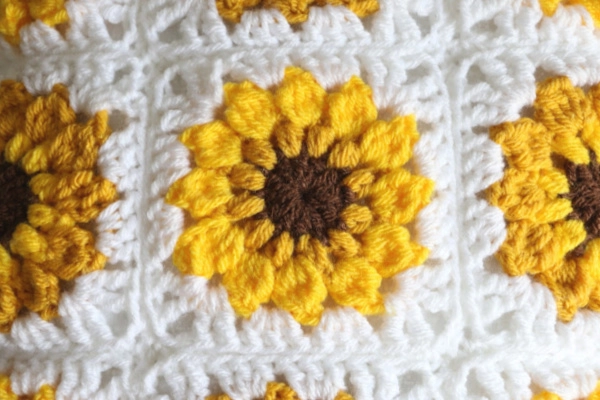
- Add new color of yarn in between 2 puff stitches. Pull up a loop and chain 2 (counts as first stitch). yo, insert hook into same stitch, yo, pull through, yo pull through 2 loops only. yo, insert hook, yo pull through, yo pull through 2 loops only (3 loops on hook). yo, insert hook, yo pull through, yo pull through 2 loops (there should be 4 loops on hook). yo and pull through all 4 loops. ch 2.


- Now create a 4dc bobble stitch for the remaining 11 petals of the sunflower. slip stitch back to the beginning, trim and fasten off.

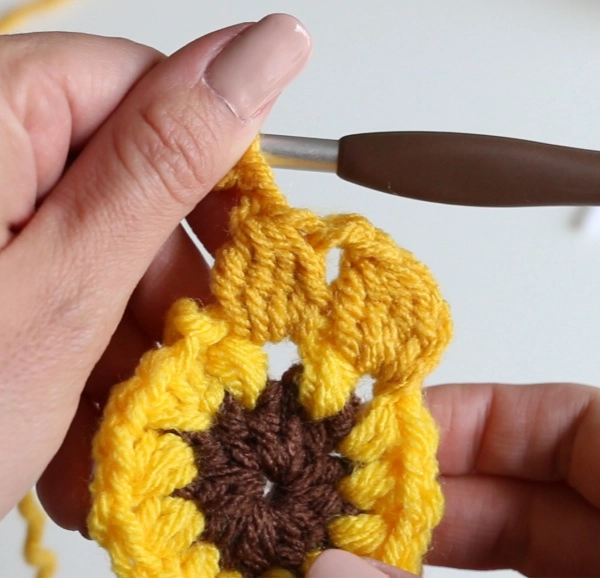
- Attach background color and chain 3 (counts as first treble). 1 tr, ch 2, 2 tr in the same space between the previous petals. In the next space, 3dc for 2 sets. Then do another corner (2tr, ch 2, 2 tr), repeat all the way around and trim, fasten off. Weave in all tails.


- Block if needed. lightly spray block with water and pin in place to shape block. Leave like this to dry.

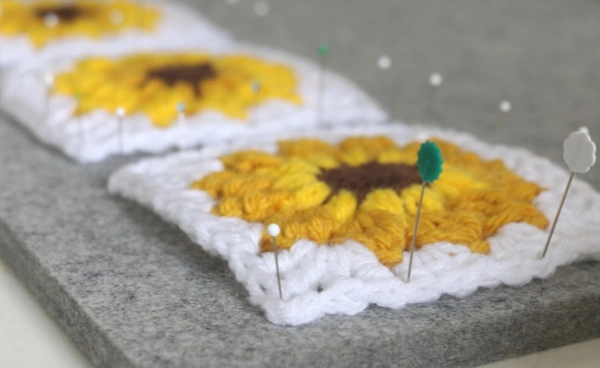
- To make 14 inch pillow, create 9 sunflower blocks and sew them together to make the pillow front. Make 2 back panels with remaining yarn that measure 14 x 9 and 14 x7 and sew together to make an envelope pillow cover.

Notes
A good visual description of puff, bobble and popcorn stitches. https://www.interweave.com/article/crochet/puff-bobble-popcorn-stitches/
Recommended Products
As an Amazon Associate and member of other affiliate programs, I earn from qualifying purchases.


Sofia
Thursday 7th of May 2020
Finished my squares. How do we make the back ?
Sofia
Thursday 16th of April 2020
I'm confused the pillow part? How do you insert the pillow, what size should the pillow be?
Jenna
Thursday 16th of April 2020
This is beautiful! I am going to make a pair :) If one were to do the back in a solid color, do you have an idea of the approximate yardage? Keep up the great work! These videos are delightful and always a bit of sunshine :)
Sarah McCarthy
Wednesday 15th of April 2020
Hi Melanie! I just subscribed to your YouTube channel and find your videos so helpful! Thank you! Quick question. I noticed that you have this felt pad on your work table that you iron on. What is it? I have a vintage ironing board in my kitchen wall and it's a pain to move the kitchen table every time I need to use it, even for little things. Any suggestions would be great. Thank you!!
Barb
Saturday 2nd of May 2020
This is the mat I have and love it, 13.5 x 13.5 Inches Wool Ironing... https://www.amazon.com/dp/B07RLNFQY6?ref=ppx_pop_mob_ap_share
Alzira
Wednesday 15th of April 2020
Hi Melanie, do you have instructions for back of the cushion?